
Blog
How to Do Your First Push-up: Easy Steps to Build Strength
Learn how to do your first push-up with our easy, step-by-step guide. Build strength safely and effectively with proper form and progressions.

Maybe you’ve never been able to do a full push-up, or you’re getting back into exercise after a break. The secret isn’t about being stronger overnight. It’s about starting with the right variation and building up. This article covers the best beginner-friendly progressions, proper form, common mistakes to avoid, and a realistic timeline so you can safely work toward your first full push-up.

Courtesy of: blog.alomoves.com
Key Takeaways
- Start with wall or incline push-ups to build foundational strength safely.
- Keep your body in a straight line from head to heels throughout the movement.
- Tuck your elbows at a 45-degree angle to protect your shoulder joints.
- Practice 2-3 times a week for consistent strength gains over several weeks.
- Stop immediately if you feel sharp pain in your shoulders, wrists, or lower back.
Start Your Push-Up Journey Today
Push-ups are a fundamental exercise that builds upper body and core strength. My tip: start with wall or incline push-ups to build foundational strength safely. Focus on keeping your body in a straight line from head to heels and tuck your elbows at a 45-degree angle to protect your joints. With consistent practice, you will progress toward a full push-up.
Essential Tools for Your Push-Up Practice

Photo credit: gornation.com
You don’t need much to start, which is part of what makes push-ups so accessible. An exercise mat is a nice comfort addition if you’re working on your knees or on a hard floor; it cushions your joints without interfering with your balance.
A sturdy wall is your first tool for wall push-ups, just make sure it’s clear of anything that could slip under your hands. For incline progressions, a stable counter, bench, or low table works well, and it should be solid enough that it won’t shift when you lean into it.
Push-up bars are optional but can help if your wrists feel strained in the standard hand position. They let your wrists stay in a more neutral alignment, which many people find more comfortable.
Step-by-Step: Mastering the Full Push-Up

Image credit: betterme.world
- Wall push-up: Stand arm’s length from a wall, place hands shoulder-width apart, and lean in. Lower your chest toward the wall, keeping your body straight. Push back. This teaches the movement pattern.
- Incline push-up: Place your hands on a stable elevated surface like a counter or bench. Walk your feet back until your body forms a straight line. Lower your chest toward the surface, then push up.
- Knee push-up: Start on all fours, then walk your hands forward. Lower your knees to the floor, keeping your body in a straight line from head to knees. Perform the push-up motion.
- Eccentric push-up: From a full push-up position, lower yourself slowly over 3-4 seconds, then push up from your knees. This builds strength for the upward phase.
- Full push-up: Hands slightly wider than shoulder-width, fingers forward. Keep your body in a straight line from head to heels. Lower until your chest is an inch or two from the floor or your upper arms are parallel. Exhale as you push up, inhale as you lower.
Muscles Worked During a Push-Up
A standard push-up is a compound movement, meaning it recruits multiple muscle groups at once. The primary drivers are the pectoralis major in your chest, the deltoids in your shoulders, and the triceps along the back of your upper arms. Together, they handle the pushing motion as you lower and lift your body.
Your core is the unsung hero here. The abdominals, obliques, and lower back muscles work isometrically to keep your torso rigid and your body in a straight line from head to heels. Without that core engagement, your hips will sag and the exercise loses its effectiveness.
Glutes and quadriceps also play a supporting role. Squeezing your glutes and keeping your legs engaged prevents your hips from dropping and promotes overall body rigidity. Think of your entire body as a single plank, not just your arms doing the work.
My tip: before you even lower yourself, do a quick full-body squeeze. Grip the floor with your hands, brace your abs, and clench your glutes. That tension from head to toe is what separates a solid push-up from a wobbly one.
Common Push-Up Mistakes and How to Fix Them
Sagging hips or arched lower back: This usually means your core and glutes aren’t engaged. Squeeze your abs and glutes to keep your body in one straight line from head to heels.
Piking your butt up: If your hips point toward the ceiling, you’re taking tension off your chest and core. Reset your position and keep a straight line from head to heels.
Flaring elbows out: Elbows at 90 degrees to your body can strain your shoulders. Tuck them to about a 45-degree angle, so they point back toward your feet.
Not going low enough: A partial rep builds less strength. Lower until your chest is close to the floor or your upper arms are parallel to it.
Holding your breath: You need oxygen for the effort. Exhale as you push up, inhale as you lower down.
Straining your neck: Looking up or down pulls your spine out of alignment. Keep your gaze slightly forward, about a foot ahead of your hands, with a neutral neck.
Pro Tips for Building Push-Up Strength
Consistency is key: Practice push-ups 2-3 times a week instead of one intense session. Regular work builds strength more reliably.
Focus on controlled movement: Lower yourself slowly over 2-3 seconds, then push up with the same control. Rushing through reps reduces muscle engagement.
Engage your whole body: Squeeze your glutes and quads as you move. This keeps your torso rigid and protects your lower back.
Use push-up bars for wrist comfort: If your wrists ache in a standard position, push-up bars can help by keeping your wrists in a more neutral angle.
Don’t rush progression: Master each modification, from wall to incline to knee push-ups, before attempting the next. Solid form at an easier level prepares you for the full version.
Your Push-Up Progress Timeline and What to Expect
Plan for 2-3 push-up sessions per week. With that consistency, many people notice better strength and form within a few weeks, though a full push-up often takes several months of dedicated practice.
The cost is minimal. You mainly need your body weight, plus an exercise mat for comfort and a sturdy elevated surface like a counter or bench for incline progressions. That’s it, no gym membership required.
Progress varies by person, so compare yourself to last month, not to anyone else.
When to Consult a Professional
Caution: Stop immediately if you feel sharp pain in your shoulders, wrists, or lower back. Dull muscle fatigue is normal, sharp pain is not.
If you have pre-existing conditions in those areas, check with a doctor or physical therapist before starting push-ups. They can tell you which modifications are safe for you.
Seek professional guidance if you keep struggling with form despite consistent practice. A few sessions with a trainer can correct issues you might not see yourself.
Frequently Asked Questions
How often should I practice push-ups to see results?
For most people, 2-3 sessions per week is ideal. Consistency matters more than intensity, regular practice builds strength more reliably than occasional long workouts. Give your muscles a day of rest between sessions to recover.
Can push-ups help me lose weight?
Push-ups build muscle and burn some calories, but they aren’t a primary weight-loss exercise. For weight loss, combine strength training with a balanced diet and regular cardio. Push-ups can be part of a larger routine that supports your goals.
What if I feel pain in my wrists during push-ups?
Wrist pain is common, especially for beginners. Try doing push-ups on your fists or using push-up bars to keep your wrists in a neutral position. If the pain persists, consult a doctor or physical therapist before continuing.
Is it better to do more reps of an easier push-up or fewer reps of a harder one?
Focus on the harder variation you can do with good form for 5-8 reps. Once you can complete 10-12 controlled reps, progress to a more challenging version. Higher reps of an easier move build endurance, but harder reps build the strength needed for a full push-up.
Can I do push-ups every day?
You can, but it’s not necessary and may not speed up progress. Your muscles need recovery time to grow stronger. Two to three sessions per week with at least one rest day in between is usually enough to see steady improvement without overtraining.
Final Thoughts
My tip: pick one modification, wall, incline, or knee push-ups, and do it 2-3 times a week with controlled form. Expect to see better strength and form within a few weeks, though a full push-up often takes several months of regular practice. Start where you are, stay consistent, and your body will adapt.
This article provides general information about push-up techniques and fitness progressions. It is not a substitute for professional medical or physical therapy advice. If you have a pre-existing injury or experience persistent pain, consult a doctor or physical therapist before starting any new exercise routine.
Blog
Mixed Signals Guys Give (and What They Really Mean)
Decode the mixed signals guys give in relationships. Learn why they happen, how to respond, and protect your peace of mind.
You are texting a guy who seemed totally into you, then he goes quiet for days. Or he says he likes you but never follows through on plans. That is a mixed signal, and it can leave you second-guessing everything. This article breaks down why men send mixed signals, how to read the most common patterns, and what steps you can take to protect your peace and get the clarity you deserve.

Courtesy of: medium.com
Key Takeaways
- Mixed signals usually come from his uncertainty, not from anything you did.
- Inconsistent communication and actions that contradict words are classic red flags.
- Focus on patterns over time, not a single hot-and-cold week.
- Set clear boundaries and communicate your own needs directly.
- If behavior becomes manipulative or abusive, seek professional help immediately.
What Are Mixed Signals in Dating?
Mixed signals are behaviors or communications that don’t line up, leaving you unsure where you stand. A guy says he misses you but doesn’t text for a week, or he’s warm one night and cold the next. These hot-and-cold patterns and actions that contradict words create confusion. To make sense of them, you have to watch for repeating patterns and protect your own boundaries instead of chasing clarity from someone who won’t give it.
Why Guys Send Mixed Signals

Photo credit: magnific.com
Why Guys Send Mixed Signals
Mixed signals usually come from his own uncertainty, not from anything you did. Here are the most common reasons.
- Uncertainty about his feelings. He genuinely doesn’t know what he wants, so his behavior shifts as his mood does.
- Fear of commitment or intimacy. Getting close feels risky, so he pulls back after moments of closeness to protect himself.
- Dating multiple people. He may be seeing others and hasn’t decided who to pursue seriously, so he keeps options open with inconsistent attention.
- Poor communication skills. Some people don’t realize their messages are confusing. He might think he’s being clear when he’s not.
- Testing boundaries. He pushes limits to see how much you’ll tolerate or how invested you are, without committing himself.
Understanding the reason doesn’t excuse the behavior, but it helps you stop taking it personally. His mixed signals are about him, not your worth.
How to Interpret Common Mixed Signals

Image credit: enpareja.com
How to Interpret Common Mixed Signals
Not every mixed signal means the same thing. Here is how to read the most frequent patterns.
- Inconsistent communication. He texts you every day for a week, then goes silent for four days, then reappears with a warm message. This usually means he’s interested when he’s bored or lonely, not that he’s building something consistent.
- Actions contradicting words. He says he really likes you but never suggests a concrete plan to meet. Talk is cheap. Watch what he does, not what he says.
- Hot and cold behavior. One date is affectionate and attentive, the next is distant and distracted. This pattern often reflects his own emotional availability that day, not a genuine connection with you.
- Testing boundaries. He cancels last minute to see if you’ll get upset, or he flirts with someone else in front of you to gauge your reaction. This is a power move, not a sign of interest.
My tip: Focus on patterns over isolated incidents. One sweet gesture doesn’t erase a month of inconsistency. Your gut already knows the difference.
What to Do When You’re Getting Mixed Signals

Source: gottman.com
When you notice mixed signals, take action instead of waiting for him to change. Here is what works.
- Observe patterns over time. Track his behavior for a few weeks without jumping to conclusions. A single hot-and-cold week is a red flag; two months of it is a clear message.
- Communicate clearly and directly. Say something like, “I’ve noticed you go quiet after we have a good time. Can you help me understand what’s going on?” Keep it calm and specific.
- Set clear boundaries. Decide what you will not tolerate, then state it. For example, “If you cancel plans more than once without rescheduling, I’m going to stop initiating.” Then follow through.
- Prioritize your own emotional well-being. If his behavior leaves you anxious or drained, step back. Your peace matters more than decoding his actions.
- Focus on actions more than words. A man who is genuinely interested shows consistent effort over time. If his actions don’t match his promises, believe the actions.
Common Mistakes to Avoid When Facing Mixed Signals
When you are stuck in mixed signals mode, it is easy to fall into traps that make things worse. The biggest mistake is assuming good intentions when his behavior consistently says otherwise. Over-analyzing every text or gesture only feeds your anxiety and keeps you stuck. Believing that if you just try harder, he will suddenly become clear is a common dead end. His clarity is his responsibility, not yours. Ignoring red flags because you hope things will improve usually leads to more confusion. And engaging in mind games or playing “hard to get” just mirrors the same unclear behavior you dislike. My tip: Don’t blame yourself for his lack of clarity. Focus on what he does, not what you wish he meant.
Protecting Your Peace of Mind

Via aspirefrisco.com
Your emotional health matters more than decoding his behavior. Trust your gut, if something feels off, do not rationalize it away. Do not wait endlessly for him to “come around” or change. That waiting period is your life moving forward without clarity. Shift your focus back to your own needs and boundaries. What do you want and need from a relationship right now? If you are struggling, talk to trusted friends or a therapist. They can offer perspective you cannot see on your own. If the relationship is causing significant distress without any resolution, it is okay to disengage entirely. Tip: Your emotional health is paramount. Walking away is not giving up; it is protecting yourself.
How to Foster Clearer Communication Early On
You can reduce the chances of mixed signals by setting a clear tone from the beginning. Be honest about your own intentions and expectations early on, say what you are looking for. Observe whether his actions match his words from day one. If something feels vague, ask a direct question: “What are you looking for right now?” Communicate your boundaries firmly and early so there is no guesswork. Look for consistent effort and clear communication as a baseline standard. Pro move: If he cannot give you a straightforward answer about his intentions, treat that as your answer. Consistent effort is the real green flag.
When to Seek Outside Support
Mixed signals are confusing, but sometimes they cross into territory where you need outside support. If his behavior becomes manipulative or abusive, reach out for help immediately. If you feel prolonged emotional exhaustion, anxiety, or self-doubt, that is a sign to talk to a professional. A therapist can give you tools to interpret signals and set boundaries you cannot set alone. If you notice a pattern of ending up in relationships with mixed signals, it is worth exploring why with someone trained to help. You do not have to figure this out on your own.
Frequently Asked Questions
How do I know if I’m over-analyzing mixed signals?
If you find yourself re-reading every text or replaying every interaction for hidden meaning, you are likely over-analyzing. A good rule is to step back and look at the big picture over several weeks. If the overall pattern is inconsistent, it is a real signal, not just your imagination.
Can mixed signals ever lead to a healthy relationship?
It is rare but possible if the mixed signals stem from temporary circumstances, like stress or poor communication habits that the person is willing to address. However, if the pattern continues after you have communicated clearly, it is unlikely to turn into a healthy, stable relationship.
What if he’s just a bad communicator?
Some people are naturally poor communicators and may not realize they are sending mixed messages. If you value the connection, have a direct conversation about communication preferences. If he makes an effort to improve, it may be worth giving it time. If not, the mixed signals will likely continue.
Final Thoughts
Your best move when facing mixed signals is to stop decoding and start observing. Watch his behavior for a few weeks, if the inconsistency continues, take it as a clear answer. Real interest shows up as steady effort and honest words that match actions. In the meantime, protect your emotional health by not waiting around and by trusting what your gut is telling you. You deserve clarity, not confusion.
Blog
Avoidant Attachment Style: Signs and How to Love an Avoidant Partner
Understand the signs of avoidant attachment in yourself or your partner and learn practical strategies to build healthier, more secure relationships.
If you’re in a relationship where your partner often pulls away, avoids deep conversations, or seems to value independence above all else, you might be dealing with avoidant attachment. This pattern isn’t about a lack of love, it’s a deeply ingrained way of relating that stems from early childhood experiences. In this article, I’ll walk you through the key signs of avoidant attachment, why it develops, and practical strategies for loving an avoidant partner while protecting your own emotional well-being.

Courtesy of: stockcake.com
Key Takeaways
- Avoidant attachment is an insecure style marked by a strong need for independence and discomfort with intimacy.
- Common behaviors include withdrawing during conflict, suppressing emotions, and prioritizing personal space.
- Use calm, direct ‘I’ statements to express your needs without triggering their defensiveness.
- Respect their need for space and avoid chasing them when they pull away.
- Shifting attachment patterns takes months or years of consistent effort, often with professional support.
What is Avoidant Attachment?
Avoidant attachment is one of the primary insecure attachment styles, alongside anxious and disorganized attachment. Its core characteristic is a strong need for independence and a deep discomfort with emotional closeness in relationships. This pattern often originates in childhood, when primary caregivers were consistently unavailable, rejecting, or intrusive. As a result, individuals learn to suppress their needs for closeness to cope, carrying that self-reliance into adult relationships.
1. Recognize the Signs of Avoidant Attachment

Photo credit: glamour.com
People with avoidant attachment highly value independence and self-sufficiency. They may feel suffocated by too much intimacy or emotional demands from a partner. Common behaviors include:
- Withdrawing during conflict instead of working through it together
- Difficulty expressing emotions or avoiding deep conversations
- Prioritizing personal space over shared activities
They often appear self-sufficient and may not ask for help, even when they need it.
2. Understand Why Avoidant Attachment Develops
This attachment style develops in early childhood when caregivers are consistently unavailable, rejecting, or intrusive. To cope, children learn to suppress their needs for closeness and comfort. They become highly self-reliant because depending on others feels unsafe or futile. This suppression carries into adulthood, influencing how they approach relationships. They may avoid vulnerability, keep partners at arm’s length, and struggle with commitment because deep down, closeness feels risky.
3. Prioritize Clear and Calm Communication

Image credit: medibilbaosalud.com
Communicate your needs directly and calmly, without accusatory language. Focus on ‘I’ statements to express your feelings without placing blame. For example, say “I feel disconnected when we don’t talk about our day” instead of “You never share anything.” Tip: This approach helps prevent an avoidant partner from feeling cornered or withdrawing further. It creates a safer space for them to hear you without their defenses rising.
4. Respect Their Need for Space
Needing space is a core part of avoidant attachment, not a sign that you’ve done something wrong. When your partner pulls back, resist the urge to chase or demand explanations. That usually makes them withdraw more. Instead, calmly state what you need for yourself, then give them room to come back on their own terms.
My tip: Set clear agreements about alone time and shared time. Say something like, “I’d like us to have dinner together three nights a week, and other nights we each do our own thing.” This gives them predictability and control, which builds safety over time.
5. Build Trust Gradually and Consistently

Source: yourtango.com
Trust with an avoidant partner grows through small, consistent actions over weeks and months, not grand romantic gestures. Show up when you say you will, respect their stated boundaries, and avoid pressure for quick emotional intimacy. Each reliable moment builds a track record that says, “I’m safe and predictable.”
Good to know: Avoidant individuals often test reliability in subtle ways, like canceling plans to see how you react. Stay calm and flexible, not punitive. Your steady response teaches them that closeness doesn’t mean losing their independence.
6. Encourage Emotional Expression Gently
Create a safe, judgment-free space for them to share feelings by starting with low-stakes topics. Ask about their day, a hobby, or a movie they watched before moving toward deeper emotions. Keep your tone neutral and avoid pushing for more than they offer.
Caution: If you sense them tensing up or shutting down, back off immediately. Say, “We don’t have to talk about this now,” and return to a lighter subject. Pushing too hard triggers their withdrawal reflex and undoes the trust you’re building.
7. Engage in Shared Activities Without Pressure

Shared activities that don’t demand emotional vulnerability can create connection without pressure. Try hiking, biking, cooking a meal together, or working on a home project side by side. The focus is on doing something you both enjoy, not on having deep conversations.
Pro move: Choose activities where you can talk or be quiet as you like, like a walk in a park or painting at a table. This lets them control the pace of interaction, making closeness feel safe rather than threatening.
8. Avoid Common Relationship Mistakes
The biggest mistake partners make is chasing an avoidant person when they withdraw. Pressing for contact or demanding explanations usually backfires, making them pull further away. Instead, give them the space they need without interpreting it as a personal rejection or lack of love.
Common pitfalls to avoid:
- Don’t send multiple texts or call repeatedly after they pull back. This reinforces their need to distance.
- Don’t demand immediate emotional intimacy or vulnerability. It can feel overwhelming and push them away.
- Don’t take their need for alone time as a sign you did something wrong. It’s about their internal regulation, not you.
9. Focus on Your Own Needs and Boundaries

Courtesy of: selfcarejoy.com
Supporting an avoidant partner should never come at the cost of your own well-being. Set clear boundaries around what you need emotionally and stick to them, even if it feels uncomfortable. Trying to fix them or force change against their will leads to resentment for both of you.
How to protect yourself:
- Keep up your own friendships, hobbies, and routines. Don’t make the relationship your only source of fulfillment.
- State your needs calmly and directly, then let go of the outcome. You can’t control their response, only your boundaries.
- Watch for signs of codependency, like constantly adjusting your behavior to avoid triggering their withdrawal. That pattern erodes your identity over time.
10. Understand Deactivating Strategies
Deactivating strategies are unconscious tactics avoidant individuals use to create distance after moments of closeness. Common ones include mentally listing a partner’s flaws, fantasizing about being with someone else, or suddenly finding reasons to be busy. These behaviors aren’t personal attacks, they are defense mechanisms against the discomfort of intimacy.
How to respond:
- Recognize the pattern without taking it as a sign you’re not good enough. It’s about their internal wiring, not your value.
- Don’t confront them aggressively about it. Instead, gently name what you notice: “I sense you’re pulling away. I’m here when you’re ready.”
- Remind yourself that these strategies are temporary and don’t define the entire relationship. With awareness, they can diminish over time.
11. Recognize That Change Takes Time
Photo credit: wiki-calendar.com
Shifting an avoidant attachment style is not a quick fix. It takes consistent effort over months or even years to rewire deeply ingrained patterns of emotional distance. The goal is gradual improvements in how you both navigate closeness and conflict, not overnight transformation.
What to keep in mind:
- Celebrate small wins: a deeper conversation, a moment of vulnerability, or a conflict resolved without withdrawal.
- Avoid setting a rigid timeline for change. Pressure to “be better by next month” can trigger more avoidance.
- Both partners need patience. The avoidant person must practice staying present, and you must practice not taking distance personally.
When to Seek Professional Help
If avoidant patterns are deeply entrenched and causing ongoing emotional neglect, rejection, or significant distress, individual or couples therapy is a smart next step. A trained therapist can help both partners understand the underlying dynamics and develop healthier ways to connect. Self-help alone may not be enough for deep-seated issues.
Caution: Attachment styles are never an excuse for abusive behavior. If you experience emotional, verbal, or physical abuse, seek professional help immediately. Your safety and well-being come first.
Frequently Asked Questions
Can an avoidant person change their attachment style?
Yes, change is possible. Through self-awareness, consistent effort, and often therapy, individuals with avoidant attachment can learn to develop a more secure way of relating. It’s a long-term process that involves gradually becoming more comfortable with intimacy and emotional expression.
What is the difference between avoidant and anxious attachment?
Avoidant attachment involves pulling away from closeness and suppressing emotions, while anxious attachment involves craving constant reassurance and fearing abandonment. Anxious individuals often pursue their partner, while avoidant individuals create distance. These styles can sometimes attract each other, creating a push-pull dynamic.
How do I know if I have an avoidant attachment style?
Signs include feeling suffocated by too much intimacy, withdrawing during conflict, difficulty expressing emotions, and prioritizing personal space over shared activities. If you often feel relief when a partner is away or find yourself mentally listing their flaws after a good moment, these may be signs of avoidant attachment.
Is it possible to have a healthy relationship with an avoidant partner?
Yes, it’s possible, but it requires understanding, patience, and mutual effort. Both partners need to communicate clearly, respect each other’s needs, and work on building trust gradually. Professional guidance can be very helpful if patterns are deeply entrenched.
What should I do if my partner withdraws?
Give them space without chasing or demanding explanations, as that usually makes them withdraw more. Calmly state your own needs and then focus on your own activities. When they come back, gently reconnect without criticism or pressure.
Can therapy help with avoidant attachment?
Yes, therapy is highly recommended for deep-seated attachment issues. A trained therapist can help both partners understand the underlying dynamics, develop healthier communication patterns, and gradually build a more secure bond. Self-help alone may not be sufficient for entrenched patterns.
Final Thoughts
My tip: Focus on building trust through small, reliable actions rather than pushing for quick emotional closeness. Realistic expectations are key, expect gradual progress over months and years, not overnight change. Remember that your own needs matter just as much, so set clear boundaries and seek support if the dynamic leaves you feeling consistently neglected or distressed. With patience, empathy, and the right strategies, you can create a more secure connection.
This article is for informational purposes only and does not constitute professional psychological or medical advice. Attachment patterns are complex, and every relationship is unique. If you or your partner are experiencing significant distress or if the dynamic involves emotional neglect or abuse, please consult a licensed therapist or mental health professional for personalized support.
Blog
How to Clean Any Kind of Hairbrush in Minutes
Learn how to clean any type of hairbrush quickly and effectively, ensuring better hair hygiene and extending the life of your favorite brushes.
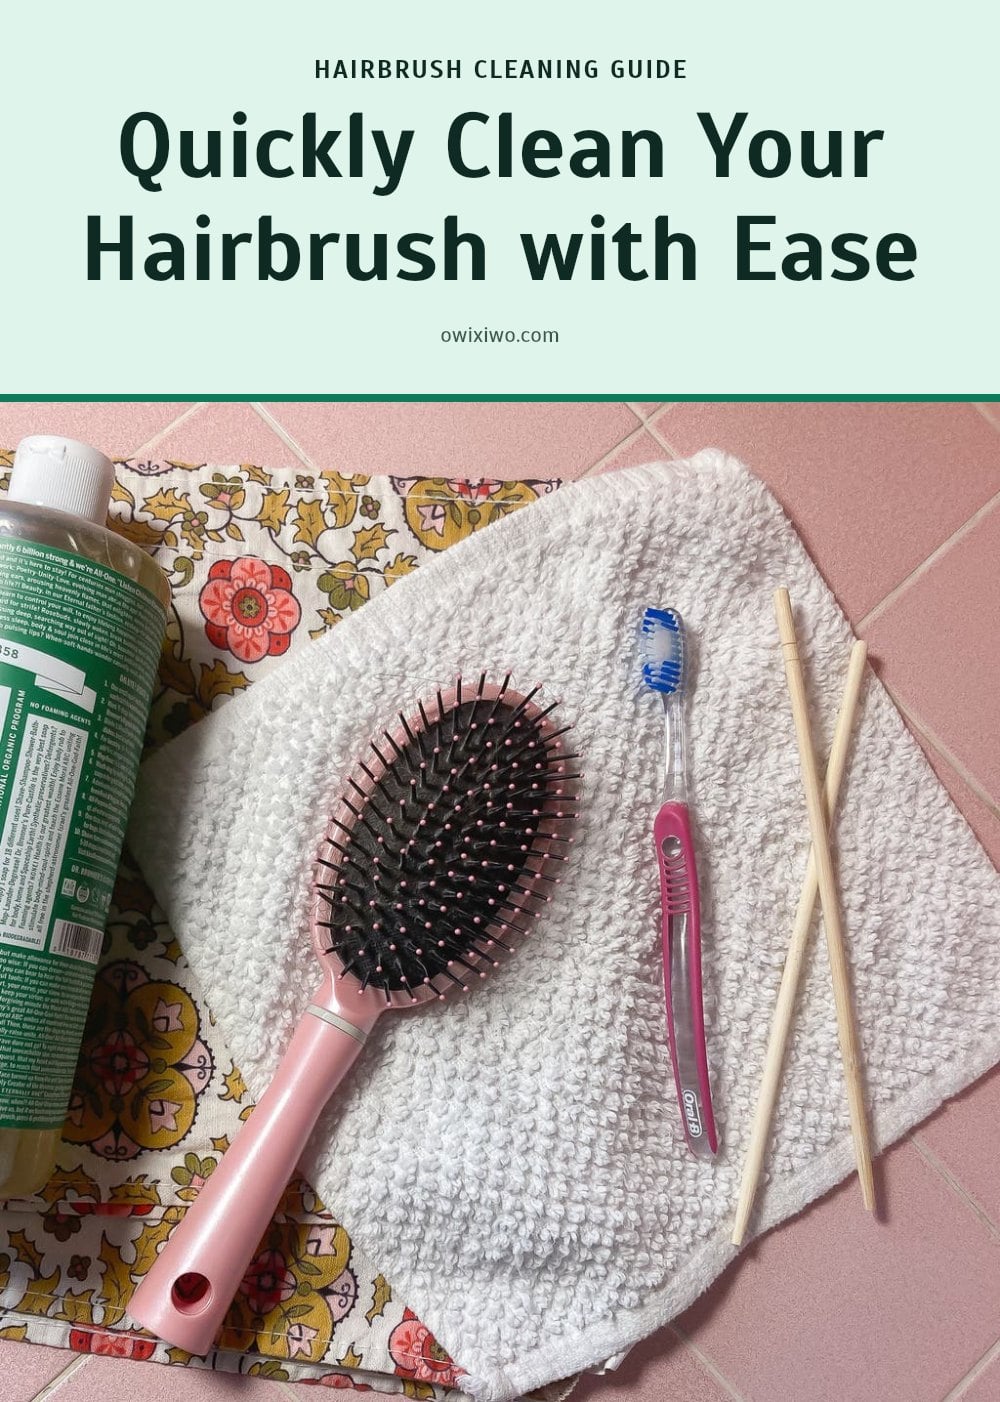
You know that feeling when your hair looks greasy even though you just washed it? Your brush might be the culprit. A brush full of old hair, product residue, and oil transfers all of that back onto clean hair, leaving it dull and weighed down. Cleaning your brush regularly is a simple habit that makes a real difference for your hair and your brush.
This guide walks you through how to clean any type of hairbrush, from plastic to wood, in just a few minutes of active work.
Courtesy of: nytimes.com
Key Takeaways
- Clean your hairbrush at least once a week, and more often if you use styling products.
- Always remove loose hair before washing; it is the most important step.
- For wooden, cork, or padded brushes, never soak them; wipe or dip only the bristles.
- Air dry brushes completely bristle-side down on a towel before storing.
- Avoid hot water and harsh cleaners that can damage bristles or glue.
Why Cleaning Your Hairbrush Is So Important
Cleaning your hairbrush regularly is non-negotiable for hygiene, hair health, and keeping the brush effective for years. A dirty brush collects hair, product residue, dust, and oils, and all of that transfers back onto your clean hair, leaving it looking dull or greasy. The process is simple: remove loose hair, wash with a gentle cleanser, and let it air dry completely, though delicate brushes need slight tweaks. Aim to clean at least once a week, or more often if you use heavy styling products.
Essential Tools for Hairbrush Cleaning
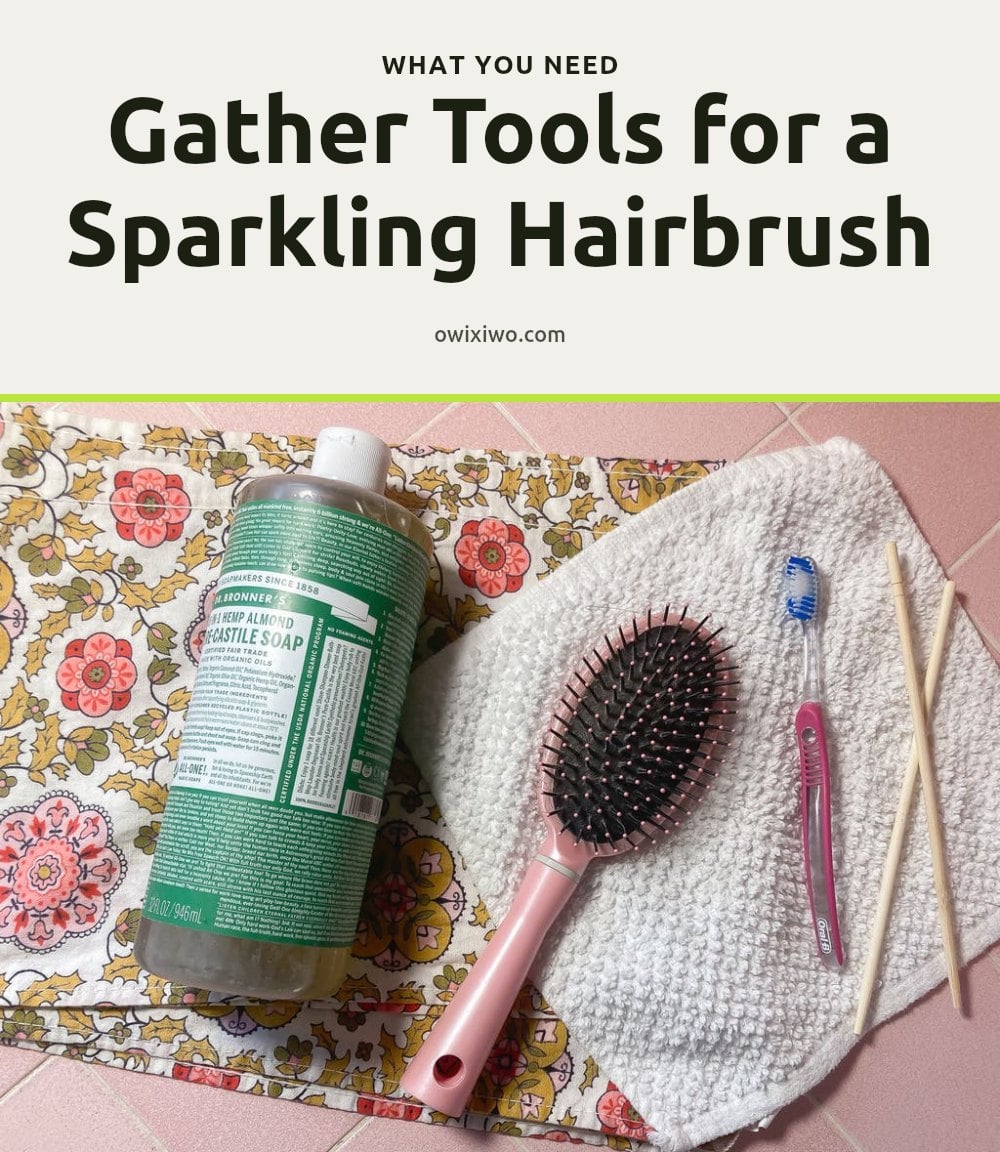
Photo credit: nytimes.com
You don’t need fancy gadgets to get your brushes sparkling clean. Gather these basics:
- Fine-tooth comb or rat-tail comb: Perfect for lifting out tangled hair.
- Mild shampoo or gentle liquid soap: Breaks down oil and product buildup.
- Small bowl or sink: For mixing your cleaning solution.
- Clean towel: Essential for patting brushes dry.
- Old toothbrush or dedicated scrubber: Helps reach between bristles and clean the base.
That’s it. No special sprays or pricey tools required.
Step-by-Step: How to Clean Most Hairbrushes
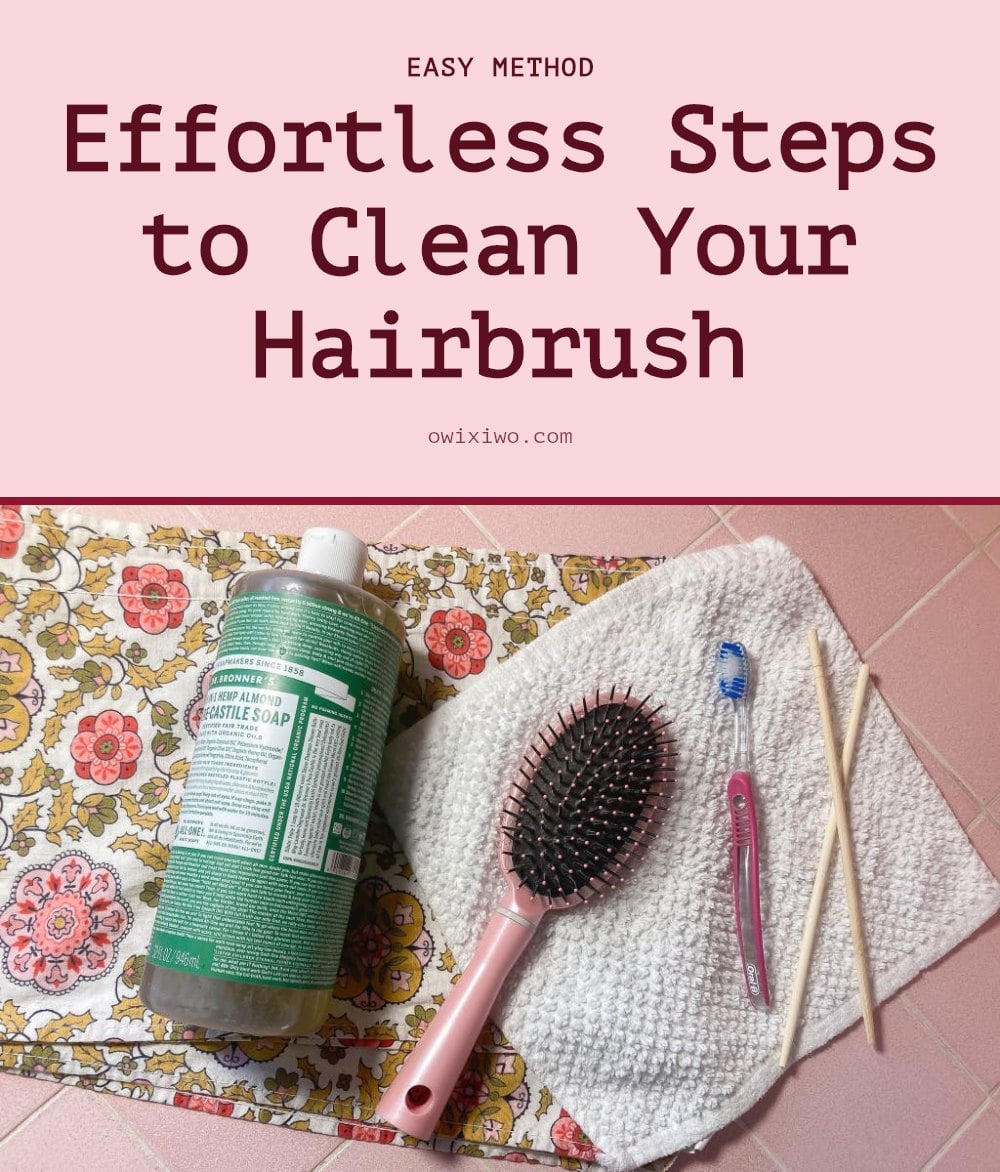
Image credit: nytimes.com
Follow this method for most plastic, metal, or mixed-bristle brushes. It takes about 5 to 15 minutes of active time, plus a few hours to dry.
- Remove loose hair: Use a hair rake, rat-tail comb, or any long, skinny object to lift hair from the bristles. For round brushes with tightly wrapped hair, carefully cut the hair up the middle with scissors, then peel it off.
- Prepare the solution: Fill a bowl or sink with lukewarm water and add shampoo (clarifying or regular) or dish soap. For a deeper clean, a mild soap is sufficient.
- Soak for 3 minutes: Submerge the brush (if it has no wood, cork, or padded base) and let it soak to loosen dirt and product buildup.
- Scrub thoroughly: Use a dedicated toothbrush, an old dish scrubber, or your fingers. Focus on the bristles, the base where they attach, the back of the brush, and the handle. For very dirty brushes, apply soap directly.
- Rinse completely: Rinse under clean running water until all soap and debris are gone. If using a sink, drain the soapy water first, then rinse.
- Dry bristle-side down: Pat the brush with a towel to remove excess moisture, then lay it bristle-side down on a clean towel to air dry completely. This prevents mold and mildew.
If you learn better by watching, this 15-minute video from Kayley Melissa shows every step. The how-to part starts at 2:41.
Special Care for ‘Fancy’ and Wooden Hairbrushes
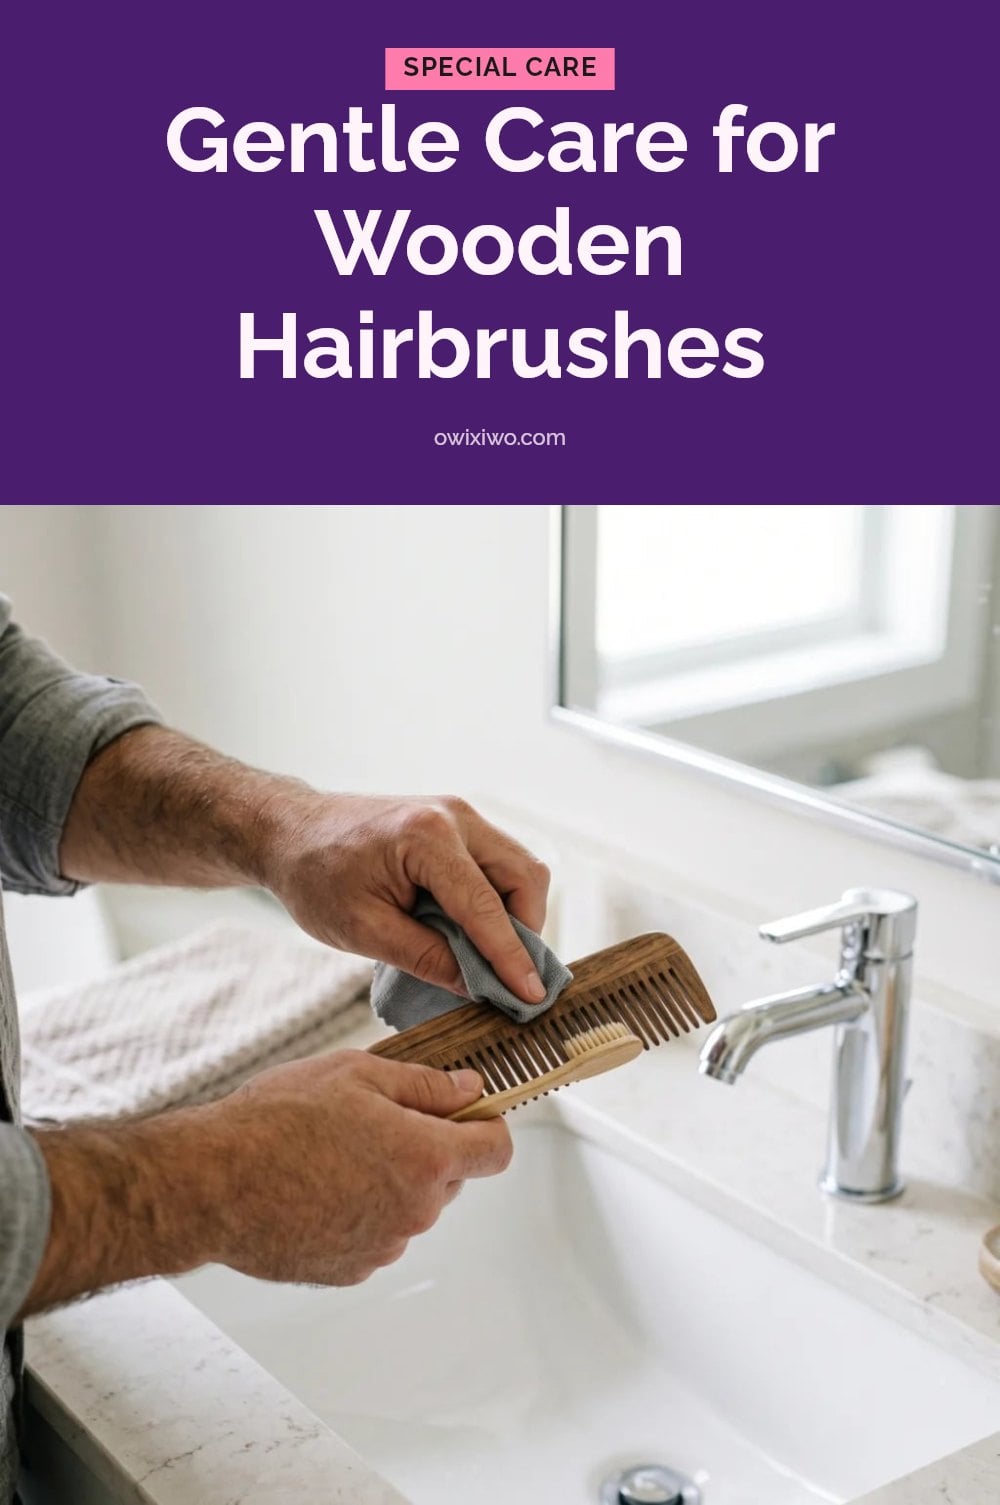
Source: beardbeasts.com
Brushes made of wood, cork, or with padded bases need a gentler touch. Soaking them can damage the materials and the glue that holds everything together.
For most delicate brushes
- Dip only the bristles: Dip just the bristles into the soapy water, not the whole brush. This avoids soaking the base.
- Scrub quickly: Use a dedicated toothbrush or your fingers to clean the bristles for about 30 seconds.
- Rinse gently: Rinse quickly under clean running water, keeping the base and handle dry.
For wooden brushes
Skip soaking entirely. Wipe the brush with a damp cloth to remove buildup, then pat dry. If you prefer a deeper clean, dip only the bristles in soapy water and rinse quickly, but avoid any water on the wood.
Caution: Always pat these brushes dry immediately after any contact with water, then let them air dry completely, bristle-side down on a towel, to prevent moisture damage.
Common Hairbrush Cleaning Mistakes to Avoid
Even with the best intentions, a few common mistakes can undo all your cleaning work. The biggest one is skipping the hair removal step. If you wash a brush still full of tangled strands, the soap and water can’t reach the bristles or the base where the real buildup hides.
Soaking natural bristle brushes or wooden ones is another frequent error. Prolonged submersion warps the wood, loosens the glue, and can ruin natural bristles. Stick to the quick dip method for those.
Rinsing matters more than you think. Leftover soap residue transfers to your hair, leaving it dull or greasy. Rinse until the water runs completely clear. And never store a damp brush. Tucking it away while wet invites mold and mildew, which create odors and can damage the brush over time.
Caution: Very hot water can melt plastic bristles and weaken the glue. Use warm water only.
Pro Tips for Maintaining Your Hairbrush
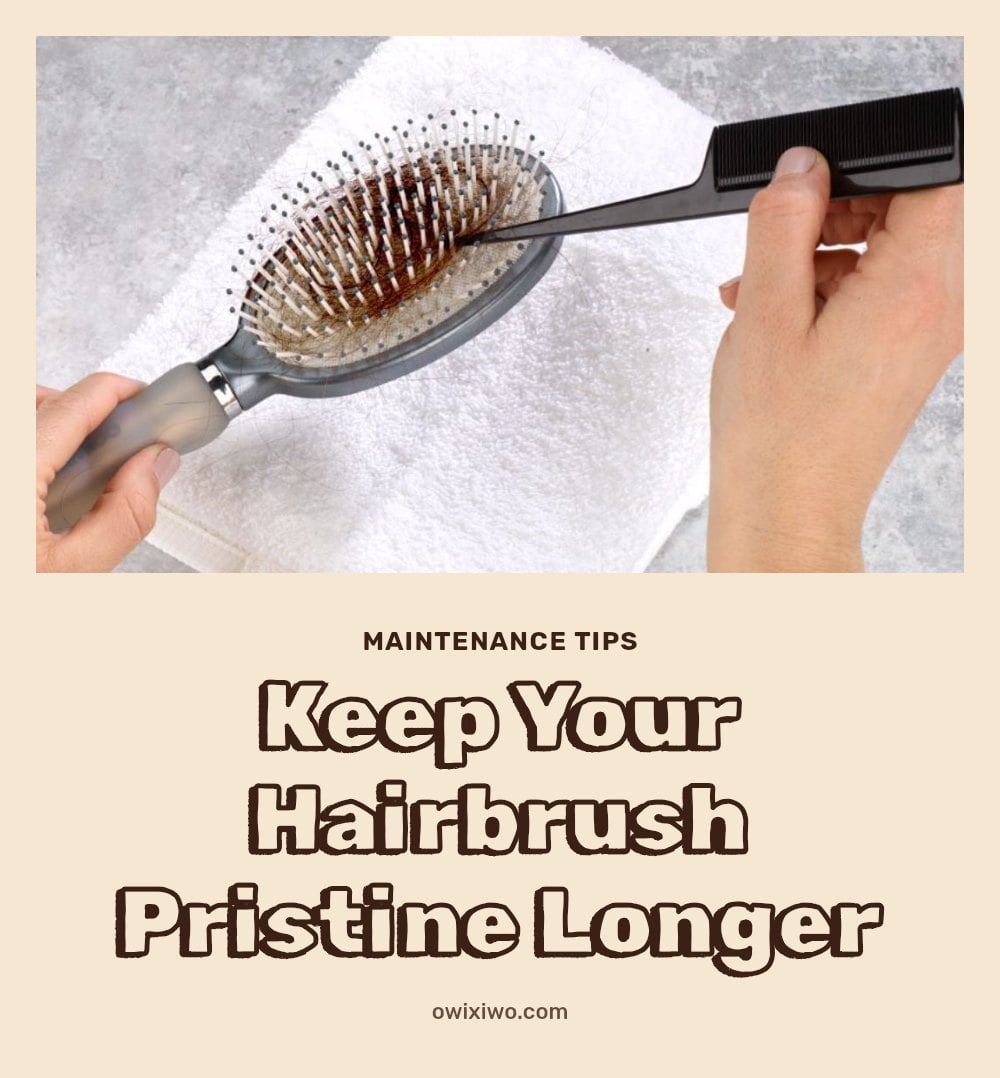
Via herabeauty.sg
Keeping your brushes in top shape between deep cleans is easier than you think. A few small habits make a big difference.
Weekly Hair Removal: Pull out loose hair about once a week to prevent buildup. A hair rake with both wide and small bristles is incredibly effective for this. If you don’t have one, a rat-tail comb or any long, skinny object works too.
Shower Cleaning: If you only own one or two brushes, clean them in the shower while your conditioner sets. The warm water and steam help loosen product residue, and you’re already in the right place.
Lint Pompom Removal: After your brushes are completely dry, use tweezers to pick out any remaining lint pompoms or stubborn debris from the bristles. It’s a satisfying final touch.
Full Coverage Clean: Remember to scrub not just the bristles but also the base, back, and handle. Product buildup collects there too and can transfer back to your hair.
After Cleaning: Proper Storage and Maintenance
Once your brushes are completely dry, store them in a clean, dry place away from humidity. Avoid putting them away in a drawer or enclosed space while still damp, as trapped moisture encourages bacterial growth.
Regularly check your brushes for signs of wear, damage, or persistent odor. If you notice mold or a strong, unpleasant smell that doesn’t go away after cleaning, it’s a clear sign it’s time to replace the brush.
Maintaining your brushes between washes by pulling out loose hair helps keep them effective and hygienic longer. A few seconds each week extends their life and keeps your hair looking its best.
Frequently Asked Questions
How often should I deep clean my hairbrush?
Deep clean your hairbrush at least once a week. If you use a lot of styling products, you may need to clean it more often, such as twice a week, to prevent buildup.
Can I use household cleaners like bleach on my hairbrush?
No, avoid harsh chemicals like bleach. They can damage the bristles and the brush base. Stick to mild shampoo or gentle soap for safe and effective cleaning.
What’s the best way to remove lint from my hairbrush after cleaning?
After the brush is completely dry, use tweezers to pick out any remaining lint or debris from the bristles. This step is optional but helps keep the brush fresh.
My hairbrush smells musty after cleaning, what went wrong?
A musty smell usually means the brush was not dried completely before storage. Always air dry bristle-side down on a towel and ensure it is fully dry before putting it away. If the smell persists, it is best to replace the brush.
Is it okay to share hairbrushes after cleaning them?
It is generally not recommended to share hairbrushes, even after cleaning, as it can transfer oils, skin cells, and potential infections. It is best to use your own brush.
Final Thoughts
My tip: pick a regular day each week to clean your brushes, and the habit will stick. Expect the whole process to take about 5 to 15 minutes of active cleaning, plus a few hours for air drying. You will notice your hair feels cleaner and your brush works better when you stay consistent. A clean brush is a small investment that pays off every day.
-

 Makeup Trends2 years ago
29 Harley Quinn Makeup Ideas: Iconic Looks for Every Occasion
-

 Hairstyle2 years ago
Round Face Haircuts Ideas 2025: 29 Flattering Styles to Try
-

 Hairstyle2 years ago
25 90s Layered Hair Ideas to Inspire Your 2025 Look
-

 Fashion2 years ago
27 Every Day Spring Outfits Inspiration for 2025
-

 Hairstyle2 years ago
29 Long Layered Haircuts Ideas for 2025
-

 Hairstyle2 years ago
64 Fall Hair Color Trends to Elevate Your Style in 2024
-

 Hairstyle2 years ago
Choppy Bob Haircuts 2025: 29 Stylish Ideas
-

 Hairstyle2 years ago
27 Medium Length Haircut with Layers Ideas for 2025