
Blog
26 Surprising Uses for Baking Soda Around the House
Discover 27 surprising ways to use baking soda for natural cleaning, deodorizing, and more around your home. Learn practical tips and avoid common mistakes.

You probably already have a box of baking soda tucked away in your pantry, but its uses go way beyond baking. This mild alkali neutralizes acids, absorbs odors, and provides gentle scrubbing power, making it a go-to for natural cleaning around the house. In this article, I’ll walk you through 26 practical ways to put that box to work, from freshening your fridge to polishing silver.
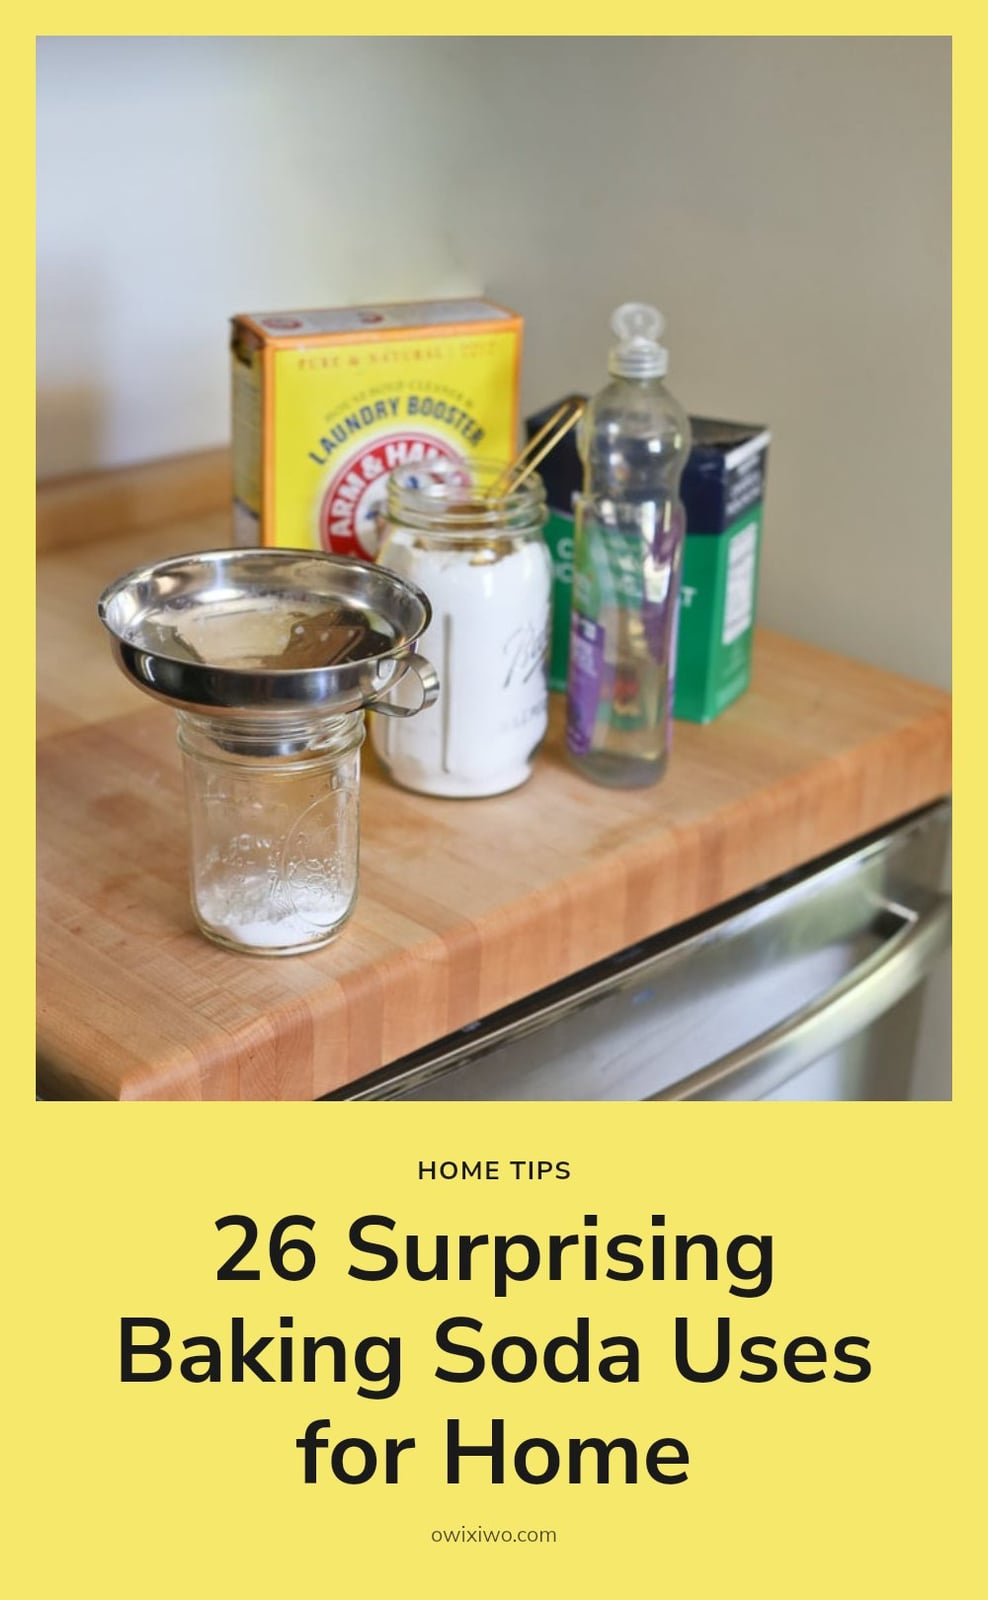
Courtesy of: greenwillowhomestead.com
Key Takeaways
- Baking soda absorbs odors instead of masking them, so replace open boxes every 1-3 months.
- For carpet deodorizing, let baking soda sit for at least 15 minutes, overnight for strong smells.
- Add 1/2 cup of baking soda to laundry to soften water and boost detergent effectiveness.
- Never use baking soda on aluminum cookware or gold-plated items to avoid damage.
- Baking soda cleans and deodorizes but does not kill germs; it is not a disinfectant.
Why Baking Soda Is Your Go-To Household Hero
Baking soda is sodium bicarbonate, a mild alkali that neutralizes acids on contact. That chemistry is what makes it such a powerhouse for cleaning and deodorizing. Its fine crystalline structure gives it a gentle abrasive texture that scrubs away grime without scratching most surfaces. Instead of masking odors with fragrance, it actually absorbs and traps them. And since it’s non-toxic and environmentally friendly, it’s a smart swap for many harsh chemical cleaners.
1. Deodorize Your Refrigerator

Photo credit: homedit.com
Place an open box or a bowl of baking soda on the back of a shelf in your fridge. It absorbs lingering food odors rather than covering them up, so your fridge stays fresh without any artificial scent.
- Replace every 1-3 months: Once the baking soda becomes saturated with odors, it stops working. Mark your calendar so you don’t forget.
2. Freshen Carpets and Rugs

Image credit: cleanhomecraft.com
Sprinkle a generous layer of baking soda over your carpets or rugs, focusing on high-traffic areas. Let it sit for at least 15 minutes, overnight works even better for strong smells like pet odors or smoke.
- Vacuum thoroughly: A full pass with your vacuum picks up the baking soda along with the trapped odors, leaving your carpet smelling clean.
3. Boost Laundry Detergent
Add 1/2 cup of baking soda directly to the drum of your washing machine at the start of each load. It softens the water, which helps your detergent work more effectively, and it brightens whites naturally.
- Deodorizes smelly clothes: The same odor-absorbing action that works in your fridge tackles sweat and musty smells in fabrics without added perfumes.
4. Clean Grout Lines
Source: thetidyapron.com
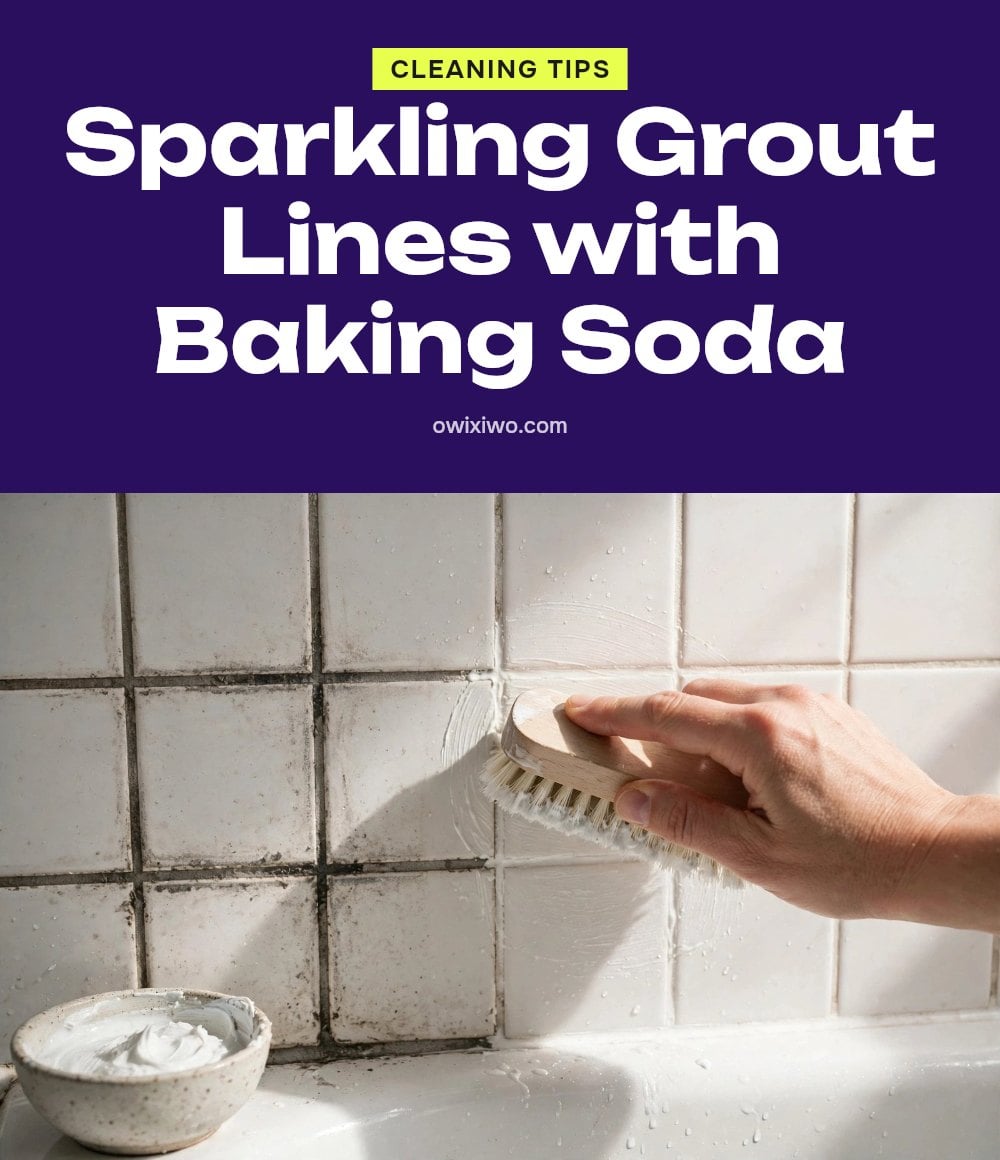
Mix baking soda with just enough water to form a thick paste. Apply the paste directly to grout lines and let it sit for 5-10 minutes. The mild abrasive action loosens embedded dirt without damaging the tile. Scrub with an old toothbrush or a grout brush, then rinse clean with water. Your grout will look noticeably brighter.
5. Unclog Minor Drains
Via knoxsolutions.us
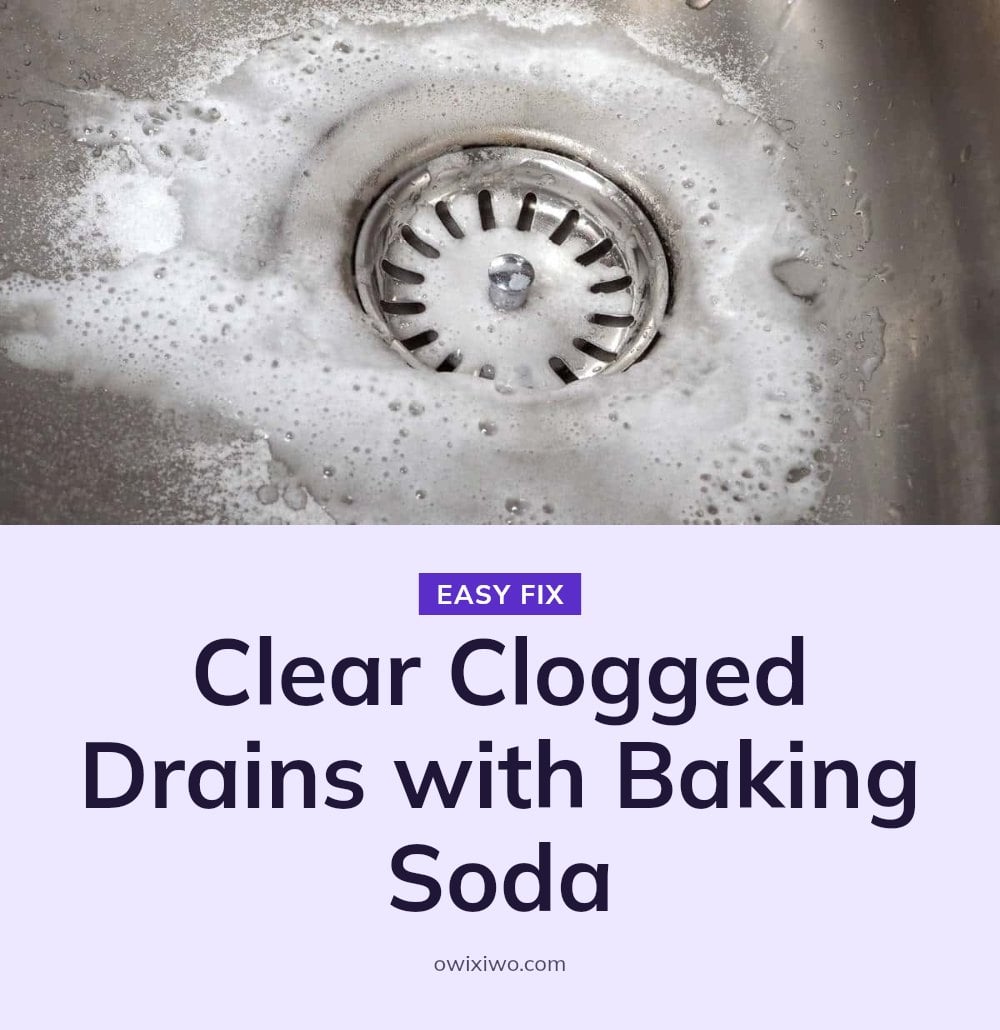
Pour 1/2 cup of baking soda down the drain, followed by 1/2 cup of white vinegar. The fizzing reaction breaks down grease and soap scum. Cover the drain immediately and let it work for 15-30 minutes. Finish by flushing with hot water. This method works best for minor clogs and eliminating drain odors, not major blockages.
6. Clean and Deodorize Dishwashers
Sprinkle 1 cup of baking soda across the bottom of an empty dishwasher. Run a short hot water cycle. The baking soda neutralizes food odors and helps clean residue from the interior. No scrubbing required, and your dishwasher will smell fresh.
7. Polish Silverware

Courtesy of: houseofhawthornes.com
Line a glass bowl with aluminum foil, shiny side facing up. Place your silver items on the foil so each piece touches the foil. Cover with boiling water, then add 1/4 cup baking soda and a pinch of salt. Let it sit for a few minutes. The chemical reaction transfers tarnish from the silver to the foil. Rinse and dry with a soft cloth.
8. Remove Crayon Marks
Lightly dampen a sponge and sprinkle baking soda directly onto it. Gently rub the crayon marks on painted walls using small circular motions. The mild abrasive lifts the wax without damaging most paint finishes.
Caution: Test on an inconspicuous area first, especially on flat or matte paint, to confirm it won’t dull the finish.
9. Clean Fruits and Vegetables
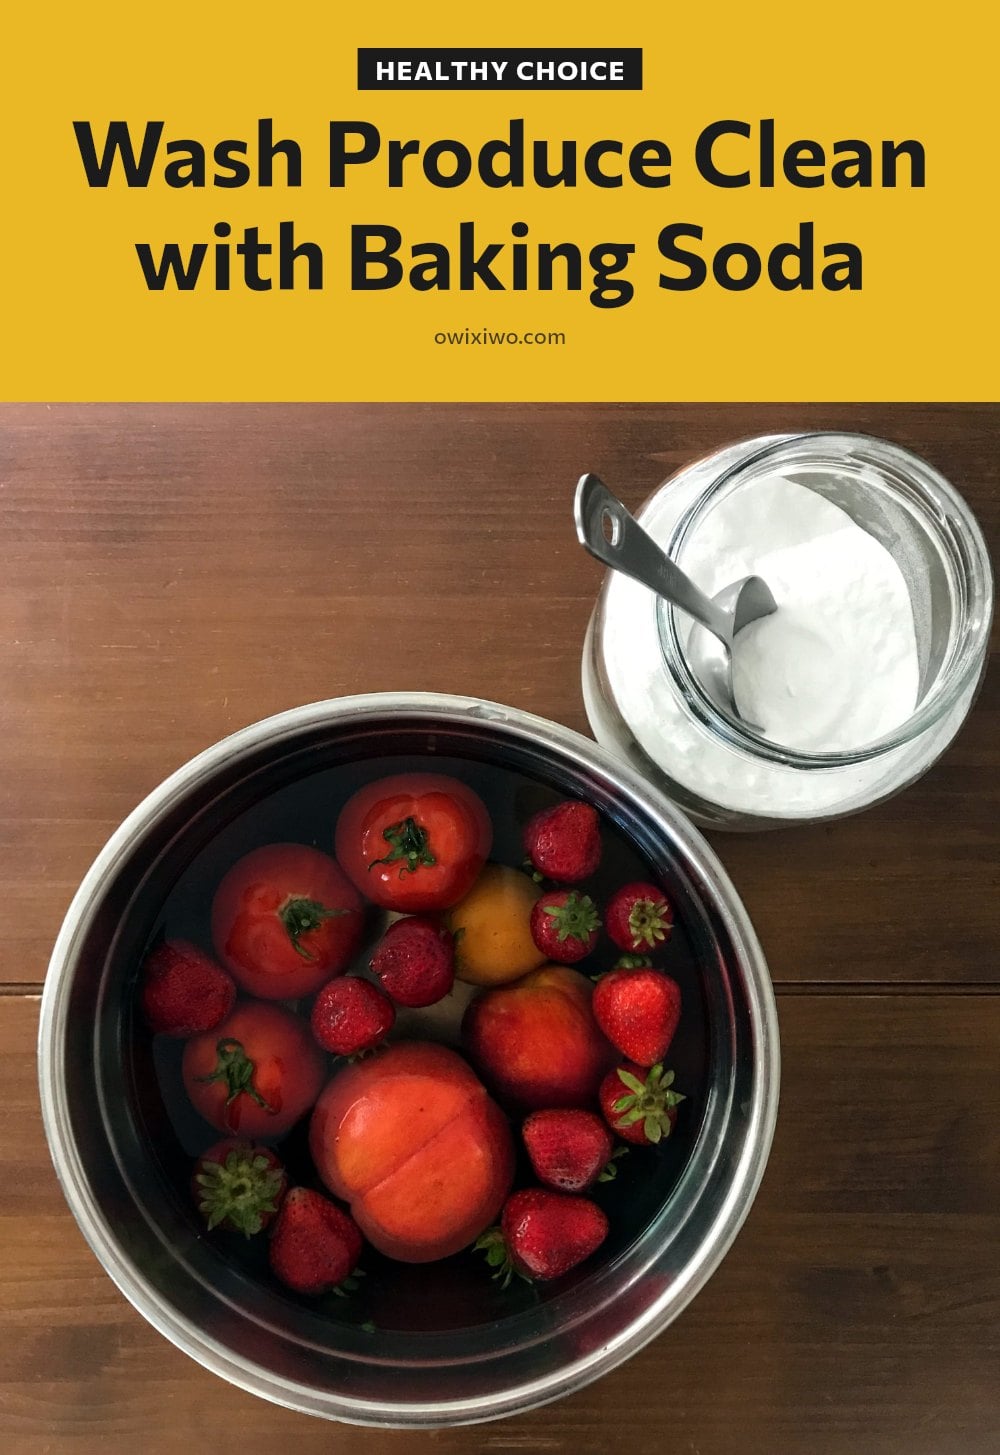
Photo credit: zerowastechef.com
Fill a large bowl with water and add 1-2 tablespoons of baking soda. Submerge your produce and let it soak for 10-15 minutes. The baking soda helps loosen dirt, soften wax coatings, and reduce some pesticide residues.
Rinse everything thoroughly under running water before eating or cooking. This method works especially well for apples, berries, and leafy greens.
10. Deodorize Trash Cans
Sprinkle a thin layer of baking soda across the bottom of your empty trash can before inserting a new liner. It absorbs odors as they develop, keeping the can fresh between changes.
For extra odor control during the week, sprinkle a small amount directly on top of trash, especially after discarding food scraps or diapers. Replace the baking soda each time you swap the liner.
11. Clean Microwaves
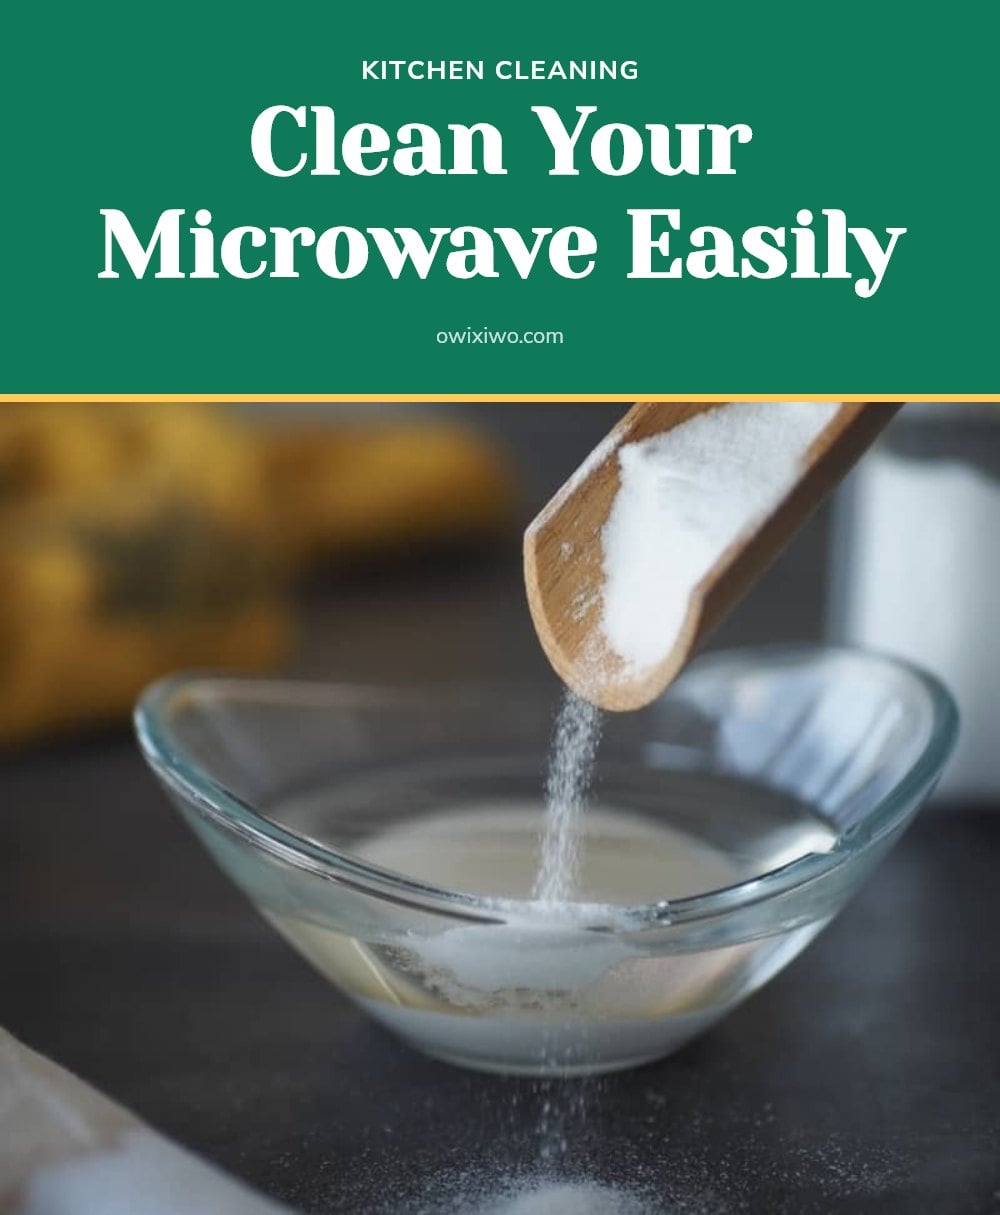
Image credit: maid2match.com.au
Mix 2 tablespoons of baking soda with 1 cup of water in a microwave-safe bowl. Heat on high for 3-5 minutes until the mixture is steaming and the window fogs up. Let the bowl sit inside for 5 minutes so the steam softens baked-on food.
Remove the bowl carefully and wipe down the interior with a damp sponge. The baking soda residue helps lift stubborn splatters without scratching the surface.
12. Scrub Sinks and Countertops
Sprinkle baking soda directly onto a damp sink or countertop surface. Scrub gently with a sponge or cloth, using small circular motions. The fine crystals provide just enough abrasion to lift grime without scratching. Rinse thoroughly with water. It cleans and brightens in one step, no harsh chemicals needed.
13. Neutralize Pet Odors
Source: tiendaregalos.eu
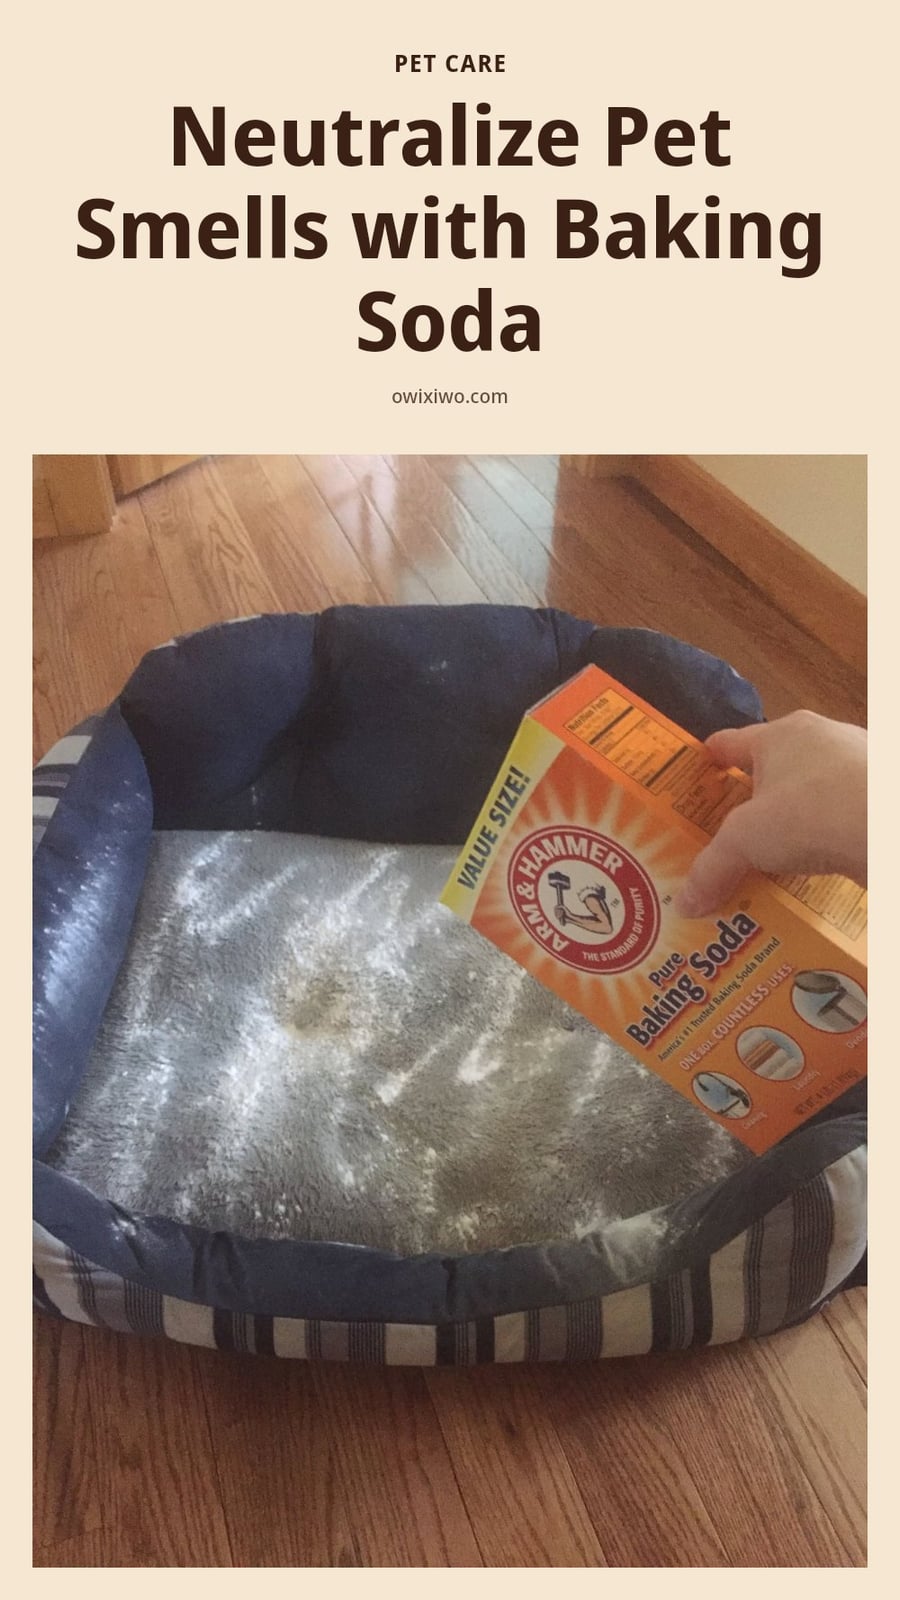
Sprinkle baking soda generously over pet beds, upholstery, or any accident spot. Let it sit for at least 30 minutes, longer for stronger smells. The baking soda absorbs and neutralizes odors rather than just covering them. Vacuum thoroughly to remove the powder along with the trapped smells.
14. Clean Coffee and Tea Stains
For stubborn coffee or tea stains in mugs or carafes, make a paste of baking soda and a small amount of water. Apply the paste directly to the stain and let it sit for a few minutes. Scrub gently with a sponge, then rinse. The mild abrasive action lifts the discoloration without scrubbing hard.
15. Freshen Musty Books
Place a musty book in a sealed plastic bag with an open container or small bowl of baking soda. Seal the bag and leave it for several days to a week. The baking soda gradually absorbs the musty odors from the paper fibers. Remove the book and shake off any loose powder before reading.
16. Clean Toilets
Sprinkle 1/2 cup of baking soda directly into the toilet bowl. Let it sit for 30 minutes so the mild abrasive can break down stains and the deodorizing properties neutralize odors. Scrub with a toilet brush, then flush. This method cleans and freshens without harsh chemical fumes.
17. Deodorize Shoes
Source: guides.brit.co
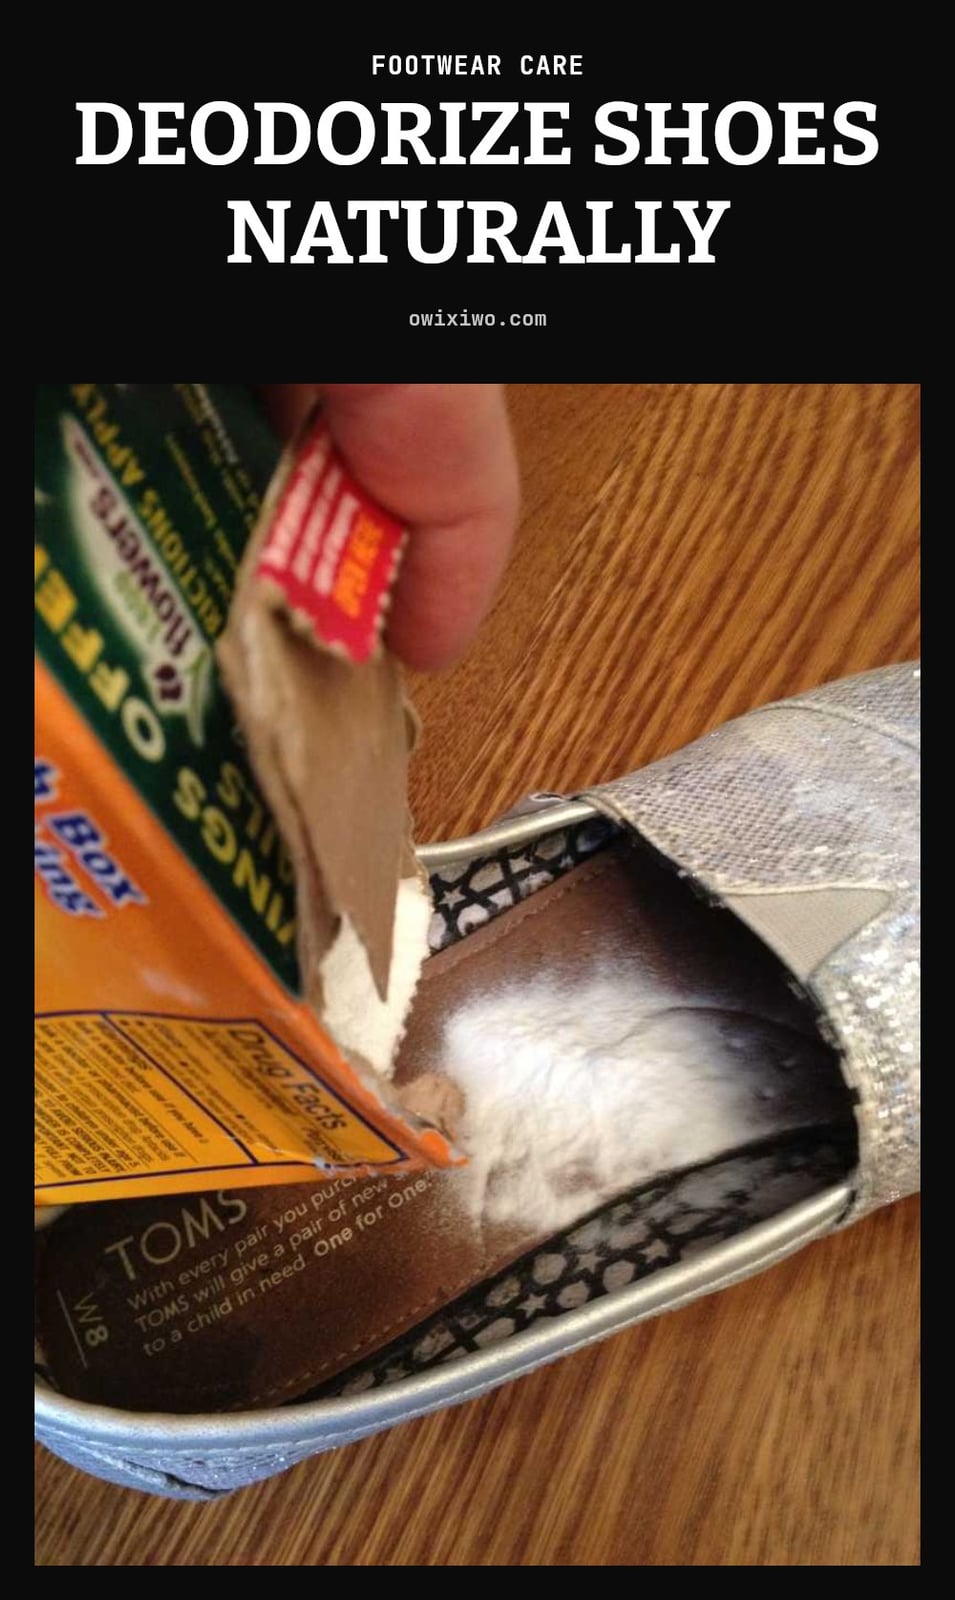
Sprinkle baking soda directly into smelly shoes, making sure to cover the insoles. Let it sit overnight to absorb trapped odors. Before wearing, tap out the excess powder. This works well for gym shoes or boots that have absorbed moisture and sweat.
18. Clean Shower Curtains
For vinyl or plastic shower curtains, sprinkle baking soda on a damp sponge. Scrub gently to lift soap scum and mildew stains. The mild abrasive cleans without damaging the material. Rinse thoroughly with warm water. Your curtain will look fresh without harsh bleach.
19. Extinguish Small Grease Fires
Keep a box of baking soda within reach of your stove. If a small grease fire starts in a pan, pour a generous amount directly onto the flames. Baking soda releases carbon dioxide when heated, which smothers the fire by cutting off oxygen. Caution: Never use water on a grease fire, as it will spread the flames. This method is only for small, contained fires.
20. Clean Hairbrushes and Combs
Remove hair: Pull all hair from brushes and combs before cleaning. Soak them in a basin of warm water mixed with 1/4 cup of baking soda for 15-30 minutes. The baking soda breaks down product buildup and oils trapped in the bristles. Rinse thoroughly and let air dry completely.
21. Deodorize Cutting Boards
Sprinkle on a damp board: Sprinkle baking soda directly onto a damp cutting board. Rub with a sponge or cloth in circular motions, then rinse well. The mild abrasive lifts odors from garlic, onions, and other strong foods without damaging the surface.
22. Soothe Minor Insect Bites
Make a paste: Mix baking soda with a small amount of water to form a thick paste. Apply it directly to insect bites or stings. The alkaline properties help neutralize the acidic compounds in the bite, which can reduce itching and irritation. Reapply as needed.
23. Clean Patio Furniture
Mix the solution: Combine 1/4 cup baking soda with 1 quart of warm water in a bucket. Dip a sponge or brush into the mixture and scrub away dirt and grime from plastic or metal patio furniture. Rinse thoroughly with a hose. It cleans without harsh chemicals and is gentle on outdoor finishes.
24. Remove Burnt Food from Pans

Via thekitchn.com
Sprinkle a generous layer of baking soda directly over the burnt residue in the pan. Add enough hot water to cover the scorched area and let it soak overnight. The baking soda gradually loosens the charred bits, so the next day you can scrub them away with minimal effort.
25. Deodorize Closets and Drawers
Place a small open container of baking soda on a shelf in your closet or in a dresser drawer. It continuously absorbs musty odors, keeping clothes and linens smelling fresh. Replace the container every month or two, because once the baking soda is saturated it stops working.
26. Clean Car Interiors
Sprinkle baking soda evenly over car seats and floor mats. Let it sit for at least 15 minutes to absorb odors from spills, pets, or food. Vacuum thoroughly to remove the powder along with trapped smells, leaving the interior noticeably fresher.
Common Baking Soda Mistakes to Avoid
- Using baking soda and baking powder interchangeably: They are not the same. Baking soda needs an acid to activate, while baking powder already contains its own acid. Using the wrong one affects your recipe.
- Expecting instant results on tough stains: Baking soda often needs time to work, especially for soaking or odor absorption. Let it sit for at least 15 minutes, sometimes overnight.
- Using it dry on delicate surfaces: Always mix baking soda with water to create a paste when scrubbing delicate surfaces to prevent scratching.
- Believing it’s a disinfectant: While it cleans and deodorizes, baking soda does not kill all germs. It is a cleaner, not a sterilizer.
- Not replacing deodorizing boxes: For odor absorption, baking soda eventually becomes saturated. Replace open boxes in fridges and closets every 1-3 months.
- Using on aluminum cookware: Baking soda can cause discoloration on aluminum. Avoid using it on these specific items.
- Using on marble or granite frequently: While occasional use is fine, its alkalinity can etch natural stone over time. Use sparingly and rinse quickly.
Frequently Asked Questions
Is baking soda safe to use on all surfaces?
No, baking soda is not safe for every surface. Avoid using it on aluminum cookware, gold-plated items, and marble or granite surfaces (frequent use can etch the stone). Always test on an inconspicuous area first, especially on painted walls or delicate fabrics, to check for damage or discoloration.
How often should I replace baking soda used for deodorizing?
Replace open boxes of baking soda used for deodorizing every 1 to 3 months. Once the baking soda is saturated with odors, it stops absorbing effectively. For best results in the refrigerator or closet, mark the date on the box so you remember to swap it out.
Can baking soda kill mold and mildew?
Baking soda can help clean and deodorize surfaces affected by mold and mildew, but it does not kill them. Its mild abrasive action can scrub away visible growth, and its deodorizing properties can reduce musty smells. For mold remediation, use a product specifically designed to kill mold or consult a professional.
What is the difference between baking soda and baking powder?
Baking soda is pure sodium bicarbonate and needs an acid (like vinegar or lemon juice) to activate. Baking powder contains baking soda plus its own acid, so it activates with moisture and heat. They are not interchangeable in recipes or cleaning uses; using the wrong one can affect results.
Can baking soda remove tough stains?
Baking soda can help lift many stains, but it often needs time and scrubbing to work on set-in marks. For tough stains like burnt food in pans, let a baking soda paste or soak sit overnight before scrubbing. For crayon marks or coffee stains, gentle scrubbing with a damp sponge and baking soda usually does the trick.
Final Thoughts
My tip: keep a box of baking soda under your kitchen sink and another in your laundry room so you always have it on hand. Most cleaning results are visible immediately, though deodorizing in spaces like the fridge or closet takes a few hours to a couple of days to fully work. With these 26 uses, you can replace several commercial cleaners with one simple, non-toxic staple.
Blog
How to Build Your Savings: Essential Tools and Strategies
Discover how to build your savings effectively. Learn essential tools and strategies to increase your savings and achieve financial security.
You want to grow your savings faster, but it can feel overwhelming knowing where to start. The good news is that simple, consistent habits can make a huge difference. This article covers the essential steps, from building a budget and cutting expenses to automating your savings and avoiding common mistakes.

Courtesy of: girlgonnalaunch.org
Key Takeaways
- Build an emergency fund that covers 3 to 6 months of essential expenses.
- Use the 50/30/20 rule: 50% for needs, 30% for wants, 20% for savings and debt.
- Automate transfers to a separate savings account to save consistently.
- Set SMART goals to stay motivated and track your progress.
- Review your spending and cut unnecessary expenses regularly.
Why Building Your Savings Is So Important
Building savings is about creating a cushion that catches you when life throws a curveball. That emergency fund for a car repair or medical bill means you don’t have to rely on credit cards, which keeps financial stress in check. Savings also turn big dreams into real plans, whether that’s a down payment on a home or a comfortable retirement. Consistent saving builds long-term security and gives you peace of mind knowing you’re prepared for both the expected and the unexpected.
Essential Tools for Boosting Your Savings

Photo credit: nerdwallet.com
You don’t need a finance degree to get your savings on track. The right tools make the process almost automatic.
- Budgeting apps or spreadsheets: These track every dollar coming in and going out, so you see exactly where your money goes.
- Online banking services: Most banks let you set up automated transfers to a separate savings account, which removes the temptation to spend that money.
- High-yield savings accounts: They pay significantly more interest than a standard account, so your money grows faster without extra effort.
- Investment accounts (IRA or 401k): These offer tax advantages for retirement savings, helping your money compound over time.
My tip: I’ve tested several budgeting apps, and the one that sticks is the one I actually open every week. Start with a free version before committing to a paid plan.
Your Step-by-Step Guide to Smarter Savings

Image credit: residencyadvisor.com
Follow these steps to build a savings system that works for you.
- Create a budget: List all income and expenses for the month. The 50/30/20 rule is a solid starting point: 50% for needs, 30% for wants, and 20% for savings and debt repayment. I’ve tried the envelope system, zero-based budgeting, and the 50/30/20 method, and the last one is the easiest to stick with long term.
- Automate transfers: Set up a recurring transfer from your checking to your savings account on payday. This ensures you save before you have a chance to spend.
- Set SMART goals: Make your goals Specific, Measurable, Achievable, Relevant, and Time-bound. Instead of “save more,” aim for “save $1,000 for a vacation by December.”
- Track spending: Review your bank and credit card statements weekly. This helps you spot patterns and find areas to cut back.
- Build an emergency fund first: Aim for 3 to 6 months of essential living expenses in a separate, easily accessible account before focusing on other goals.
- Explore high-yield savings: Move your emergency fund and short-term savings to a high-yield account so your money earns more interest.
- Review progress: Every quarter, check your savings balance and adjust your budget or goals as your income or expenses change.
Smart Strategies to Cut Expenses and Save More
Source: new.abb.com
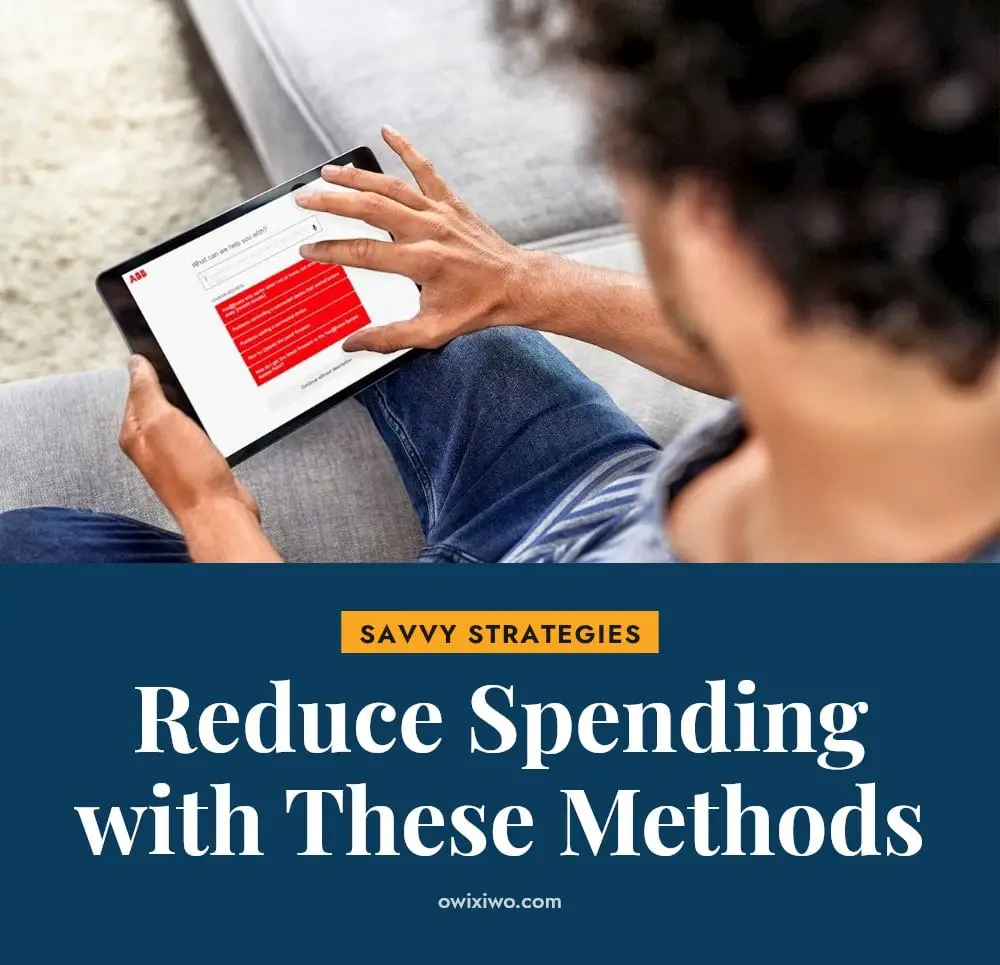
Finding extra money to save often starts with rethinking how you spend. Here are practical ways to cut expenses without feeling deprived.
Distinguish needs from wants
Needs are rent, groceries, utilities, and minimum debt payments. Wants are takeout, streaming subscriptions, and new clothes. Prioritize needs first, then allocate a smaller portion to wants.
Reduce discretionary spending
Cook at home more often, limit dining out to once a week, and choose free entertainment like hiking or library books. Small changes add up quickly.
Review recurring subscriptions
Check your bank statement for subscriptions you no longer use, like gym memberships, streaming services, or app subscriptions. Cancel anything you haven’t used in the past month.
Pay down high-interest debt
Credit card debt often carries interest rates above 20%. Paying it off frees up money that can then go into savings. Focus on the highest rate first.
Try round-up apps
Apps that round up your purchases to the nearest dollar and save the difference can build a small emergency fund without you noticing. My tip: Set a monthly cap so the micro-savings don’t accidentally drain your checking account.
Common Savings Mistakes and How to Avoid Them
Not having a clear budget: Without a budget, money tends to disappear. Create a detailed monthly plan that accounts for every dollar of income and expense. The 50/30/20 rule gives you a simple framework to start.
Failing to automate savings: Manual transfers are easy to skip. Set up recurring transfers from your checking to your savings account on payday. This makes saving a non-negotiable habit.
Underestimating small expenses: A daily coffee or lunch out adds up fast. Track every dollar you spend for a month to see where your money actually goes. You might be surprised.
No emergency fund: Unexpected expenses happen. Prioritize building a fund that covers 3 to 6 months of essential living expenses before focusing on other goals.
Low-interest accounts: Keeping savings in a standard checking account earns little to no interest. Move your money to a high-yield savings account, which typically offers much better returns with no fees.
Unrealistic goals: Setting a goal to save 50% of your income right away is a recipe for burnout. Set SMART goals, specific, measurable, achievable, relevant, and time-bound, so you can celebrate small wins along the way.
Advanced Tips for Accelerating Your Savings

Increase income: A side hustle or negotiating a raise can dramatically accelerate your savings. My tip: look at skills you already have, freelancing, tutoring, or selling handmade items can add hundreds per month.
Utilize tax-advantaged accounts: Maximize contributions to a 401k or IRA. These accounts offer tax benefits that help your money grow faster than a regular savings account.
Review bank statements: Spend five minutes each month scanning your bank and credit card statements. Cancel subscriptions, memberships, or services you no longer use. Those small monthly fees add up over a year.
Stay consistent: Even small, regular contributions compound over time. Setting aside $25 per week adds up to $1,300 in a year, plus interest. Consistency beats occasional large deposits every time.
When to Consult a Financial Advisor
If your financial situation feels complex, you have multiple income streams, significant debt, or large assets, a financial advisor can provide clarity. They help with investment planning, retirement strategies, and estate planning tailored to your life.
Caution: Avoid anyone promising guaranteed high returns or pressuring you into quick decisions. Reputable advisors offer personalized advice and charge transparent fees. For most people, a one-time consultation is enough to set a solid course.
Timeline and Investment for Growing Your Savings
Timeline: Growing savings is a marathon, not a sprint. Consistent effort over months and years produces the most meaningful results. An emergency fund can be built in 6-12 months with steady contributions.
Cost: Budgeting apps range from free to about $5, $15 per month. High-yield savings accounts typically have no monthly fees. Your main cost is time and discipline, both are free.
Investment: Your primary investment is your commitment to tracking spending and sticking to your plan. That time pays off in reduced financial stress and a growing safety net.
Frequently Asked Questions
How much should I have in my emergency fund?
Aim for 3 to 6 months of essential living expenses. This cushion helps cover unexpected costs like car repairs or medical bills without relying on credit cards or loans. Start with a smaller goal, such as $1,000, and build from there.
What is the 50/30/20 rule for budgeting?
It’s a simple budgeting framework. Allocate 50% of your after-tax income to needs like rent and groceries, 30% to wants like dining out and entertainment, and 20% to savings and debt repayment. This gives you a clear structure to manage your money.
Are budgeting apps really helpful for saving?
Yes, many people find them useful. Budgeting apps track your income and expenses automatically, helping you see where your money goes and identify areas to cut back. They can also send reminders and help you stick to your savings goals.
When should I consider a financial advisor?
Consider a financial advisor if your situation feels complex, such as having multiple income streams, significant debt, or large assets. They can help with investment planning, retirement strategies, and estate planning. Avoid anyone promising guaranteed high returns.
How can I start saving money with a low income?
Start small by setting aside even a few dollars each week. Focus on cutting small expenses, like coffee or subscriptions, and use a high-yield savings account to earn more interest. Automating even a small amount can help build the habit over time.
Final Thoughts
Start with one habit that feels manageable, like setting up an automatic transfer to a high-yield savings account or creating a simple monthly budget. Expect your savings to grow slowly at first, but consistent effort over months and years will build real financial security. The key is to keep going, even when progress seems small.
This article is for general informational purposes only and does not constitute financial, legal, or professional advice. Individual financial situations vary, so consult a qualified financial advisor or professional for personalized guidance on your specific needs and goals.
Blog
How to Do Ego Work: 6 Steps to Self-Awareness
Learn how to do ego work with these 6 practical steps to foster self-awareness, improve relationships, and achieve inner peace.
You’ve probably heard the word ‘ego’ thrown around in conversations about personal growth, but what does it actually mean to work on it? Ego work isn’t about getting rid of your ego. It’s about understanding how it shapes your thoughts, feelings, and reactions so you can relate to yourself and others more authentically. This article walks you through six practical steps to build self-awareness, from observing your reactions to practicing self-compassion, and explains when it might be wise to seek professional support.
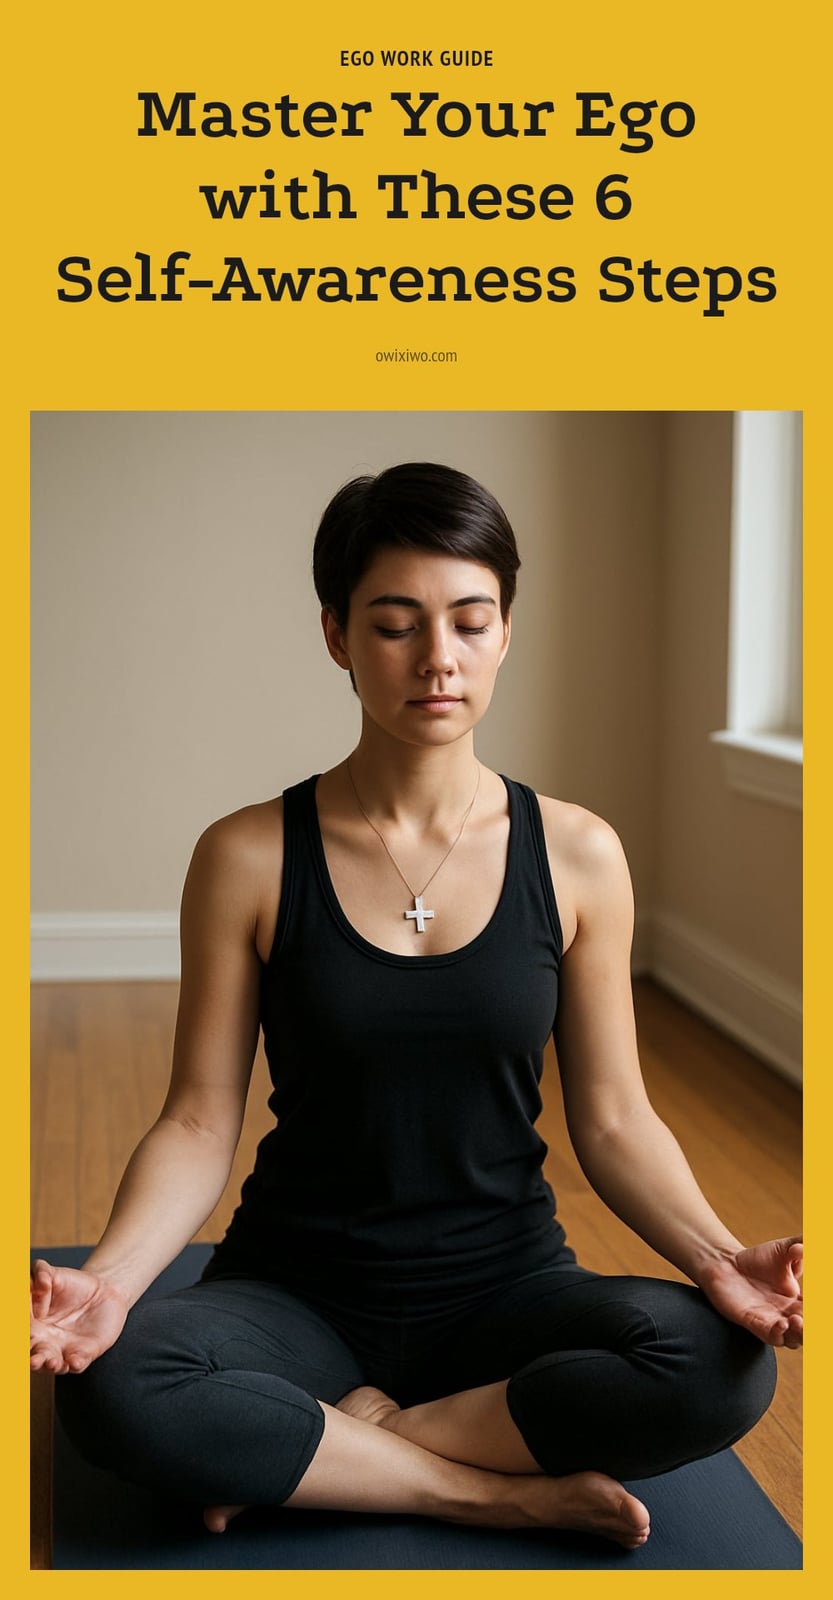
Courtesy of: medium.com
Key Takeaways
- Ego work means understanding and integrating your ego, not eliminating it.
- Start by observing your thoughts and reactions without judgment to spot ego-driven patterns.
- Identify core beliefs that quietly drive behaviors like defensiveness or people-pleasing.
- Practice humility, active listening, and seeking feedback to loosen the ego’s grip.
- Be patient, ego work is a continuous process, with insights unfolding over weeks, months, or years.
What Is Ego Work?
Ego work means understanding and integrating different parts of yourself, not getting rid of your ego. It builds self-awareness so you can see how your ego shapes your thoughts, feelings, and reactions. The goal is better emotional control, stronger relationships, and a more genuine sense of who you are. In psychology, the ego helps you navigate daily life; in spiritual traditions, it’s the separate self you learn to see beyond. Either way, the work is about balance, not destruction.
1. Observe Your Thoughts and Reactions

Photo credit: ihasco.co.uk
Start by watching your own mind like a curious scientist. Notice a thought, emotion, or reaction as it happens, and hold off on judging it. This pause reveals patterns where your ego takes over, such as when you feel defensive or need to be right.
My tip: Try to become a neutral observer of your own internal landscape, as if you’re watching a movie of your mind. You’re not the director or the critic, just the audience. Over time, this simple shift helps you catch ego-driven impulses before they run the show.
2. Identify Your Core Beliefs
Your core beliefs are the hidden scripts that shape how you see yourself and react to the world. Many of these were formed early in life and can quietly drive ego-driven behaviors like people-pleasing or perfectionism. Uncovering them is a major step in ego work.
Journaling works well here. Write down questions like ‘Why do I react this way?’ or ‘What am I afraid will happen if I don’t…?’ The answers often point to a belief you never consciously chose. Once you see it, you can decide if it still serves you.
3. Cultivate Humility and Openness
An unhealthy ego hates being wrong and sees feedback as a threat. Practicing humility means choosing growth over being right. It opens you up to learning, admitting mistakes, and accepting constructive criticism without taking it personally.
When you let go of the need to control every outcome, you gain perspective. You can see situations from other angles, which reduces defensiveness and helps you respond rather than react. Humility isn’t weakness; it’s the strength to keep growing.
4. Practice Active Listening
Shift your focus from planning your reply to actually understanding what the other person is saying. Ego often pushes us to interrupt, dominate the conversation, or steer it back to ourselves. Active listening pulls you out of that loop and helps you step outside your immediate perspective.
- Pause before responding: let a beat of silence pass so you can absorb their words.
- Reflect back: say, “So what I hear you saying is…” to confirm you got it right.
- Ask one follow-up question: it keeps the focus on them, not you.
This small shift improves relationships because people feel heard, and it reduces the ego’s grip on the conversation.
5. Seek Constructive Feedback
Ask trusted friends, mentors, or a therapist for honest insight into how you come across. External perspectives can highlight egoic patterns you might not see in yourself, like defensiveness or a need to control. Choose people who are kind but also honest, and be prepared to truly listen without immediately defending yourself.
My tip: Frame the request clearly: “I’m working on being more open. Can you tell me one thing I do that makes it hard to give me feedback?” Then thank them and sit with the answer before reacting. The goal is not to argue but to gather data. If you notice yourself justifying, take a breath and ask a clarifying question instead. This turns feedback into a tool for growth rather than a threat.
6. Engage in Self-Compassion
As you uncover challenging aspects of your ego, be kind and understanding towards yourself. Ego work is a continuous process, not a one-time fix, and self-criticism can be counterproductive. Treat yourself with the same empathy and patience you would offer a friend going through a similar journey.
When you catch yourself in an ego-driven reaction, try saying, “That’s a pattern I’m working on,” instead of “I’m so selfish.” This small shift keeps you motivated rather than ashamed. Remember that progress is not linear, and some days will feel harder than others. Self-compassion is not about letting yourself off the hook; it’s about creating a safe internal environment where growth can happen.
When to Seek Professional Guidance
If ego work triggers significant emotional distress, anxiety, or depression that you find difficult to manage, consider seeking guidance from a qualified therapist or counselor. Also seek help when you feel stuck in persistent negative patterns or beliefs related to your ego, or if you suspect underlying mental health concerns are impacting your ability to engage in self-reflection effectively. Professional support can provide tools and perspective that are hard to access alone.
Frequently Asked Questions
What is the difference between ego and self-esteem?
Ego is the part of your personality that mediates between your instincts, morals, and reality, giving you a sense of identity. Self-esteem is how you value and respect yourself. A healthy ego supports realistic self-esteem, while an inflated ego can lead to arrogance or defensiveness. Ego work helps you build grounded self-esteem without needing to be superior.
Can ego work make you less confident?
No, ego work should not make you less confident. The goal is to develop a more authentic, grounded confidence rather than one that relies on being right or superior. As you understand your ego, you may feel more secure in who you are, which can actually boost healthy self-esteem. If you feel more insecure, it might be helpful to talk with a therapist.
How long does it take to see results from ego work?
Ego work is a continuous process, not a one-time fix. Some people notice small shifts in their reactions within a few weeks of consistent practice, like pausing before getting defensive. Deeper changes, such as reshaping core beliefs, often take months or years of ongoing self-awareness and reflection. Be patient with yourself.
Is ego work a spiritual practice?
Ego work can overlap with spiritual traditions that view the ego as a limited sense of self, separate from a larger consciousness. Many people incorporate mindfulness or meditation into their ego work, which are common in both secular and spiritual contexts. However, you don’t need to be spiritual to benefit from the psychological approaches described here.
Can ego work help with anxiety?
Ego work may help reduce anxiety by making you more aware of the thoughts and beliefs that drive worry or defensiveness. By observing these patterns without judgment, you can create space between the trigger and your reaction. However, if you have significant or persistent anxiety, it’s important to consult a qualified therapist or counselor for personalized support.
Final Thoughts
If you take one thing from this, start with simple self-observation. Just notice when you feel defensive, need to be right, or react strongly, without judging yourself for it. That awareness alone can shift how you interact with others over time. Remember, ego work isn’t a quick fix; it’s a lifelong practice that deepens your self-understanding and compassion. Give yourself grace as you explore these parts of yourself.
This article is for general informational purposes only and does not constitute professional psychological or medical advice. Ego work can be a valuable tool for self-awareness, but if you experience significant emotional distress, anxiety, or depression, please consult a qualified therapist or counselor for personalized support.
Blog
10 Posture Exercises to Fix Rounded Shoulders
Discover 10 effective posture exercises to correct rounded shoulders. Strengthen your back and stretch your chest for better alignment and reduced discomfort.
If you spend hours at a desk or scrolling on your phone, you might notice your shoulders creeping forward and your upper back rounding. This common issue, often called rounded shoulders, can lead to discomfort and even pain over time. The good news is that with the right mix of strengthening and stretching exercises, you can improve your posture and feel better in your body.
In this article, I’ll walk you through 10 effective exercises that target the muscles responsible for pulling your shoulders back and down, while loosening the tight chest muscles that pull them forward. You’ll also get a simple weekly plan to help you stay consistent and see real progress.
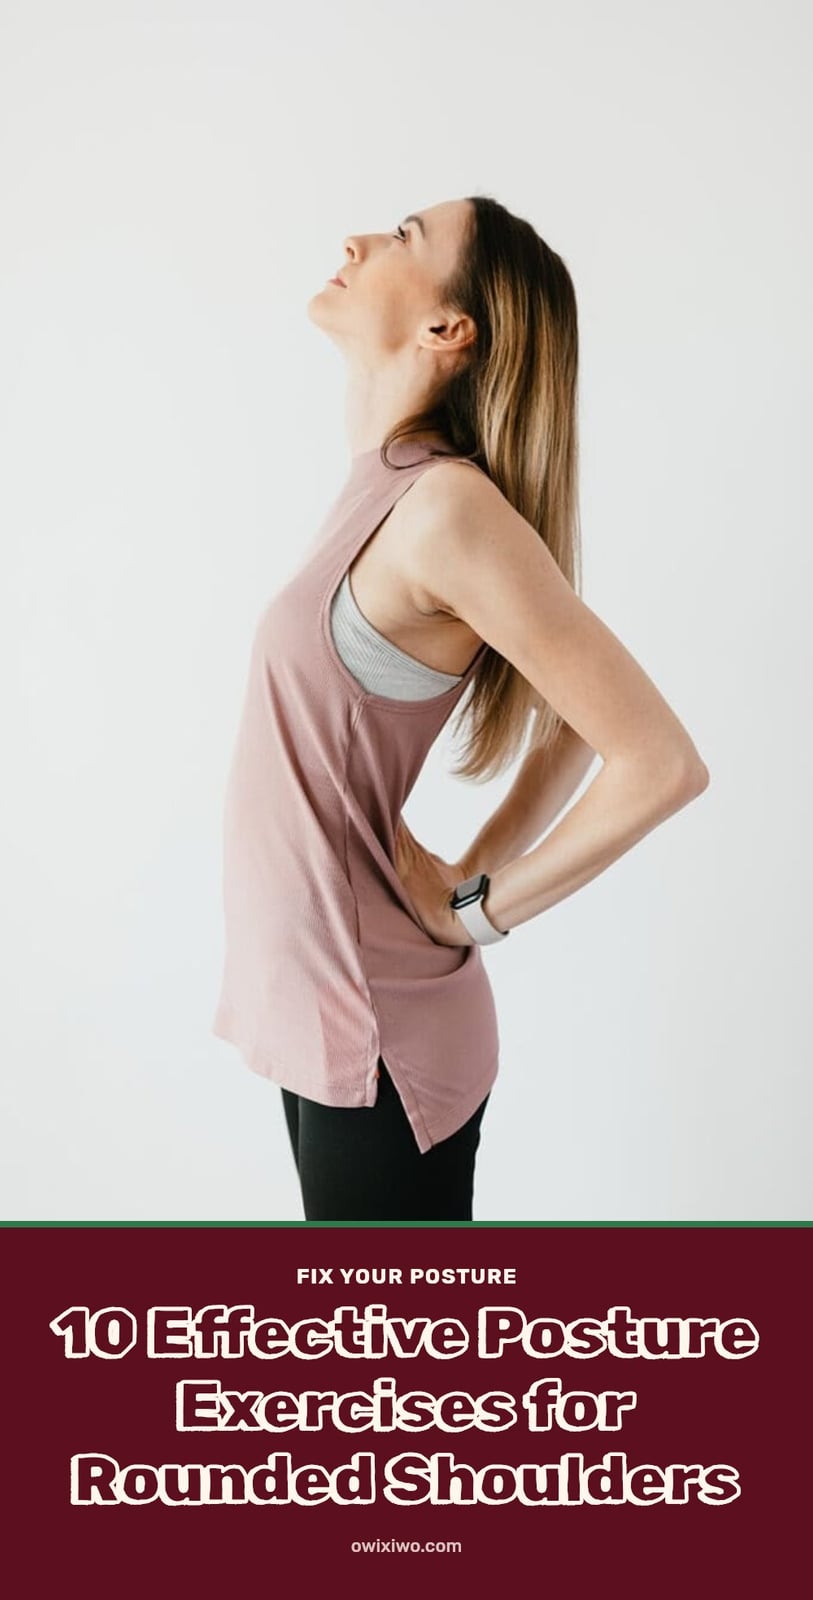
Courtesy of: idahopainrelief.com
Key Takeaways
- Strengthen upper back muscles like rhomboids and trapezius to pull shoulders back.
- Stretch tight chest muscles, including pectorals, to relieve forward pull.
- Perform exercises slowly with control and steady breathing for best results.
- Aim for 3-5 sessions weekly, with at least one rest day between.
- Expect noticeable improvements in 4-8 weeks with consistent practice.
Improve Your Posture and Fix Rounded Shoulders
Rounded shoulders, often from prolonged sitting, can be improved with a combination of targeted strengthening and stretching exercises. Focus on strengthening your upper back muscles like rhomboids and trapezius, while stretching tight chest muscles such as the pectorals. Consistency is key, and incorporating these movements daily can lead to significant improvements in posture over several weeks.
1. Chest Stretch in a Doorway
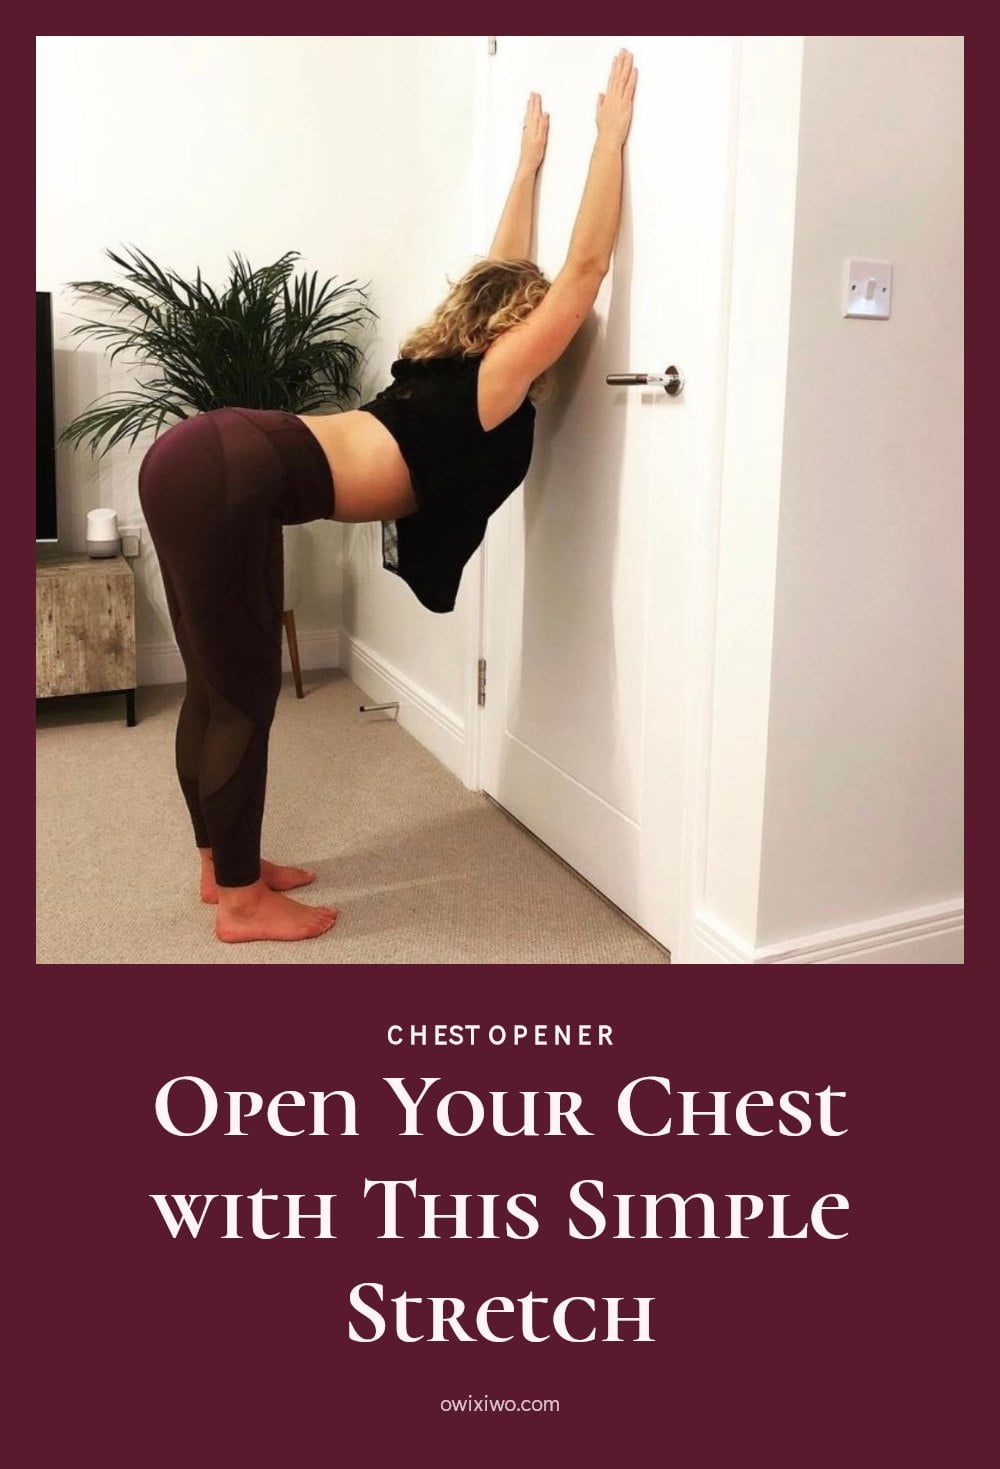
Photo credit: setforset.com
Stand in a doorway with your forearms on the frame, elbows at shoulder height. Gently lean forward until you feel a stretch across your chest. Keep your core engaged and avoid arching your lower back.
- Time: Hold for 30 seconds, 2-3 repetitions.
- Form cue: Keep your core engaged and avoid arching your lower back.
- Make it easier or harder: Place your hands higher on the frame for a deeper stretch, or lower for a gentler one.
2. Scapular Squeezes
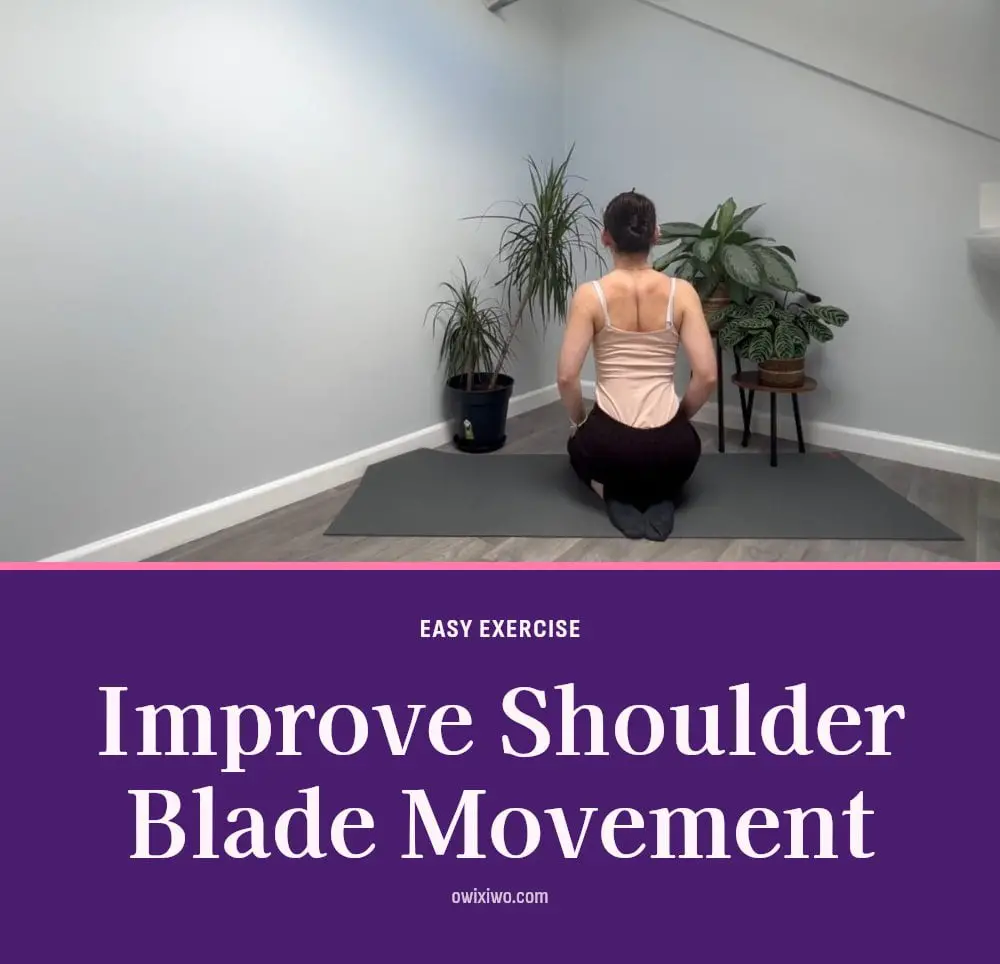
Image credit: spinavita.co.uk
Sit or stand tall with your shoulders relaxed. Gently squeeze your shoulder blades together as if trying to hold a pencil between them. Hold for 5 seconds, then release slowly.
- Sets and reps: 10-15 repetitions, 2-3 sets.
- Form cue: Focus on moving only your shoulder blades, not shrugging your shoulders up.
- Make it easier or harder: Perform with arms at your sides for easier, or with arms extended forward for more challenge.
3. Wall Angels
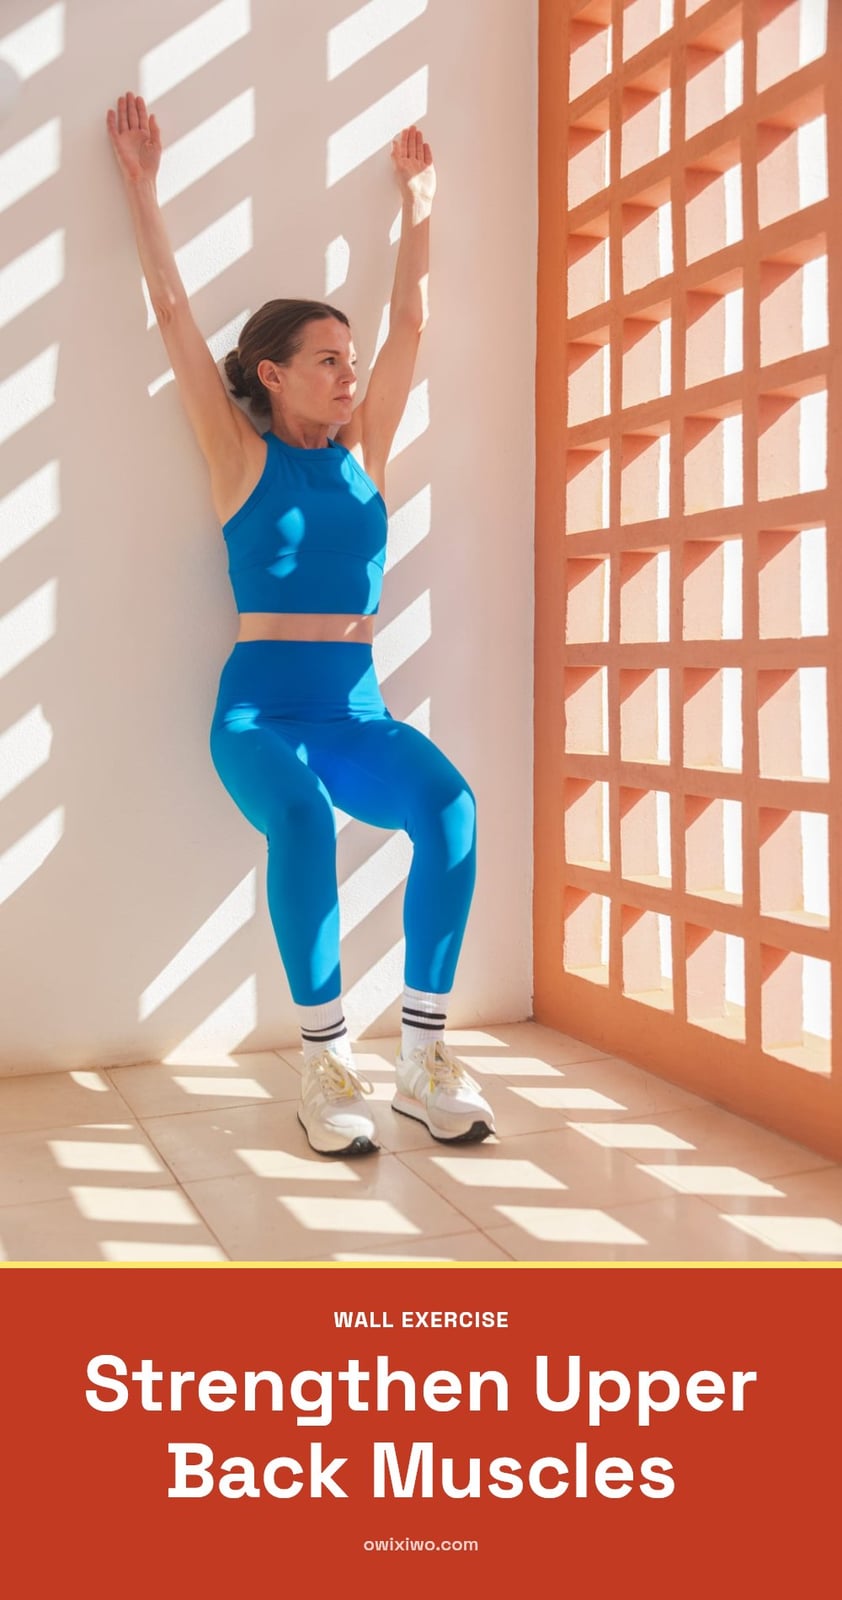
Source: womenshealthmag.com
Stand with your back, head, and hips against a wall, feet shoulder-width apart. Press your lower back gently into the wall without arching. Raise your arms to a goalpost position (elbows bent 90 degrees, upper arms parallel to the floor), keeping them against the wall. Slowly slide your arms up the wall, then back down, maintaining contact throughout.
- Sets and reps: 8-12 repetitions, 2 sets.
- Form cue: If your arms lift off the wall, don’t go as high. Focus on keeping contact.
- Make it easier or harder: Reduce the range of motion for easier, or use a resistance band around your wrists for more challenge.
4. Band Pull-Aparts
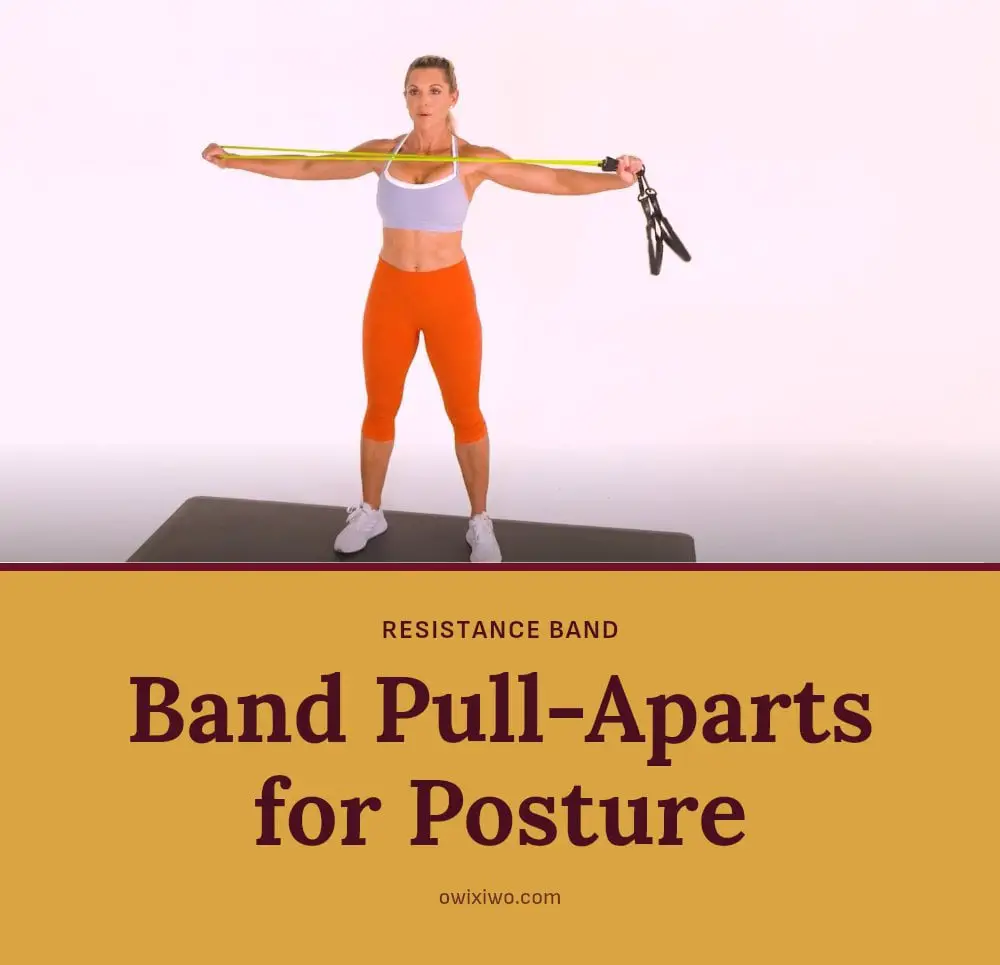
Via oxygenmag.com
Hold a resistance band in both hands, palms down, arms extended straight in front of you at shoulder height. Keeping your arms straight, pull the band apart horizontally until it touches your chest, squeezing your shoulder blades together. Slowly return to the start with control.
- Sets and reps: 10-15 repetitions, 2-3 sets.
- Form cue: Control the movement; don’t let the band snap back. Keep your shoulders down, away from your ears.
- Make it easier or harder: Use a lighter band for less resistance or a heavier band for more challenge.
5. Cobra Pose (Modified)

Courtesy of: autumnschrock.com
Lie face down on a yoga mat with your hands under your shoulders, elbows tucked close to your body. Press your hips into the mat and gently lift your chest off the floor, keeping your gaze down. Engage your back muscles, not just your arms, and hold the position.
- Sets and reps: Hold for 15-20 seconds, 2-3 repetitions.
- Form cue: Keep your neck long and avoid shrugging your shoulders toward your ears. Only lift as high as comfortable.
- Make it easier or harder: For a gentler version, keep your forearms on the floor. To increase intensity, hold the top position for 2-3 extra seconds per repetition.
6. Reverse Fly with Resistance Band
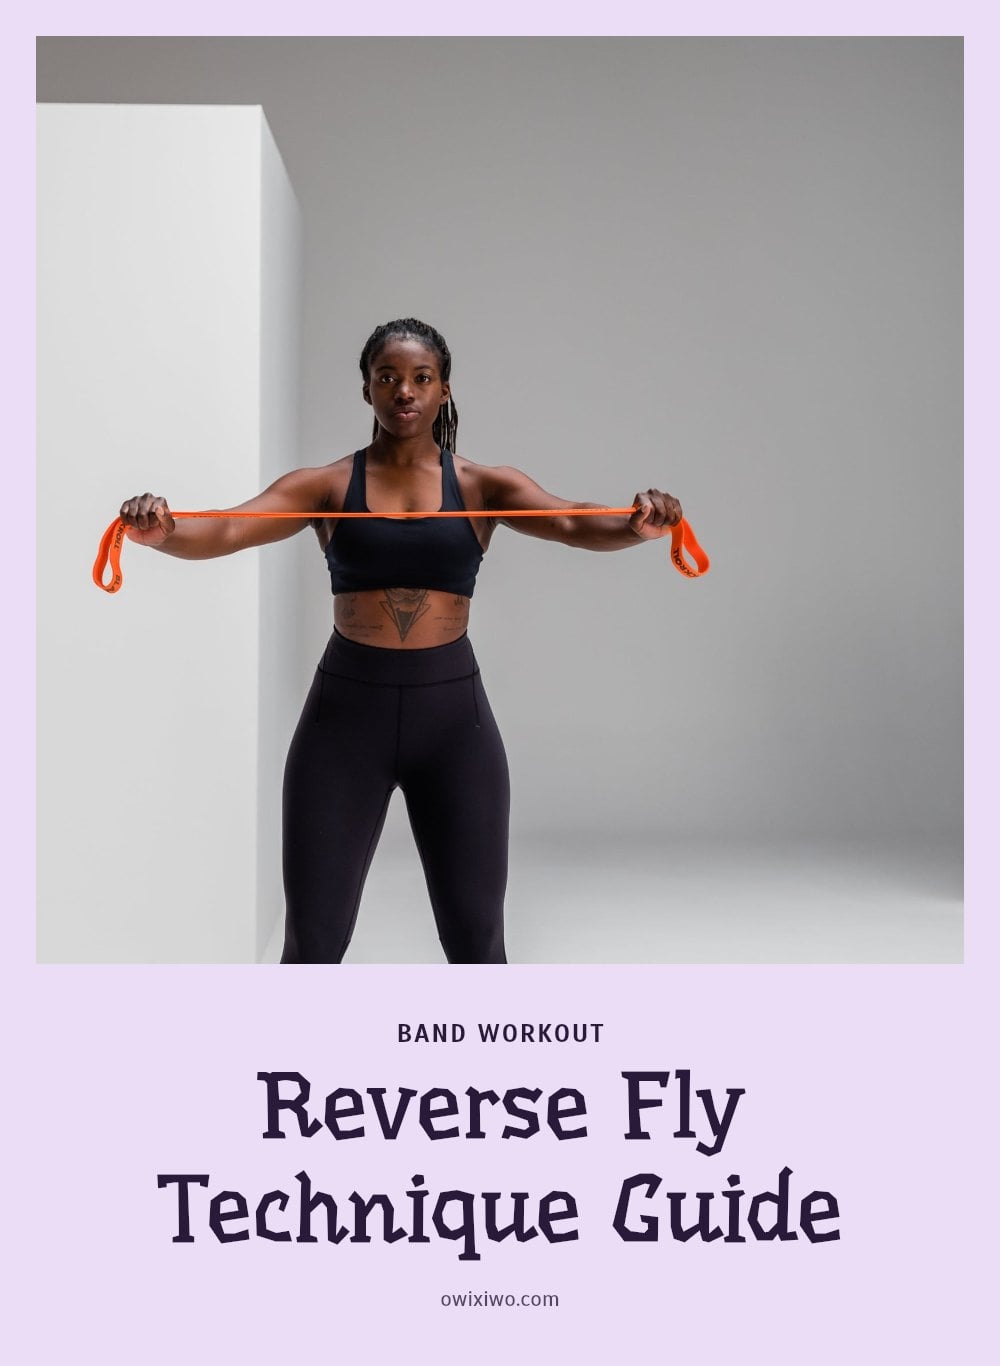
Photo credit: blackroll.com
Anchor a resistance band to a sturdy object at chest height or loop it around your feet if seated. Hold the ends with arms extended forward, palms facing each other, and a slight bend in your elbows. Pull the band out and back, squeezing your shoulder blades together as if opening your arms wide, then slowly return.
- Sets and reps: 10-15 repetitions, 2-3 sets.
- Form cue: Keep your core tight and avoid shrugging your shoulders. Focus on the squeeze in your upper back.
- Make it easier or harder: Use a lighter band for less resistance or move your hands closer to the anchor point for more tension.
7. Thoracic Extension Over Foam Roller (Optional)

Image credit: pneux.io
Lie on your back with a foam roller placed perpendicular to your spine, just below your shoulder blades. Support your head with your hands, elbows pointing forward, and gently extend your upper back over the roller, letting your head drop toward the floor. Roll slowly in small, controlled movements along your upper back only, keeping the motion between your shoulder blades and mid-back.
- Time: 30-60 seconds of controlled rolling.
- Form cue: Keep your core engaged to protect your lower back. Stop the roll before you reach your lower back or neck, stay within the upper back region.
- Make it easier or harder: For a gentler version, use a rolled-up towel instead of a foam roller. To increase the stretch, extend your arms overhead while rolling.
8. Cat-Cow Stretch
Start on all fours with your hands directly under your shoulders and your knees under your hips. On an inhale, drop your belly toward the mat, lift your tailbone and chest, and look slightly up into Cow pose. On an exhale, round your spine toward the ceiling, tuck your chin toward your chest, and draw your navel in for Cat pose.
- Sets and reps: 10-15 slow, fluid repetitions, moving with your breath.
- Form cue: Coordinate your breath with your movement so each inhale and exhale guides the shape.
- Make it easier or harder: Place a folded towel under your knees for comfort; to deepen, pause at the top of Cat or Cow for an extra breath.
9. Child’s Pose
From all fours, sit your hips back toward your heels and extend your arms forward on the mat, resting your forehead on the floor. Breathe deeply, letting your back and shoulders relax completely. Hold this position as a gentle cool-down or anytime you need to release tension.
- Time: 30-60 seconds, breathing deeply the entire hold.
- Form cue: Allow your body to sink into the pose; avoid forcing the stretch.
- Make it easier or harder: Widen your knees for more space, or place a pillow under your forehead if your neck is uncomfortable.
10. Standing Chest Opener
Stand tall with your feet hip-width apart. Interlace your fingers behind your back, straighten your arms, and gently lift them away from your body while squeezing your shoulder blades together. You should feel a stretch across your chest and the front of your shoulders.
- Sets and reps: Hold for 20-30 seconds, 2-3 repetitions.
- Form cue: Keep your core engaged and avoid arching your lower back excessively as you lift your arms.
- Make it easier or harder: If lifting both arms is too intense, hold a towel or strap in your hands to keep them connected without a full grip.
Tools and Materials for Your Posture Workout
You don’t need a gym for these posture exercises. A yoga mat adds cushioning for floor moves, and a light to medium resistance band helps strengthen your upper back. Find a clear wall space for Wall Angels and a doorway for chest stretches. That’s all you need to get started.
- Yoga mat for cushioning and stability on floor exercises.
- Resistance band (light to medium) to add intensity to strengthening movements.
- Clear wall space for exercises like Wall Angels.
- Doorway for chest stretches.
Your Weekly Posture Exercise Plan
Your weekly plan mixes strengthening and stretching to target both weak upper back muscles and tight chest muscles. Aim for 3-5 days per week, with at least one rest day between sessions. Here is a sample schedule to follow.
| Day | Focus | Exercises (choose 2-3 per day) |
|---|---|---|
| Monday | Strength | Scapular squeeze, Band pull-apart, Reverse fly |
| Tuesday | Stretch | Doorway chest stretch, Cat-Cow, Child’s pose |
| Wednesday | Rest or light walk | |
| Thursday | Strength + Stretch | Wall angels, Thoracic extension, Standing chest opener |
| Friday | Rest or light activity | |
| Weekend | Strength + Stretch | Choose 1 strength and 1 stretch from the week |
Listen to your body and adjust reps or sets if you feel fatigue. Consistent, gentle practice matters more than intense sessions a few times a month.
Frequently Asked Questions
How long does it take to improve posture with exercises?
With consistent practice 3-5 times a week, many people notice improvements in posture within 4-8 weeks. More significant changes may take several months. The key is consistency and combining strengthening with stretching, plus being mindful of your posture during daily activities.
Can poor posture cause neck and back pain?
Yes, poor posture can contribute to neck pain, back pain, and even headaches. When your shoulders round forward, it puts extra strain on the muscles and joints in your neck and upper back. Improving your posture through exercises and better daily habits may help alleviate this discomfort.
Do I need any equipment for posture exercises?
You don’t need a gym. A yoga mat adds cushioning for floor exercises, and a light to medium resistance band helps strengthen your upper back. You’ll also need a clear wall space for wall angels and a doorway for chest stretches. That’s all you need to get started.
Is it possible to completely fix rounded shoulders?
Many people see significant improvement with consistent exercise and better posture habits, but ‘completely fixing’ rounded shoulders can vary by individual. Factors like the severity of the curvature and how long you’ve had it play a role. Regular practice can greatly reduce the forward rounding and associated discomfort.
What are the most common causes of rounded shoulders?
Rounded shoulders often result from prolonged sitting, computer use, and looking down at phones. These activities shorten the chest muscles and weaken the upper back muscles, pulling the shoulders forward. Over time, this becomes a habitual posture that feels ‘normal’ even when it’s not.
Final Thoughts
To fix rounded shoulders, commit to a routine that combines strengthening and stretching, and do it 3-5 times a week. Start with a few exercises, focus on proper form, and gradually increase intensity. Remember to take breaks from sitting and stay mindful of your posture throughout the day.
With consistency, you can expect to see noticeable improvements within 4-8 weeks, and more significant changes over several months. Be patient with yourself, and if you have any concerns or chronic pain, consult a professional before starting.
This article is for general informational purposes only and is not a substitute for professional medical advice. Always consult a doctor or physical therapist before starting a new exercise program, especially if you have pre-existing conditions or chronic pain. If you experience sharp pain, numbness, or tingling during any exercise, stop immediately and seek professional guidance.
-

 Makeup Trends2 years ago
29 Harley Quinn Makeup Ideas: Iconic Looks for Every Occasion
-

 Hairstyle2 years ago
Round Face Haircuts Ideas 2025: 29 Flattering Styles to Try
-

 Hairstyle2 years ago
25 90s Layered Hair Ideas to Inspire Your 2025 Look
-

 Fashion2 years ago
27 Every Day Spring Outfits Inspiration for 2025
-

 Hairstyle2 years ago
29 Long Layered Haircuts Ideas for 2025
-

 Hairstyle2 years ago
64 Fall Hair Color Trends to Elevate Your Style in 2024
-

 Hairstyle2 years ago
Choppy Bob Haircuts 2025: 29 Stylish Ideas
-

 Hairstyle2 years ago
27 Medium Length Haircut with Layers Ideas for 2025