
Blog
A to K Vitamin Cheat Sheet: Best Food Sources of Every Vitamin
Unlock the power of vitamins! Learn what vitamins are, why they’re essential, and discover the best food sources for each, from A to K.

You already know vitamins are important, but keeping track of which ones do what and where to find them can feel like a full-time job. That’s exactly why I put together this cheat sheet: it covers the essential vitamins from A to K, their best food sources, and a few simple tips to help you get more from your meals. Whether you’re trying to boost your energy, support your immune system, or just eat a little smarter, this guide has you covered.

Courtesy of: nytimes.com
Key Takeaways
- Eat a wide variety of fruits, vegetables, whole grains, and lean proteins daily for a full spectrum of vitamins.
- Fat-soluble vitamins (A, D, E, K) can build up in your body, so avoid excessive supplements.
- Water-soluble vitamins (C and B-complex) need regular replenishment since your body doesn’t store them.
- Choose fresh or minimally processed foods and avoid overcooking veggies to preserve heat-sensitive nutrients.
- Consult a healthcare professional before starting high-dose supplements, especially if you take prescription medications.
What Are Vitamins and Why Do We Need Them?
Vitamins are organic compounds your body needs in small amounts to function properly. They support growth, digestion, nerve function, and more. The catch: your body can’t produce most of them, so you have to get them from food. My tip: focus on a balanced diet packed with fruits, vegetables, whole grains, and lean proteins. That’s the most reliable way to cover your vitamin needs without guessing.
1. Vitamin A (Retinol)

Photo credit: themediterraneandish.com
Vitamin A is a powerhouse for your vision, immune system, and skin health. It helps your eyes adjust to light changes and keeps skin cells regenerating. Load up on carrots, sweet potatoes, spinach, and liver. Tip: pair these with a little healthy fat, like olive oil on roasted carrots, since vitamin A is fat-soluble and absorbs better that way.
2. Vitamin B1 (Thiamine)
Vitamin B1, or thiamine, is your body’s fuel converter. It helps turn carbohydrates from food into usable energy. Without enough, you might feel sluggish after meals. Good sources include whole grains, pork, and nuts. Pro move: choose whole-grain bread or brown rice over refined versions to keep thiamine levels steady.
3. Vitamin B2 (Riboflavin)
Vitamin B2, also called riboflavin, supports energy production and cellular growth, meaning it helps your body repair tissues and keep cells healthy. You’ll find it in milk, eggs, leafy greens, and fortified cereals. Caution: riboflavin is sensitive to light, so store milk and eggs in opaque containers to preserve their content.
4. Vitamin B3 (Niacin)
Vitamin B3, or niacin, keeps your energy metabolism, digestion, and nerve function running smoothly. It helps your body convert food into energy and supports the nervous system’s communication pathways. Reach for chicken, fish, peanuts, or mushrooms to get a solid dose.
5. Vitamin B5 (Pantothenic Acid)
Vitamin B5, also called pantothenic acid, is your body’s helper for energy production and hormone synthesis. It breaks down fats and carbohydrates into usable energy and supports the adrenal glands in producing stress-related hormones.
Good sources:
- Avocados and broccoli pack a solid dose.
- Whole grains and meat (especially chicken and beef) provide it too.
My tip: Steam your broccoli instead of boiling it to keep more B5 intact, since water-soluble vitamins can leach into cooking water.
6. Vitamin B6 (Pyridoxine)

Image credit: cleanfoodcrush.com
Vitamin B6, or pyridoxine, is essential for brain development, immune function, and metabolism. It helps your body produce neurotransmitters that regulate mood and supports immune cell activity. Poultry, fish, potatoes, and bananas are easy ways to add it to your meals.
7. Vitamin B7 (Biotin)
Vitamin B7, commonly called biotin, is the nutrient most people think of for healthy hair, skin, and nails. It helps your body metabolize fats, carbohydrates, and amino acids, fueling your cells from the inside out. Eggs are one of the best natural sources, but you also get biotin from nuts and sweet potatoes. Tip: rotate these foods through your week rather than leaning on a single one, since each brings different nutrients alongside the biotin.
8. Vitamin B9 (Folate/Folic Acid)
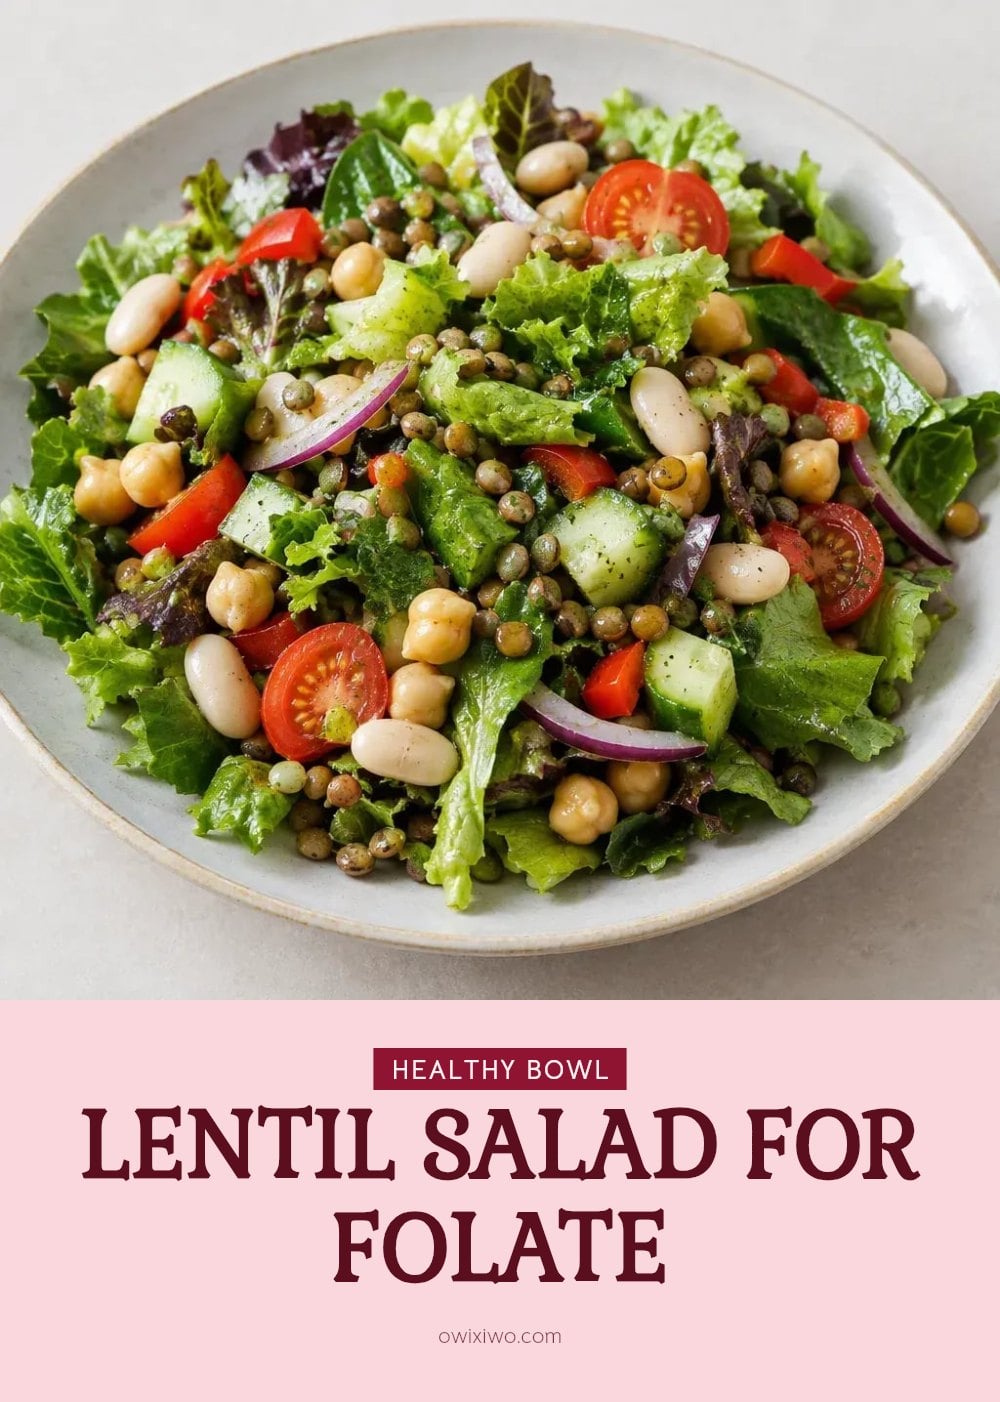
Source: eatbetter.app
This B vitamin is crucial for cell growth and DNA formation, making it especially important during pregnancy. It supports the rapid cell division that happens as a baby develops. Leafy greens like spinach, legumes, and fortified grains are excellent sources.
- My tip: Aim for a daily serving of leafy greens or legumes to maintain steady folate levels.
9. Vitamin B12 (Cobalamin)
Vitamin B12 is vital for nerve function, red blood cell formation, and DNA synthesis. Your nerves need it to send signals, and your bone marrow uses it to produce red blood cells. It’s primarily found in animal products like meat, fish, eggs, and dairy.
Caution: If you follow a plant-based diet, consider checking your B12 intake with a healthcare professional, as the body doesn’t store large amounts.
10. Vitamin C (Ascorbic Acid)

Vitamin C is a powerful antioxidant that supports immune health, collagen production, and skin repair. Collagen keeps your skin firm and helps wounds heal. Load up on citrus fruits, bell peppers, and strawberries to get your daily dose.
- Good to know: Heat can destroy vitamin C, so eat these foods raw or use cooking methods like steaming or light sauteing to preserve the nutrient content.
11. Vitamin D

Courtesy of: livingwellwithdrmichelle.com
Vitamin D is crucial for bone health, calcium absorption, and immune function. Your body produces it when your skin is exposed to sunlight, which is the primary source. Fatty fish like salmon and fortified dairy products also provide it.
Tip: During shorter days, many people find it helpful to include a serving of fatty fish in their weekly meals.
12. Vitamin E
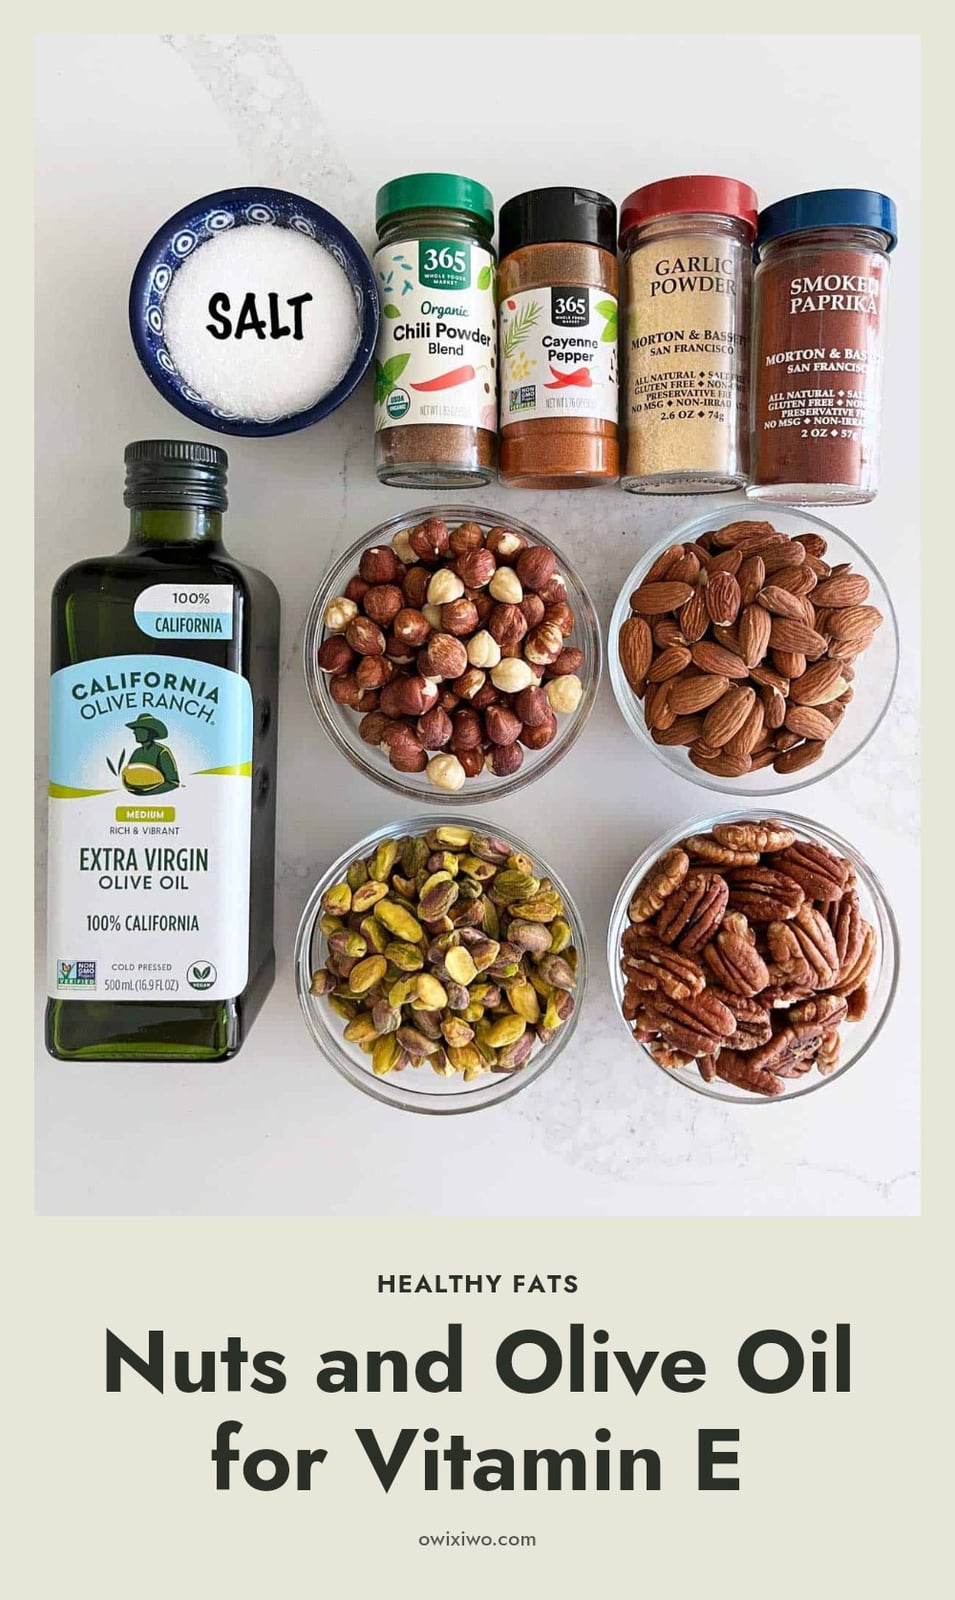
Photo credit: healthyrecipesblogs.com
Vitamin E acts as a potent antioxidant, protecting your cells from damage caused by free radicals. This protection is especially important for your skin, eyes, and immune system. You can find it in nuts like almonds and sunflower seeds, seeds such as pumpkin seeds, and vegetable oils like wheat germ oil.
Tip: Add a handful of almonds or sunflower seeds to your morning oatmeal or salad. Since vitamin E is fat-soluble, pairing it with a little healthy fat from the nuts themselves helps your body absorb it efficiently.
When to Talk to a Professional About Your Vitamin Intake
If you notice persistent fatigue, unexplained bruising, vision changes, or nerve issues, these could signal a vitamin deficiency. Do not self-diagnose; a healthcare professional can run blood tests to identify the real cause. Always consult your doctor or a registered dietitian before starting high-dose supplements, especially if you are pregnant, breastfeeding, or on prescription medications. Fat-soluble vitamins (A, D, E, K) build up in your body and can become toxic at high levels. Stick to recommended daily allowances and get professional guidance to stay safe.
Frequently Asked Questions
What’s the difference between fat-soluble and water-soluble vitamins?
Fat-soluble vitamins (A, D, E, K) dissolve in fat and are stored in your body’s fatty tissues and liver, so they can build up over time. Water-soluble vitamins (C and the B-complex) dissolve in water and are not stored, which means you need to get them from food more regularly because any extra is excreted in urine.
Can cooking destroy vitamins in food?
Yes, especially water-soluble vitamins like vitamin C and some B vitamins. Prolonged boiling or high heat can cause them to leach out or break down. To preserve nutrients, try steaming, roasting, or microwaving vegetables instead of boiling them, and keep cooking times short.
Are fortified foods a good source of vitamins?
Fortified foods, like milk with added vitamin D or cereals with B vitamins, can help fill gaps in your diet, especially for nutrients that are harder to get from food alone. However, they shouldn’t replace whole food sources, which provide a wider range of nutrients and fiber. Think of fortified foods as a helpful backup, not your main strategy.
How can I tell if I have a vitamin deficiency?
Common signs include persistent fatigue, unexplained bruising, vision changes, or nerve issues, but these can also be caused by other health problems. The only reliable way to know is to have a blood test done by a healthcare professional. Never self-diagnose or start high-dose supplements without medical advice, especially since excess fat-soluble vitamins can be toxic.
Final Thoughts
My best advice is to think of your plate as your vitamin palette. The more colorful and varied it is, the better your chances of getting everything you need. Aim for at least five servings of fruits and vegetables each day, and don’t forget to include whole grains and lean proteins at most meals. With consistent, balanced eating, you can expect to notice improvements in your energy and overall well-being over the course of a few weeks to a couple of months. Stick with it, and your body will thank you.
This article is for general informational purposes only and does not constitute medical or professional advice. Vitamin needs vary based on age, health status, and lifestyle. If you have concerns about a possible deficiency or are considering supplements, please consult a doctor or registered dietitian for personalized guidance.
Blog
How to Remove Urine Smell from Your Bathroom and Mattress
Tackle stubborn urine smells in your bathroom and mattress with our expert guide. Learn effective methods using enzymatic cleaners to eliminate odors for good.
That faint, sour smell in the bathroom or on the mattress is not just dirt. It comes from uric acid crystals that cling to fibers and grout, and plain soap and water will not dissolve them. The fix is to break those crystals down, and that changes which products you reach for.
This article walks you through the right cleaners, how to treat different surfaces, the mistakes that make the smell worse, and when to bring in a professional.

Image credit: rightpricecarpetcleaning.com.au
Key Takeaways
- Use enzymatic cleaners labeled for pet or human urine to break down uric acid crystals.
- Avoid bleach and heat, which can set the stain and odor permanently.
- Blot fresh urine, don’t rub, and saturate the area thoroughly with cleaner.
- Let enzymatic cleaners air dry completely, which can take 24 to 48 hours.
- For severe or old stains, multiple applications may be needed.
The Key to Eliminating Stubborn Urine Odors
That lingering smell is not dirt. It is uric acid crystals, and they resist plain water and soap. Regular all-purpose sprays may wipe the surface but leave the crystals behind, so the odor returns as soon as the area warms up. Enzymatic cleaners work differently: beneficial bacteria produce enzymes that break the crystals down into odorless compounds. The catch is that you cannot rush them. Soak the spot thoroughly so the cleaner reaches the urine below the surface, then let it air dry completely. Quick action on fresh accidents and full saturation are what separate a real fix from a temporary cover-up.
Why Urine Smell Lingers (It’s Not Just About Dirt)
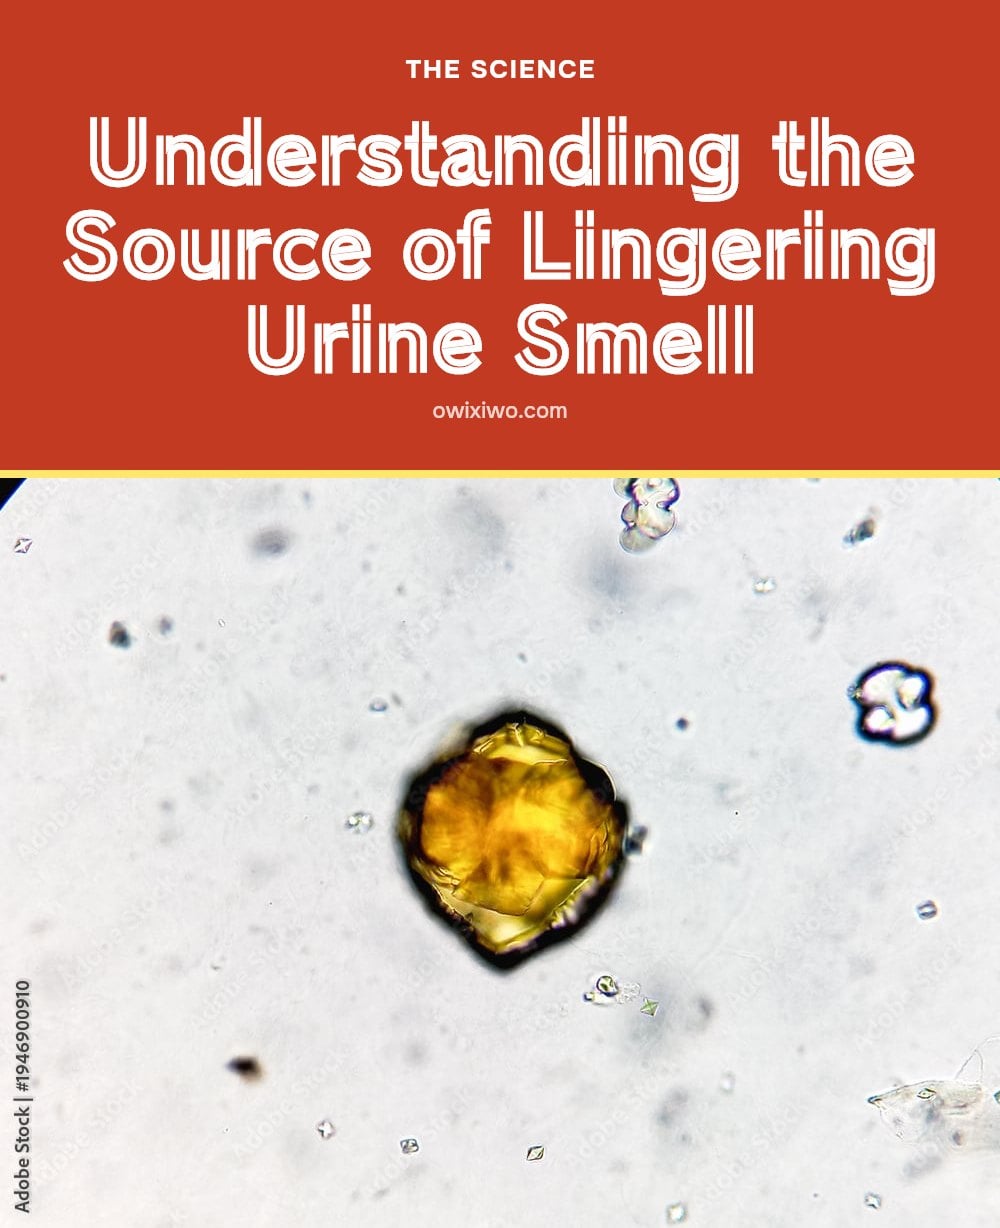
Courtesy of: abposters.com
Urine is not just water with a smell. It contains urea, creatinine and uric acid, and once it dries, the uric acid forms crystals that bind to fibers and grout. Those crystals do not dissolve in water, which is why scrubbing with soap and water rarely finishes the job.
Most household sprays either perfume the area or lift what sits on top. Neither touches the crystals, so the smell comes back on humid days or when a pet revisits the spot.
What makes it worse
- Heat: hot water, steam cleaners and dryers can bond odor molecules to the surface, making the smell much harder to remove.
- Time: the longer urine sits in padding or grout, the deeper it settles.
- Masking: air fresheners and scented sprays add fragrance on top of the source instead of removing it.
That is why the fix has to break the crystals down rather than wash over them.
Your Essential Arsenal for Urine Odor Removal
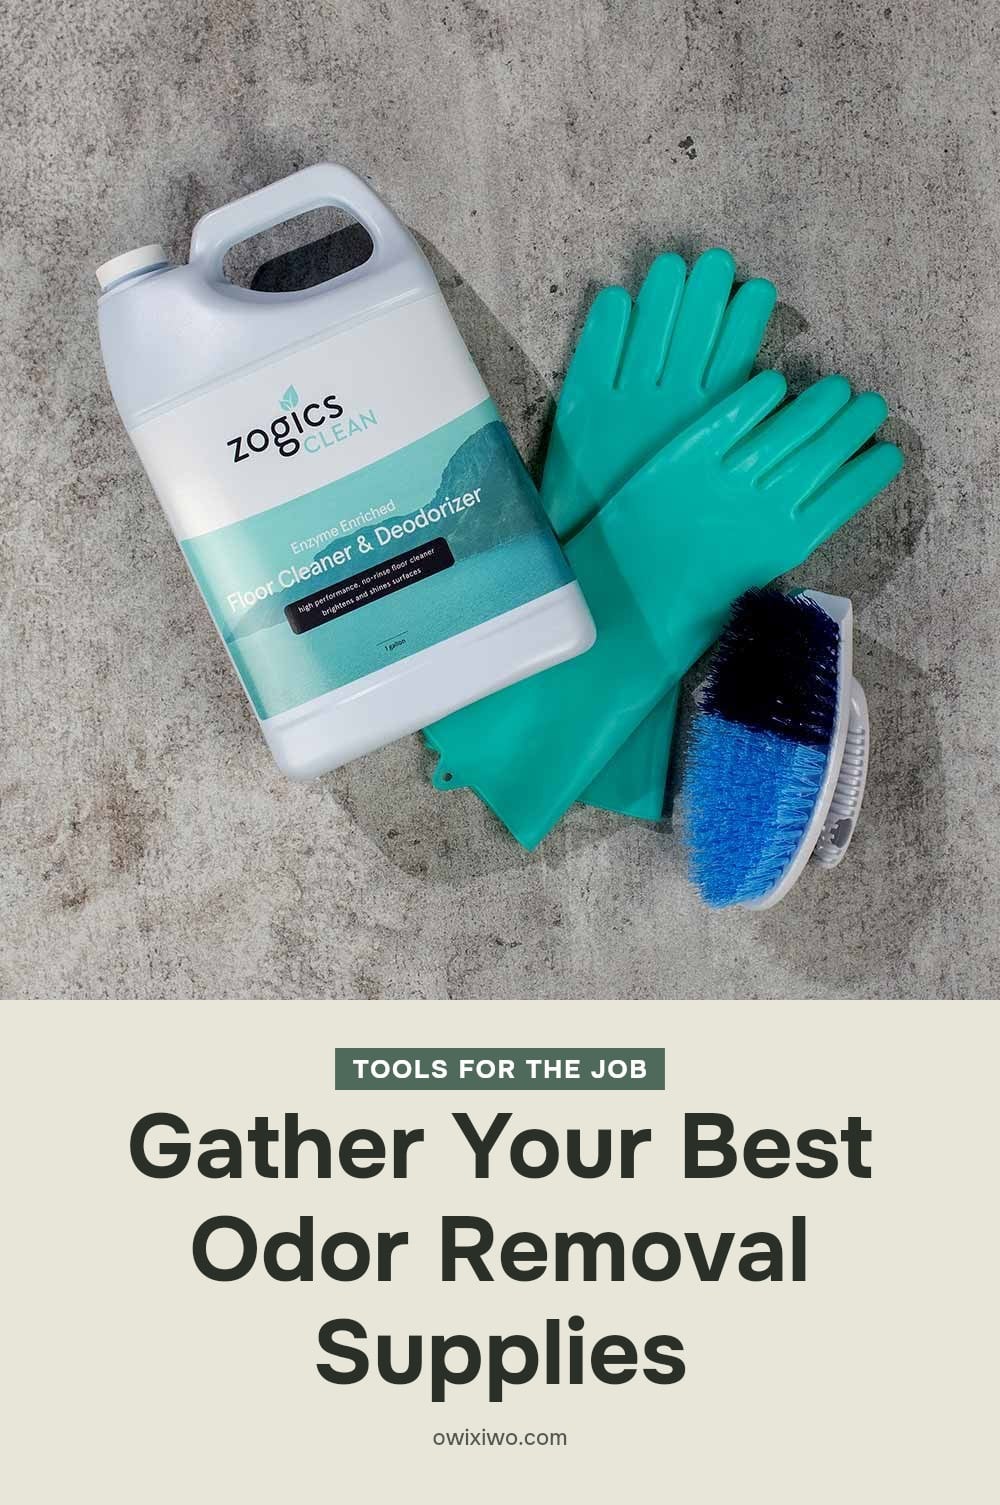
Photo credit: zogics.com
You do not need a cabinet full of products, but the right few make the job faster and safer.
- Enzymatic cleaner: choose one labeled for pet or human urine; this is the product that actually digests the uric acid crystals.
- White vinegar: useful for neutralizing surface odor on hard floors and in the bathroom.
- Baking soda: absorbs moisture and pulls odor out of carpets and mattresses.
- Hydrogen peroxide (3%): helps break down urine components and acts as a mild disinfectant; test it for colorfastness first.
- Rubber gloves: wear them for every step, since urine carries bacteria.
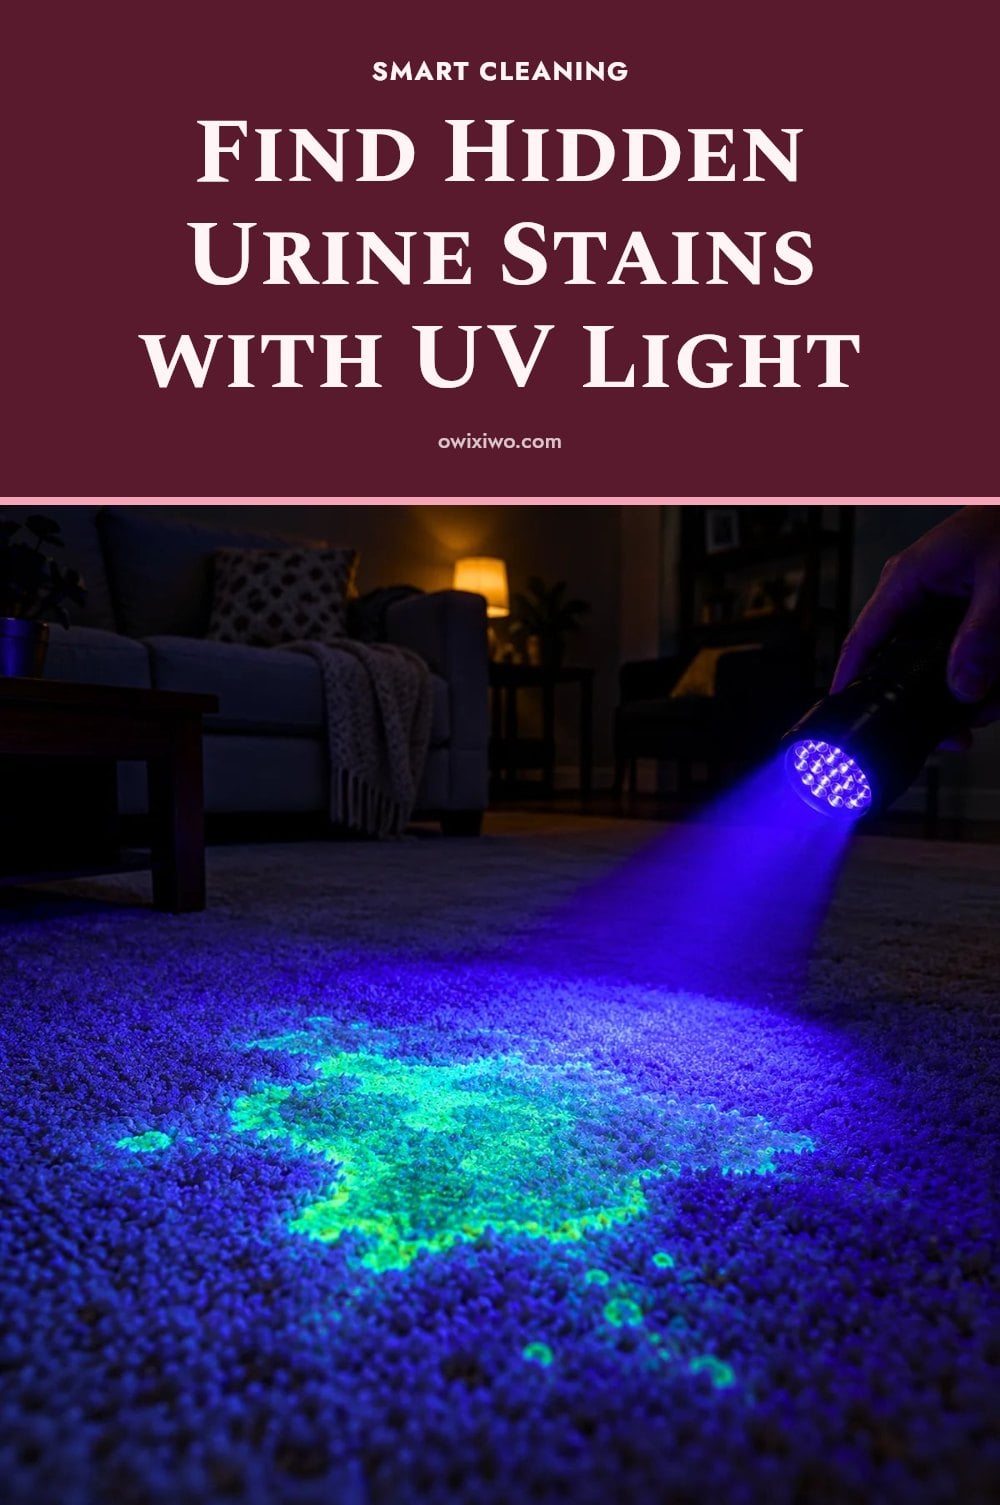
- UV blacklight: reveals dried stains you cannot see or smell yet.
Add clean cloths, paper towels and a spray bottle, and you are set.
Effective Methods to Tackle Urine Smell on Different Surfaces
Start with a patch test on a hidden corner of the fabric or surface. Some cleaners, hydrogen peroxide in particular, can lighten color, and you want to find that out before you treat the visible stain.
Fresh accidents on any surface
- Blot, do not rub: press a clean cloth onto the spot to lift as much liquid as possible; rubbing spreads urine deeper into fibers.
- Saturate: apply enough enzymatic cleaner that the area stays visibly wet, since urine seeps below the surface.
- Let it air dry: the bacteria need the drying time to work, so skip the hairdryer and direct heat.
Mattresses and carpets
After the dwell time, run a wet/dry vacuum or extractor over the area to pull out excess solution, then let it dry fully. Once dry, sprinkle baking soda over the spot, leave it for several hours to draw out moisture and odor, and vacuum it up.
Old or set stains
One pass often is not enough. Repeat the saturation and drying cycle, sometimes over a couple of days, until the smell is gone. Keep windows open and fans running during and after cleaning, both to clear fumes and to speed drying.
My tip: mark the calendar when you treat a spot, so you know how long it has been drying before you judge whether it worked.
Common Mistakes That Make Urine Smell Worse
You might grab bleach thinking it will disinfect, but it often sets the stain and odor instead, especially on porous surfaces. The same goes for heat: steam cleaners or hot water can permanently bond the smell. Not saturating enough is another trap. Urine seeps deep into padding or grout, so a quick spray leaves the source untouched. Rubbing stains: Rubbing spreads the urine and pushes it deeper into fibers. Always blot gently. Masking the smell: Air fresheners only cover the odor temporarily. They do not remove the uric acid crystals. Without breaking those down, the smell returns.
Expert Tips for a Truly Odor-Free Home
Source: peturinesolutions.com
Locate invisible stains: Use a UV blacklight in a darkened room to find dried urine spots you missed. Ventilate thoroughly: Open windows and run fans while cleaning and for several hours after. This helps odors dissipate and speeds drying. Patience is key: Enzymatic cleaners need time to digest the crystals. Do not blot or rinse early; let the area air dry completely, which can take 24 to 48 hours. Consider professional help: If the urine has soaked into subflooring or padding, professional cleaners have equipment to extract deeply and prevent mold.
Keeping Urine Smells Away for Good
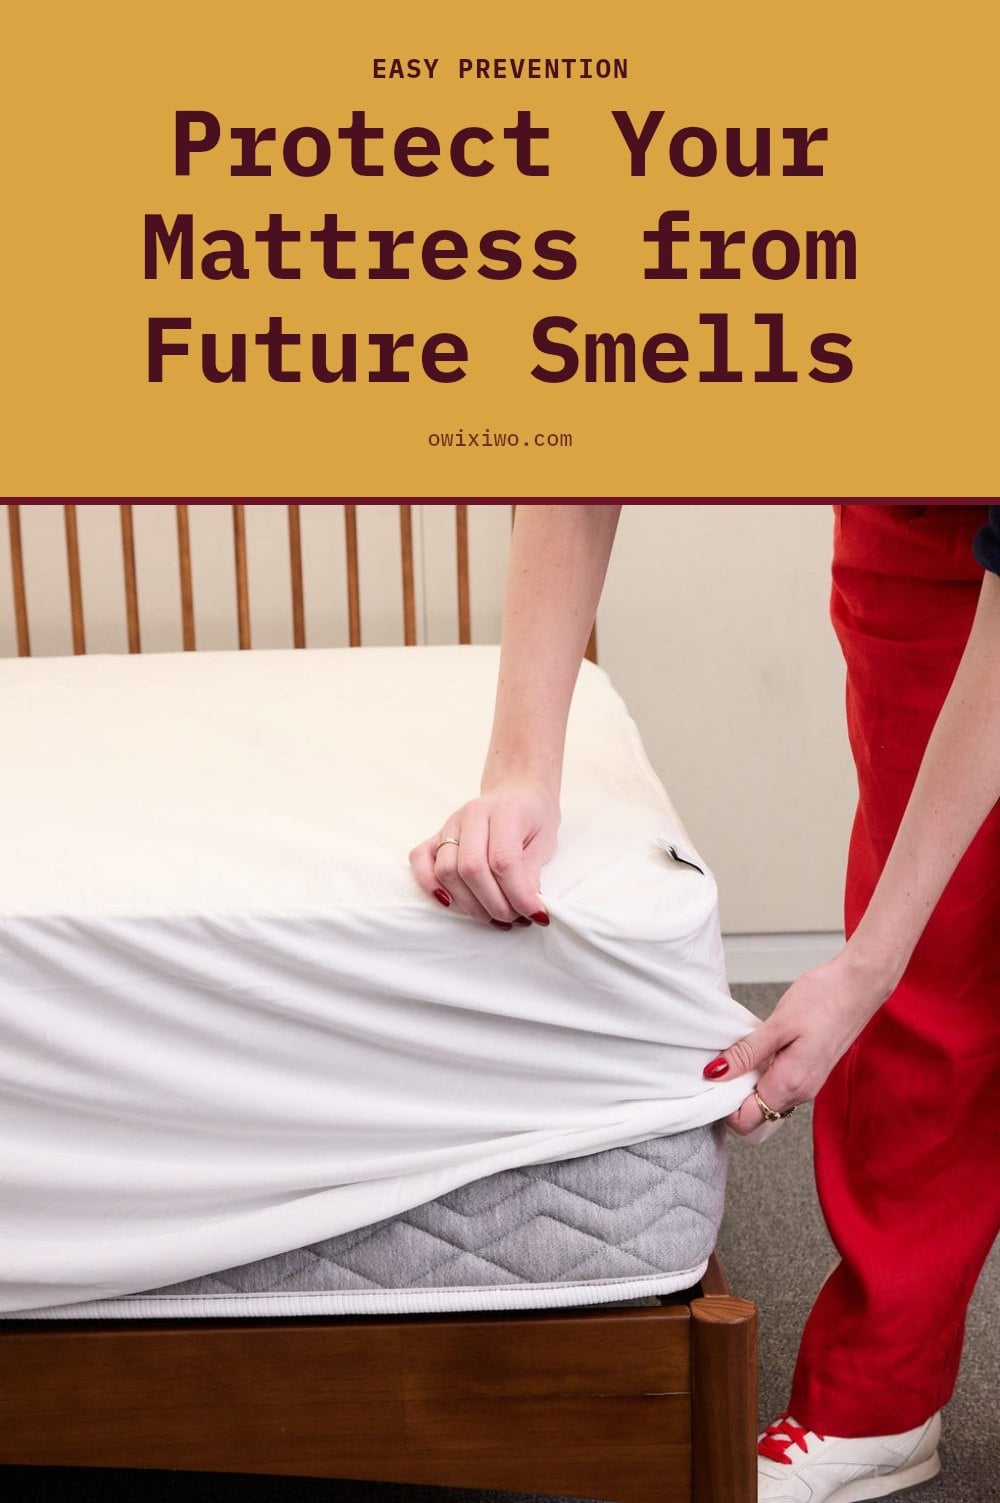
Act immediately: Clean up fresh accidents within minutes to prevent crystals from setting. Train pets: Reinforce potty training and keep litter boxes clean and accessible. Protective covers: Waterproof mattress protectors and furniture covers save your upholstery from soaking through. Regular cleaning: Vacuum carpets and wash bedding weekly in high-traffic areas to catch small accidents early. Check elderly family members: Ensure regular bathroom breaks and consider incontinence aids if needed. A proactive routine prevents odors from ever starting.
When to Call in the Professionals
If urine has soaked into subflooring or wallboards, DIY cleaning cannot reach deep enough, and professional remediation is often necessary. For very large or old stains on carpets and mattresses, professionals can extract all moisture to prevent mold. Call a pro if the odor persists after multiple thorough attempts, or if you suspect it is contributing to health issues like allergies or respiratory irritation. When the source is unknown and keeps returning, expert tools can detect and treat embedded urine.
Frequently Asked Questions
Why does urine smell so bad?
Urine odor comes from uric acid crystals, urea, and other waste products. When urine dries, the uric acid forms crystals that bind to surfaces and release that sharp, ammonia-like smell, especially in warm, humid conditions. Those crystals do not dissolve in water, so the odor can linger until they are broken down.
Can I use bleach to clean urine?
No, you should not use bleach on urine. Bleach can set the stain and odor, especially on porous surfaces, and mixing it with ammonia-based cleaners can create toxic fumes. Stick with enzymatic cleaners or other recommended solutions instead.
How long does it take for an enzymatic cleaner to work?
Enzymatic cleaners need time to digest the uric acid crystals. For best results, saturate the area and let it air dry completely, which can take 24 to 48 hours. For old or severe stains, you may need multiple applications over several hours or days.
Will urine smell ever truly go away?
Yes, with proper cleaning the smell can be eliminated. The key is to break down the uric acid crystals with an enzymatic cleaner and allow enough contact time. For deep stains, multiple applications may be necessary. If the odor persists after several attempts, a professional may need to assess the situation.
What if I can’t find the source of the urine smell?
Use a UV blacklight in a darkened room to locate dried urine stains that are invisible to the naked eye. Check common spots like carpet edges, mattress seams, and grout lines. Once you find the source, treat it with an enzymatic cleaner following the instructions.
Final Thoughts
My tip: keep an enzymatic cleaner on hand and treat fresh accidents within minutes, because the longer urine sits, the deeper it seeps. Expect to apply the cleaner more than once for old stains, and give it 24 to 48 hours to air dry completely before you judge the result. If the odor lingers after a couple of tries, a UV blacklight can help you find missed spots, and a professional may be needed for deep saturation. With patience and the right product, you can get your space smelling clean again.
This information is for general cleaning purposes only and is not a substitute for professional medical or veterinary advice. If urine odor persists and is accompanied by health concerns, consult a doctor. For large or deeply saturated areas, consider hiring a professional cleaner to prevent mold growth.
Blog
3-Day Cleanse: How to Detox Gently (and Mistakes to Avoid)
Learn how to approach a 3-day cleanse safely and effectively. Discover what to eat, what to avoid, and common mistakes to ensure a gentle detox.
A 3-day cleanse is a short reset, not a magic fix. For 72 hours you drop processed foods, added sugar, caffeine, and alcohol and build your meals around whole foods, fruit, vegetables, and plenty of fluids. Your liver and kidneys already handle detoxification around the clock, so the point here is giving them a cleaner slate, not flushing anything out.
This article walks you through what a gentle cleanse actually looks like, from your shopping list and a simple three-day plan to the mistakes that make people miserable and the aftercare that decides whether the reset holds. My tip: read the whole thing before day one so you are not improvising at dinnertime.
Courtesy of: prevention.com
Key Takeaways
- Keep whole foods on the plate three times a day plus snacks instead of running on juice alone.
- Drink water and herbal teas steadily through the day, not in one big glass at night.
- Expect water loss and depleted glycogen, not real fat loss, from three short days.
- Bring back the foods you cut out one at a time, a day or two apart, and note how you feel.
- Talk to a doctor or registered dietitian first if you have an underlying health condition.
What is a 3-Day Cleanse and How Does it Work?
A 3-day cleanse is a short-term dietary reset: you remove processed foods, added sugar, caffeine, and alcohol for 72 hours and lean on whole foods, fruit, vegetables, and plenty of fluids. Your liver and kidneys already handle detoxification around the clock. A cleanse does not flush anything out; it lowers the workload on those organs by cutting the inputs they have to process. Most of the payoff comes from better hydration and a denser nutrient intake, which many people feel as steadier energy and easier digestion.
Your Shopping List for a 3-Day Cleanse

Photo credit: friscofreshmarket.com
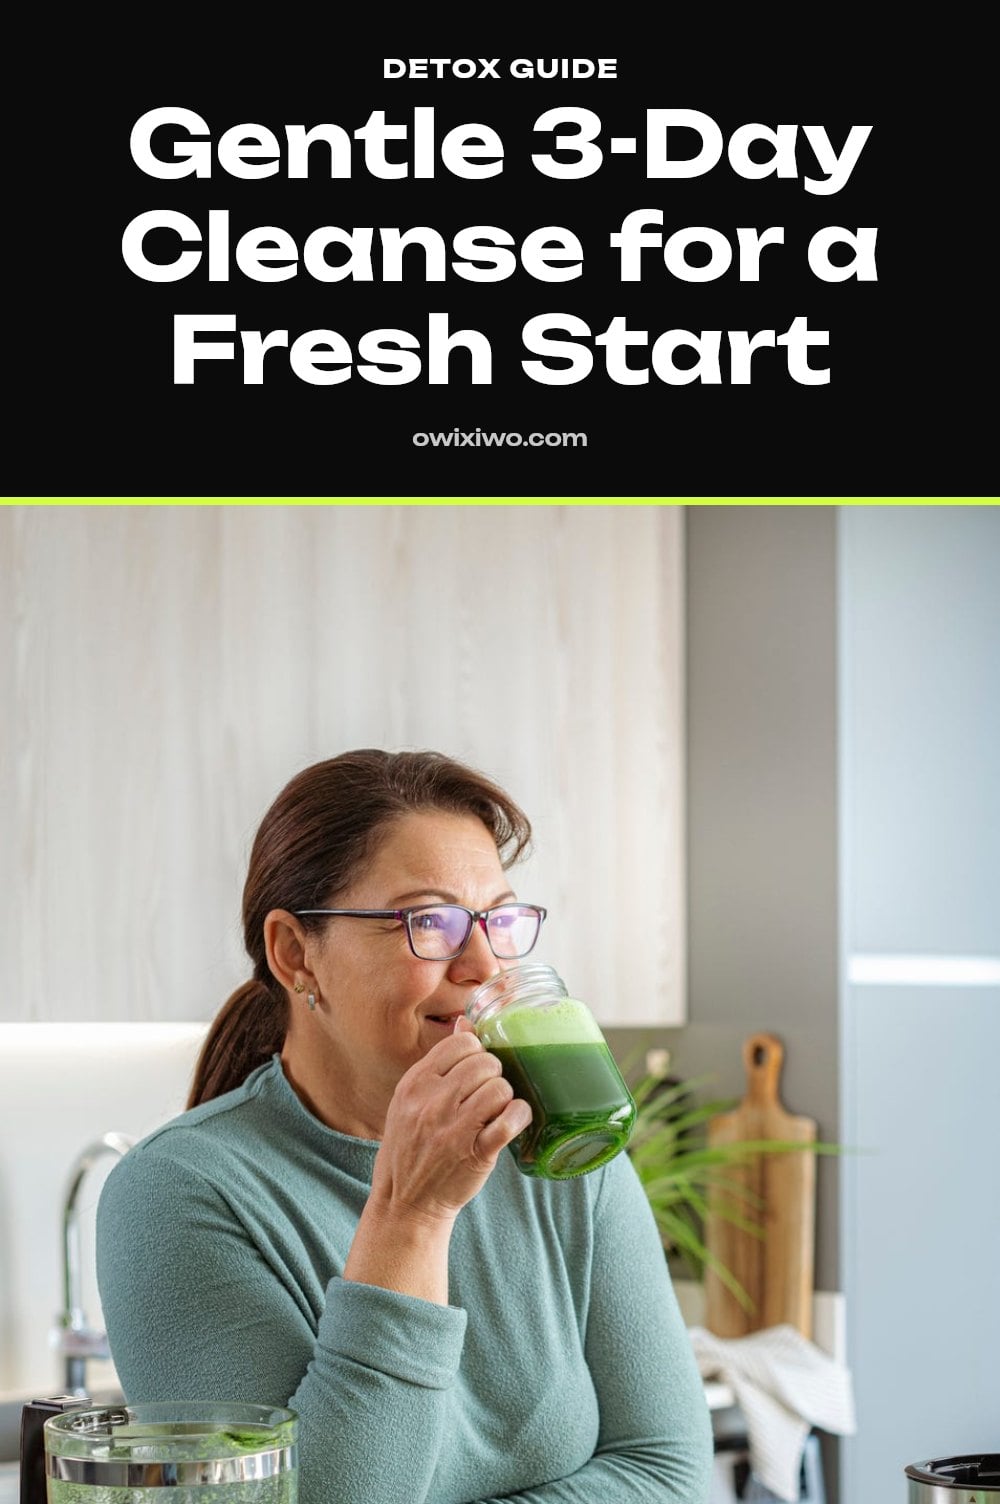
Shop once, prep once. Buy enough produce for three days of meals plus snacks, and check that your blender or juicer actually works before day one.
- Fresh fruit: Berries, apples, and citrus for snacks and smoothies.
- Fresh vegetables: Leafy greens, cruciferous vegetables, and root vegetables for meals and juices.
- Herbal teas: Ginger, peppermint, and dandelion for hydration and a soothing cup between meals.
- Water filter: Optional, but it makes plain water easier to drink all day.
- Blender or juicer: Needed for smoothies and any liquid meals in your plan.
- Lean protein: Chicken, fish, or legumes, if your plan allows them, to protect muscle mass and keep you full.
- Healthy fats: Avocado, nuts, and seeds, if allowed, for essential nutrients and energy.
Your Gentle 3-Day Cleanse Plan
This plan keeps whole, unprocessed foods on the plate three times a day plus snacks, so you are not running on juice alone. Hydration and light activity are built in. Portions are a starting point, not a rule: if you are still hungry, add more vegetables or a second snack.
| Day | Meals and snacks | Movement |
|---|---|---|
| Day 1 | Fruit and oats; big green salad with protein; roasted vegetables and legumes; nuts or fruit | 20-minute walk |
| Day 2 | Smoothie with greens and berries; vegetable soup with chicken or beans; baked fish or tofu with roots; herbal tea and seeds | Gentle yoga |
| Day 3 | Citrus and water to start; grain bowl with cruciferous vegetables; vegetable stir-fry with protein; apple with nut butter | Walk or stretch |
Keep water and herbal tea visible on the counter so sipping happens without thinking. Swap any meal for another from the table if your body wants something different that day.
Helpful Tips for a Successful 3-Day Cleanse

Image credit: abposters.com
Small habits decide whether these three days feel supportive or punishing.
- Stay hydrated: Drink water and herbal teas steadily through the day, not in one big glass at night.
- Listen to your body: If you feel overly hungry or fatigued, eat more of the allowed foods. This is not a deprivation exercise.
- Plan ahead: Wash and chop produce the night before so a hungry moment does not send you to the pantry.
- Incorporate light movement: Walking or yoga keeps things gentle; skip intense training while your intake is lower.
- Prioritize sleep: Seven to nine hours supports recovery and makes cravings easier to handle.
- Manage stress: A few minutes of breathing or meditation keeps stress low, which helps everything else on this list.
My tip: Fill a large bottle in the morning and finish it by lunch, then refill for the afternoon.
Common Mistakes to Avoid During Your Cleanse
Most cleanse regrets come from a few predictable missteps, and each one is easy to fix before day one.
- Myth: A cleanse does not flush toxins out for you. Your liver and kidneys already process waste around the clock, so treat these three days as lightening their load, not replacing them.
- Caution: Do not push through extreme hunger. Waiting it out often leads to rebound eating later, so eat approved foods when you are genuinely hungry.
- Expectation check: Early scale drops are mostly water and glycogen, not fat. Judge the cleanse by how you feel and what habits stick.
- Plan the exit: Map your return to normal eating before day three. Reintroducing everything at once can undo the benefits.
- Skip the pills: Pricey detox supplements rarely have solid evidence behind them and can be ineffective or harmful.
- Talk to a doctor first: If you have any health condition, get medical clearance before you start.
What to Do After Your 3-Day Cleanse
Source: magnific.com
The days after matter as much as the cleanse itself. How you come back to regular eating shapes whether the reset holds.
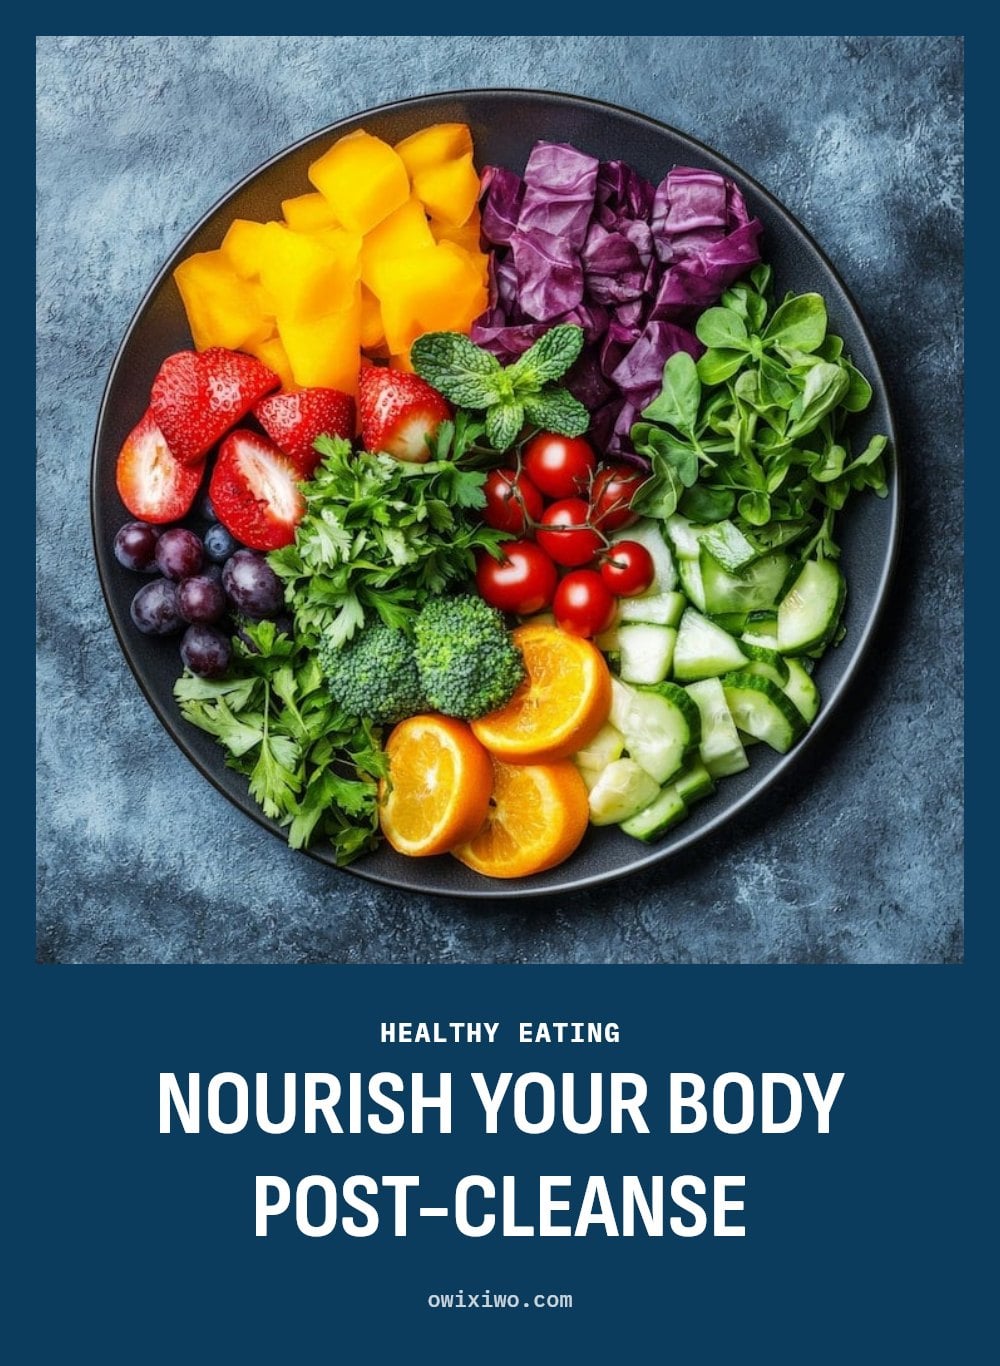
- Reintroduce slowly: Bring back the foods you cut out one at a time, a day or two apart, and note how your body responds.
- Keep drinking: Water and herbal teas stay on the menu. Hydration habits are the easiest part to carry forward.
- Hold the whole foods: Keep processed foods, added sugar, and unhealthy fats to a minimum rather than swinging back to old patterns.
- Read your signals: Pay attention to how different foods make you feel and adjust portions and choices accordingly.
- Add fiber: Fruits, vegetables, and whole grains support digestion, which can lag after a low-fiber stretch.
- Take notes: Write down what worked and what you learned about your hunger and eating habits, then keep the parts worth keeping.
When to Consult a Healthcare Professional
A short cleanse is not risk-free, and some people should not attempt one at all without medical oversight.
- Before you start: Talk to a doctor or registered dietitian about any significant dietary change, especially if you have an underlying health condition.
- Stop and get help: Severe dizziness, fainting, extreme fatigue, persistent nausea, or any unusual symptom means ending the cleanse and seeking medical advice.
- Who should avoid cleanses: People with diabetes, kidney disease, liver disease, or a history of eating disorders, and anyone pregnant or breastfeeding, should not cleanse without strict medical supervision.
- On medication: Ask your doctor about possible interactions, since dietary changes can affect how drugs are absorbed.
Frequently Asked Questions
How often can I do a 3-day cleanse?
There is no set schedule, and more is not better. A short reset a few times a year, spaced out and built around whole foods, is a reasonable approach for most healthy adults. If you find yourself wanting to cleanse constantly, that is a sign to talk to a doctor or registered dietitian about your overall eating pattern instead.
Is a juice-only cleanse safe for 3 days?
It can be done short term, but it is not the gentler option. Liquid-only days cut your fiber intake, which matters for digestive health, and they make hunger and dizziness more likely. The plan in this article keeps whole foods on the plate for that reason. If you have diabetes, kidney or liver disease, or a history of an eating disorder, skip juice-only approaches unless a doctor supervises.
Can I lose significant weight on a 3-day cleanse?
Not in the way most people hope. Any rapid drop over three days is mostly water loss and depleted glycogen stores, not significant fat loss. The scale often moves back once you return to regular eating. If lasting weight change is your goal, a short cleanse is not the tool for it, and a registered dietitian can help you build something that holds.
What should I do if I feel very hungry during the cleanse?
Eat more of the allowed foods. Hunger is information, not a test of willpower, so add another snack or a bigger portion of vegetables, fruit, or lean protein rather than pushing through. If hunger comes with dizziness, fainting, extreme fatigue, or persistent nausea, stop the cleanse and get medical advice.
What is the main goal of a 3-day cleanse?
It is a short, structured break from processed foods, added sugar, caffeine, and alcohol, with more whole foods and fluids in their place. The point is not flushing toxins, since your liver and kidneys already do that. Many people find the real value is noticing how they feel without those foods and carrying a few habits forward.
Final Thoughts
My recommendation: treat these three days as a structured break from processed food, not a detox event. Decide before you start that you will eat more of the allowed foods the moment hunger or fatigue shows up, and that you will stop if you feel severely dizzy, faint, or persistently nauseous. Realistically, expect a little less bloating and maybe better energy within the 72 hours, then plan on the aftercare doing the actual work. Bring foods back slowly, one at a time, and keep the water and vegetables going once the cleanse is over. The habits you carry out of day three matter far more than the three days themselves.
This article is general information, not medical advice. A cleanse is not right for everyone, and dietary changes can interact with medications or existing conditions. Talk to a doctor or registered dietitian before starting, and seek professional help promptly if you have a persistent or serious problem.
Blog
Hair Care Tips for Healthy, Beautiful Hair
Unlock the secrets to healthy hair with our expert tips. Learn actionable steps, product choices, and daily habits for strong, shiny, beautiful hair.
You want hair that feels strong, looks shiny, and doesn’t break every time you touch it. The good news is that most of what makes hair healthy is within your control, from how you wash and detangle to what you eat and how you protect your strands from heat and sun. Genetics play a part, but daily habits do the heavy lifting.
This article walks you through the practical steps that support healthy hair, from understanding your hair’s porosity to choosing the right products, washing mindfully, and protecting against damage. My tip: focus on consistency, not quick fixes.

Courtesy of: everypixel.com
Key Takeaways
- Match products to your hair’s porosity: high porosity absorbs and loses moisture fast, low porosity resists it.
- Wash with lukewarm water and avoid over-washing to prevent stripping natural oils.
- Detangle wet hair gently with a wide-tooth comb, starting at the ends and working up.
- Always use a heat protectant before styling with hot tools to shield the cuticle.
- Trim every 8 to 12 weeks to remove split ends before they travel up the shaft.
Achieving Healthy Hair Starts with Gentle Care
Healthy hair comes from a routine of gentle care, proper nutrition, and protection from damage, and all three have to work together. It is about understanding your hair’s unique needs and consistently supporting its natural strength and shine. Genetics play a role, but many aspects of hair health are within your control through daily habits and product choices. The sections below break those habits down into steps you can actually follow.
1. Understand Your Hair’s Needs

Photo credit: trybello.com
Before you buy another bottle, figure out what your hair actually does. Porosity, meaning how well your hair absorbs and retains moisture, decides which products work: high-porosity hair soaks up water fast and loses it fast, while low-porosity hair resists moisture and can feel coated by heavy formulas. Your hair type (oily, dry, fine, thick) then tells you how often to wash and how rich your conditioner should be.
- Test porosity: watch how quickly a strand absorbs a drop of water.
- Track reactions: note how hair feels on day two after each product switch.
My tip: pay attention to how your hair feels and reacts to different products, because that feedback beats any label on the bottle.
2. Choose the Right Products
Match the formula to what you learned about your hair. A gentle shampoo and conditioner built for your hair type clean effectively without over-drying, and the right pair should leave your scalp comfortable rather than tight or squeaky. Look for products that cleanse without stripping natural oils, since that stripped feeling usually means the formula is too harsh for regular use.
- Dry or frizz-prone hair: add a leave-in conditioner for extra moisture and protection between washes.
- Fine hair: keep leave-in products light so they don’t weigh strands down.
- Oily scalp: choose a lightweight conditioner and keep it off the roots.
3. Wash Your Hair Mindfully
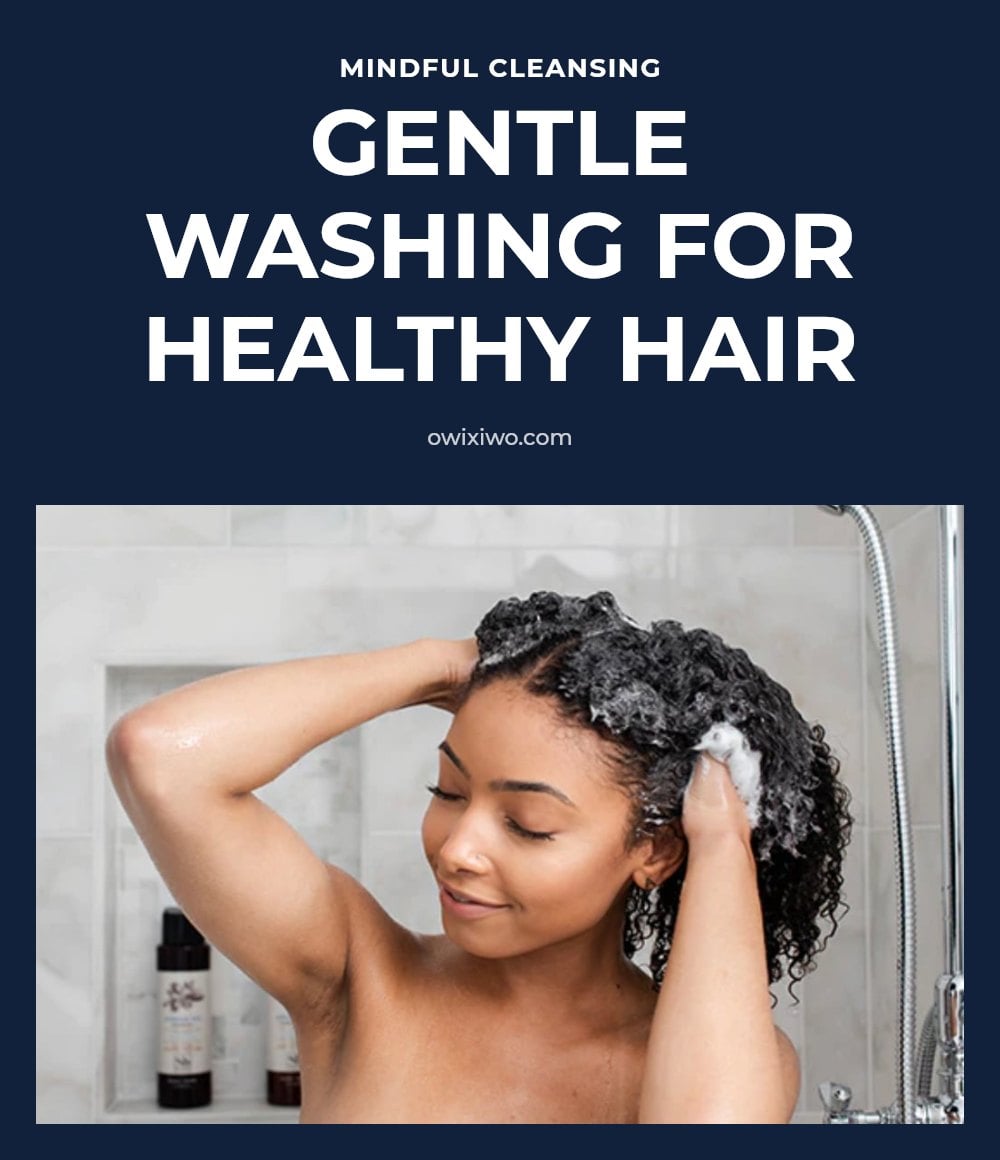
Image credit: myrevair.com
Frequency matters as much as formula. Over-washing strips your scalp and hair of natural oils, which leads to dryness and, often, more oil production as your scalp compensates. Wash with lukewarm water rather than very hot water, because high heat roughens the cuticle and leaves hair looking dull.
- Rinse thoroughly: leftover shampoo or conditioner residue can make hair feel coated and flat.
- Condition every time: always follow shampoo with conditioner to replenish the moisture you just removed.
- Focus the lather: shampoo the scalp, let the suds rinse through the ends.
My tip: finish with a cold water rinse for about 30 seconds to help seal the hair cuticle and boost shine.
4. Detangle with Care
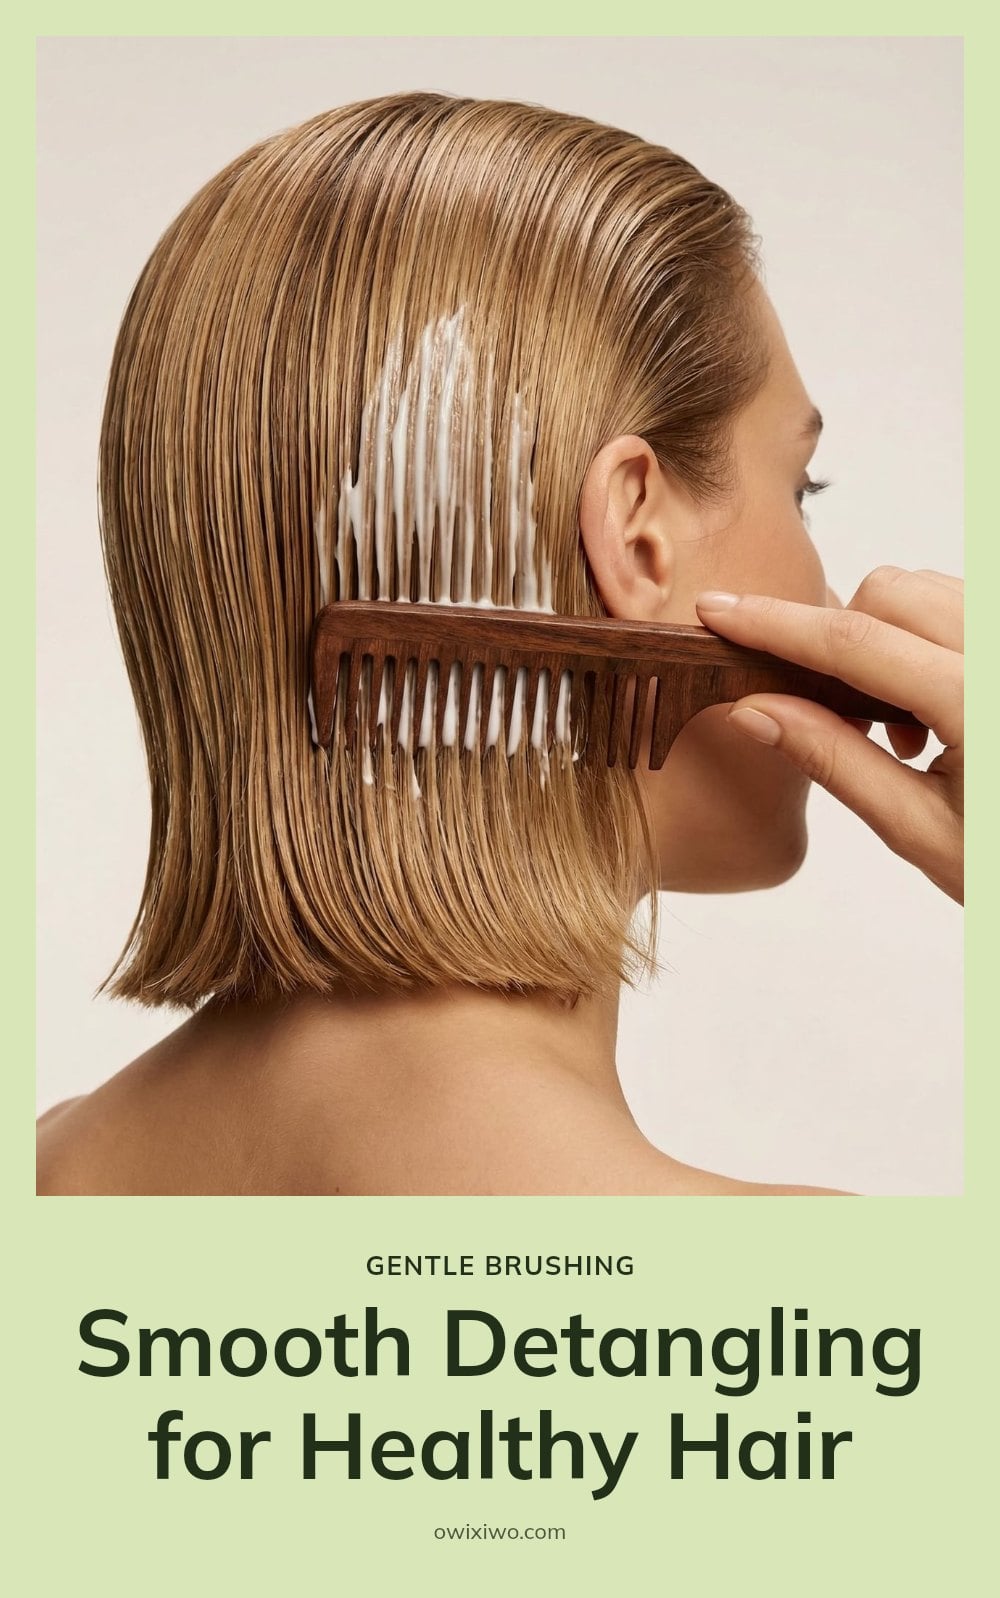
Source: phia.com
Wet hair is more elastic and fragile than dry hair, so brushing it from the roots down is where most breakage happens. A wide-tooth comb is the safer tool: it separates strands instead of dragging through them.
- Start at the ends: work through the last few inches first, then move up in sections until the comb glides from mid-length to root.
- Skip the towel rub: friction on wet strands roughs up the cuticle. Blot instead with a microfiber towel or an old cotton t-shirt and let the fabric absorb the water.
5. Protect from Heat Damage
Heat styling tools can severely damage the cuticle, the outer layer that protects the hair shaft, and that damage shows up later as frizz and split, broken ends. A heat protectant spray creates a buffer between the hot plate or barrel and the strand, so apply it to damp or dry hair before the tool touches it, not after.
Tip: air-dry whenever you have the time, and when you do reach for a dryer or iron, use the lowest heat setting that still gets the job done.
6. Nourish from Within

Via traya.health
Hair is mostly keratin, a protein, which means the strands you see are built from what you eat. A balanced diet with enough protein plus vitamins A, C, D, E and B-complex, and minerals like iron and zinc, supports growth and strength from the follicle out.
You do not need a special hair supplement to cover this. Regular meals with eggs, fish, beans, leafy greens, nuts and citrus do the work.
Good to know: think of your hair as a plant. It needs good soil, meaning your body, before it can flourish.
7. Prioritize Scalp Health
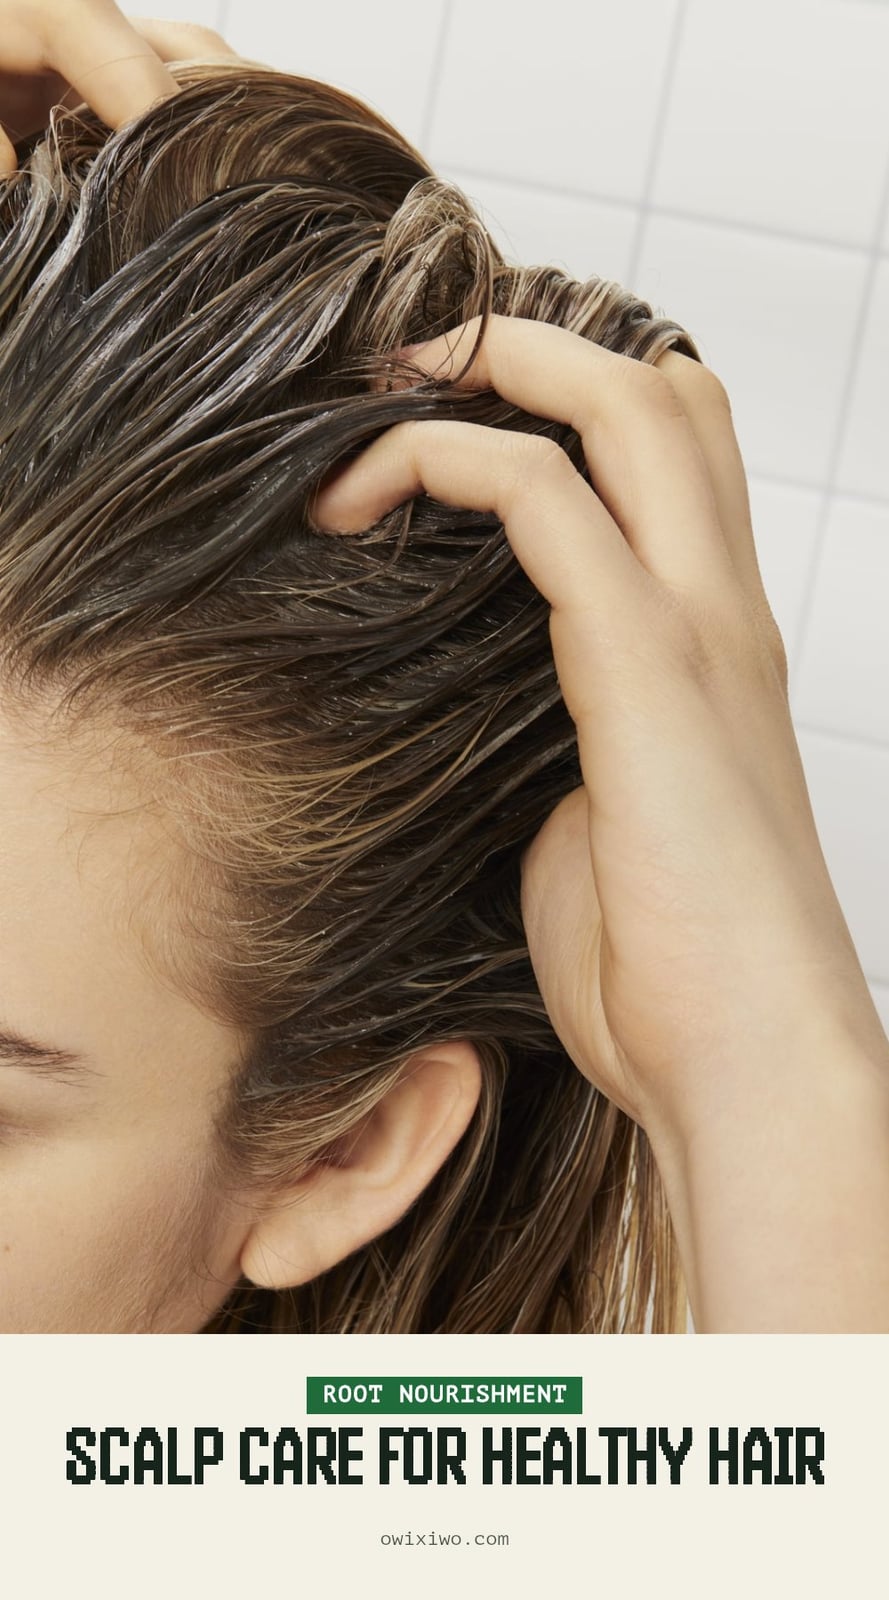
Courtesy of: prose.com
Hair follicles sit in the scalp, so growth starts there, not at the ends. If the scalp is tight, flaky or overloaded with product, the hair that grows out of it starts at a disadvantage.
- Massage gently: press your fingertips into the scalp in small circles for a few minutes to stimulate blood circulation, which can support growth. Do it on dry hair or during conditioning.
- Treat what you notice: persistent dryness or oiliness is a signal, not a nuisance. A targeted scalp treatment or a clarifying wash addresses the cause instead of masking it.
Pro move: a weekly scalp massage is the cheapest habit on this list and one of the easiest to keep.
8. Get Regular Trims
Split ends do not repair themselves, and left alone they travel up the hair shaft, turning a small frayed tip into a rough, thinning strand. A trim every 8 to 12 weeks removes the damaged section before it climbs higher, and it keeps the overall shape of your cut looking intentional rather than ragged.
Even when you are growing your hair out, a small trim every 8 to 12 weeks can keep it looking healthier. You are not giving up length; you are removing the weakest part so the rest can grow stronger.
Quick tip: Consider micro-trims if you are hesitant to cut length. Ask for just a few millimeters off the ends, and you get the benefit without losing visible length.
9. Protect from Environmental Stressors
Sun, chlorine, and saltwater all strip moisture and break down the outer cuticle, leaving hair dry, brittle, and rough to the touch. UV rays are the quietest culprit because the damage shows up weeks later as faded color and split ends.
Cover up before you head outside and rinse before you get in the water.
- Sun: Wear a hat or use a UV-protective hair product, especially on exposed parts and color-treated hair.
- Chlorine and saltwater: Rinse your hair with fresh water before and after swimming. Wet hair absorbs less chlorine and salt, and a post-swim rinse washes out what clings.
10. Avoid Tight Hairstyles
Constantly tying your hair in very tight styles pulls on the follicles and can lead to traction alopecia, a form of hair loss that shows up along the hairline and temples. The tension is the problem, not the ponytail itself.
Opt for looser hairstyles or vary your styles to reduce stress on your hair follicles. Rotate between loose braids, clips, and down days so the same spots are not pulled every day.
Tip: A satin or silk pillowcase can also reduce friction and breakage while you sleep. The smoother surface lets hair glide instead of catching and tugging.
11. Be Patient and Consistent
Healthy hair is a slow build, not an overnight switch. Results from a new routine can start to show within a few weeks to a few months, and the changes are often small at first: less breakage in the brush, softer ends, a scalp that feels calmer.
Changing products every two weeks resets the clock, so you never learn what actually works for your hair.
Good to know: Stick with a routine for at least 6 to 8 weeks before you evaluate it. Give your hair time to respond, then decide what to adjust.
When to Consult a Professional
Some hair changes are beyond what a routine can fix, and waiting only delays the answer. Book an appointment with a dermatologist or healthcare professional if you notice significant hair loss, a sudden change in texture, or persistent scalp problems such as excessive dryness, oiliness, or itching. These signs can point to an underlying condition, and a professional can diagnose it and recommend treatments that go beyond at-home care.
Caution: Always patch test new hair dyes or chemical treatments on a small area of skin first and wait the time listed on the package before applying them to your whole head, since allergic reactions can develop even to products you have used before.
Frequently Asked Questions
How often should I wash my hair for optimal health?
There is no single answer because it depends on your hair type, scalp oiliness, and lifestyle. The key is to avoid over-washing, which strips natural oils and can lead to dryness. Start with every other day or every two days and adjust based on how your scalp feels. If your scalp feels tight or your ends are dry, wash less often.
Can stress impact my hair health?
Yes, stress can affect your hair. High stress levels may contribute to shedding or slow growth, though it affects everyone differently. Managing stress through sleep, exercise, and relaxation techniques supports overall health, including your hair. If you notice sudden or severe hair loss, consult a dermatologist.
Are natural oils good for hair?
Natural oils like coconut, olive, and argan can help condition and add shine, but they are not one-size-fits-all. For low-porosity hair, heavy oils may sit on top and cause buildup. For high-porosity hair, oils can help seal in moisture. Use them sparingly and watch how your hair responds. Always do a patch test first.
What is hair porosity and why does it matter?
Hair porosity refers to how well your hair absorbs and retains moisture. High-porosity hair takes in water quickly but loses it fast, while low-porosity hair resists moisture and can feel coated. Knowing your porosity helps you choose products that work with your hair, like lighter formulas for low porosity and richer ones for high porosity.
Final Thoughts
If you take one thing from this, make it consistency. Pick a simple routine that fits your hair type and lifestyle, and stick with it. Real change takes time: expect a few weeks to a few months before you notice less breakage, softer ends, and a calmer scalp. My tip: take a photo now so you can compare later. Healthy hair is a long game, and the small daily choices add up.
This information is for general educational purposes only and is not a substitute for professional medical advice. If you have persistent scalp issues, significant hair loss, or sudden changes in hair texture, consult a dermatologist or healthcare professional.
-

 Makeup Trends2 years ago
29 Harley Quinn Makeup Ideas: Iconic Looks for Every Occasion
-

 Hairstyle2 years ago
Round Face Haircuts Ideas 2025: 29 Flattering Styles to Try
-

 Hairstyle2 years ago
25 90s Layered Hair Ideas to Inspire Your 2025 Look
-

 Fashion2 years ago
27 Every Day Spring Outfits Inspiration for 2025
-

 Hairstyle2 years ago
29 Long Layered Haircuts Ideas for 2025
-

 Hairstyle2 years ago
64 Fall Hair Color Trends to Elevate Your Style in 2024
-

 Hairstyle2 years ago
Choppy Bob Haircuts 2025: 29 Stylish Ideas
-

 Hairstyle2 years ago
27 Medium Length Haircut with Layers Ideas for 2025