
Blog
Lip Care in Spring: How to Keep Your Lips Soft and Moisturized

Spring is a season of transformation, and our skincare routine needs to adapt accordingly. The weather’s constant fluctuations can challenge the delicate skin of our lips, often leading to dryness or irritation. From my own experience, I’ve learned that keeping lips soft and hydrated during spring requires a mix of proactive care and the right products. In this article, I’ll share practical, tried-and-tested strategies to help you achieve luscious, healthy lips all season long.
Understanding Spring’s Effects on Lips
Why Spring Requires Special Lip Care
Spring weather brings warmer temperatures and higher humidity, which can ease winter’s harsh dryness. However, wind, sun exposure, and allergens also become more prominent, leading to chapping or irritation. Adjusting your routine for these challenges ensures your lips stay healthy and protected.

The Essential Lip Care Routine
1. Exfoliation: Renewing and Revitalizing
Exfoliating removes flaky, dead skin cells, allowing lip balms to penetrate more effectively. I recommend doing this gently 1-2 times a week to avoid irritation.
DIY Exfoliation Recipe
| Ingredient | Measurement | Purpose |
|---|---|---|
| Sugar (fine) | 1 teaspoon | Gently exfoliates |
| Honey | 1 teaspoon | Soothes and moisturizes |
| Olive oil | A few drops | Adds hydration and softness |
Mix these ingredients and massage them onto your lips in circular motions. Rinse off with warm water and pat dry.
2. Hydration: The Cornerstone of Lip Care
Moisturizing your lips is essential, as they lack oil glands. Choose a balm with nourishing ingredients like shea butter, beeswax, or hyaluronic acid. Reapply frequently, especially after eating or exposure to wind.
Best Lip Balms for Spring
| Product Name | Key Ingredients | Benefits |
|---|---|---|
| Sugar Advanced Therapy | Shea Butter, SPF 15 | Hydration and sun protection |
| Laneige Lip Sleeping Mask | Berry Extract | Overnight deep repair |
| Aquaphor Healing Ointment | Panthenol, Petrolatum | Restores severely dry lips |
3. Sun Protection: Shield Against Harmful Rays
Did you know that lips are one of the most sun-sensitive areas of your skin? Applying SPF lip balm prevents sunburn and discoloration. Always carry one with you during outdoor activities.
4. Break Bad Habits
Some habits, like licking or biting your lips, can cause more harm than good. Saliva dries out the lips quickly, and biting leads to cracks. Instead, reach for a hydrating balm whenever your lips feel dry.

Spring-Specific Challenges and Solutions
Managing Allergy-Induced Dryness
Spring allergies can cause frequent nose wiping, leading to irritation around your lips. To combat this:
- Use hypoallergenic, fragrance-free lip products.
- Apply a thin layer of petroleum jelly to create a protective barrier.
Dealing with Windy Days
Wind can strip moisture from your lips, so layering an occlusive balm over a hydrating one can lock in moisture and protect against the elements.
Nutrition for Naturally Soft Lips
Hydration starts from within! Include these nutrient-rich foods in your diet for naturally healthy lips:
- Vitamin E: Found in almonds and spinach, it aids in repairing skin cells.
- Omega-3 Fatty Acids: Salmon and flaxseeds help maintain moisture.
- Hydrating Foods: Cucumbers and watermelon keep your skin (and lips) hydrated.
DIY Lip Care Remedies
Natural remedies can be effective and budget-friendly. Here’s another easy-to-make mask for extra hydration:
DIY Aloe Vera Lip Mask
| Ingredient | Purpose |
|---|---|
| Aloe Vera Gel | Soothes and hydrates |
| Coconut Oil | Locks in moisture |
Mix equal parts aloe vera gel and coconut oil. Apply before bed and leave it on overnight.
Practical Tips for Outdoor Activities
- Always carry an SPF lip balm for reapplication.
- Wear a scarf or mask on windy days for extra protection.
- Avoid licking your lips during outdoor activities to minimize dryness.

Emergency Lip Repair Tips
If your lips are already chapped or cracked:
- Apply a thick layer of medical-grade lanolin for immediate hydration.
- Use a lip sleeping mask overnight for intensive repair.
- Avoid exfoliation until your lips heal completely.
FAQs: Your Lip Care Questions Answered
1. How often should I exfoliate my lips?
Once or twice a week is enough to remove dead skin cells without causing irritation.
2. Is SPF necessary for lip care in spring?
Absolutely! Lips are prone to sun damage, and an SPF balm prevents burns and discoloration.
3. What ingredients should I look for in a lip balm?
Shea butter, beeswax, hyaluronic acid, and SPF are excellent choices for hydration and protection.
4. Can I use my winter lip balm in spring?
You can, but switching to a lighter, hydrating formula suited to spring’s milder weather is better.
5. What foods can improve lip health?
Vitamin E (almonds), Omega-3s (salmon), and hydrating foods (cucumber) all contribute to softer, healthier lips.
Conclusion
Spring is the time to rejuvenate your lips and protect them from new seasonal challenges. By exfoliating regularly, hydrating with nourishing balms, protecting against the sun, and addressing allergies, you can keep your lips looking and feeling their best. Don’t forget, proper care and a balanced diet are key to achieving soft, healthy lips. Start today, and let your lips bloom as beautifully as the season!
Blog
Hair Care Tips for Healthy, Beautiful Hair
Unlock the secrets to healthy hair with our expert tips. Learn actionable steps, product choices, and daily habits for strong, shiny, beautiful hair.
You want hair that feels strong, looks shiny, and doesn’t break every time you touch it. The good news is that most of what makes hair healthy is within your control, from how you wash and detangle to what you eat and how you protect your strands from heat and sun. Genetics play a part, but daily habits do the heavy lifting.
This article walks you through the practical steps that support healthy hair, from understanding your hair’s porosity to choosing the right products, washing mindfully, and protecting against damage. My tip: focus on consistency, not quick fixes.

Courtesy of: everypixel.com
Key Takeaways
- Match products to your hair’s porosity: high porosity absorbs and loses moisture fast, low porosity resists it.
- Wash with lukewarm water and avoid over-washing to prevent stripping natural oils.
- Detangle wet hair gently with a wide-tooth comb, starting at the ends and working up.
- Always use a heat protectant before styling with hot tools to shield the cuticle.
- Trim every 8 to 12 weeks to remove split ends before they travel up the shaft.
Achieving Healthy Hair Starts with Gentle Care
Healthy hair comes from a routine of gentle care, proper nutrition, and protection from damage, and all three have to work together. It is about understanding your hair’s unique needs and consistently supporting its natural strength and shine. Genetics play a role, but many aspects of hair health are within your control through daily habits and product choices. The sections below break those habits down into steps you can actually follow.
1. Understand Your Hair’s Needs

Photo credit: trybello.com
Before you buy another bottle, figure out what your hair actually does. Porosity, meaning how well your hair absorbs and retains moisture, decides which products work: high-porosity hair soaks up water fast and loses it fast, while low-porosity hair resists moisture and can feel coated by heavy formulas. Your hair type (oily, dry, fine, thick) then tells you how often to wash and how rich your conditioner should be.
- Test porosity: watch how quickly a strand absorbs a drop of water.
- Track reactions: note how hair feels on day two after each product switch.
My tip: pay attention to how your hair feels and reacts to different products, because that feedback beats any label on the bottle.
2. Choose the Right Products
Match the formula to what you learned about your hair. A gentle shampoo and conditioner built for your hair type clean effectively without over-drying, and the right pair should leave your scalp comfortable rather than tight or squeaky. Look for products that cleanse without stripping natural oils, since that stripped feeling usually means the formula is too harsh for regular use.
- Dry or frizz-prone hair: add a leave-in conditioner for extra moisture and protection between washes.
- Fine hair: keep leave-in products light so they don’t weigh strands down.
- Oily scalp: choose a lightweight conditioner and keep it off the roots.
3. Wash Your Hair Mindfully

Image credit: myrevair.com
Frequency matters as much as formula. Over-washing strips your scalp and hair of natural oils, which leads to dryness and, often, more oil production as your scalp compensates. Wash with lukewarm water rather than very hot water, because high heat roughens the cuticle and leaves hair looking dull.
- Rinse thoroughly: leftover shampoo or conditioner residue can make hair feel coated and flat.
- Condition every time: always follow shampoo with conditioner to replenish the moisture you just removed.
- Focus the lather: shampoo the scalp, let the suds rinse through the ends.
My tip: finish with a cold water rinse for about 30 seconds to help seal the hair cuticle and boost shine.
4. Detangle with Care
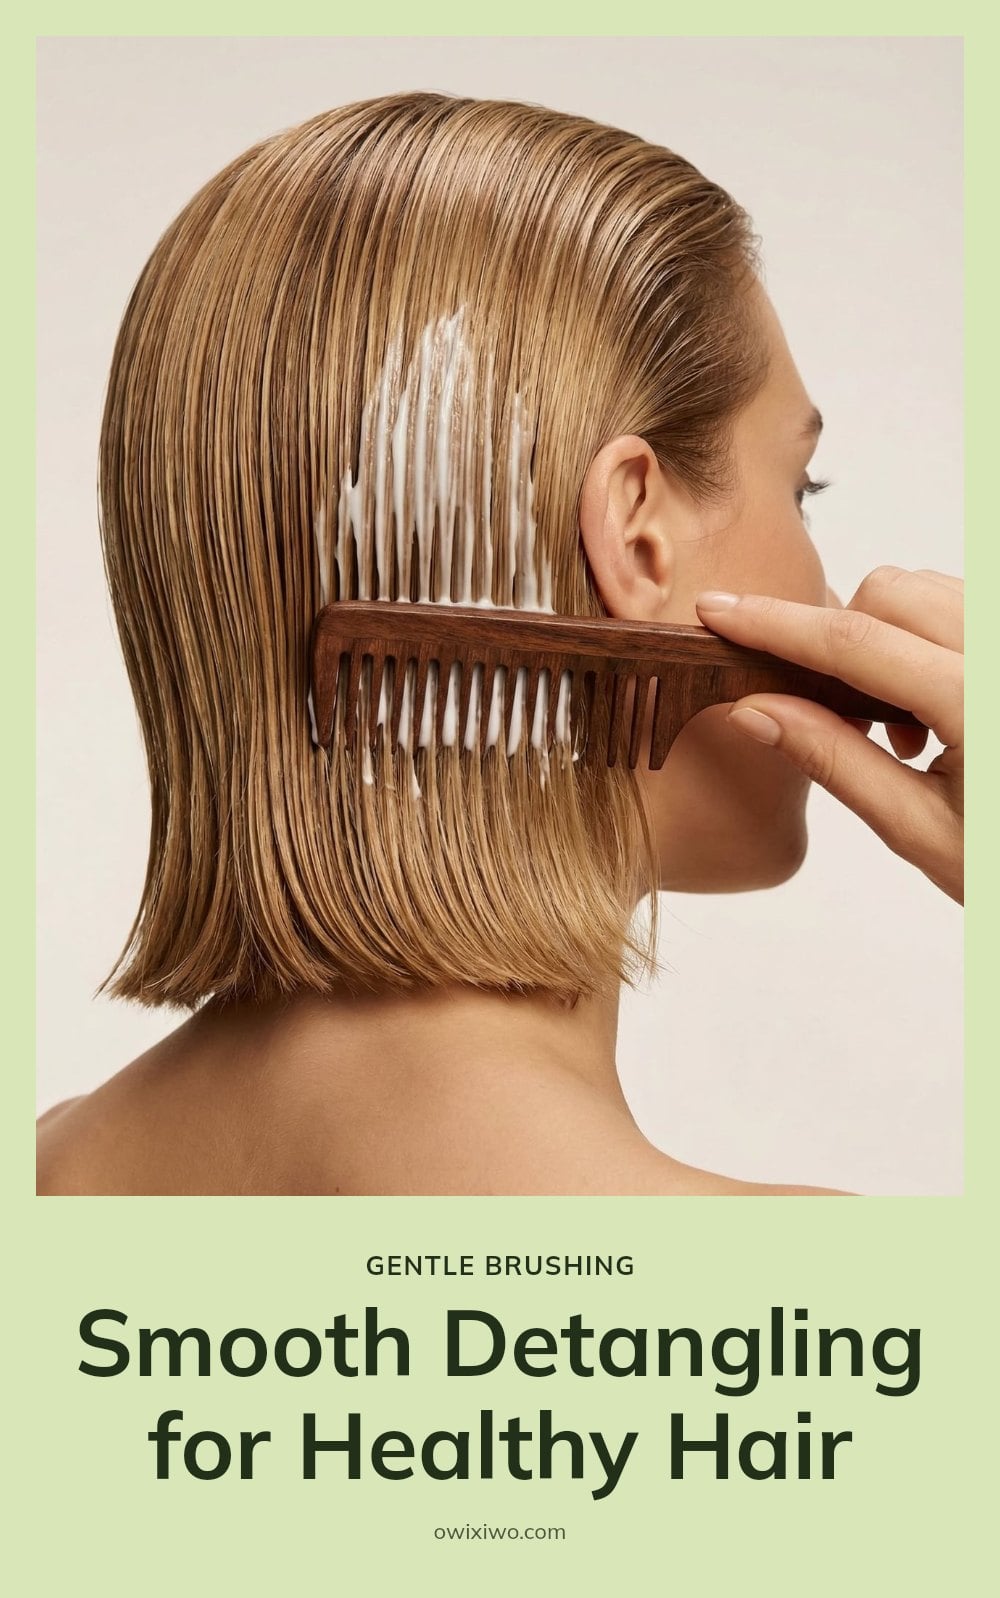
Source: phia.com
Wet hair is more elastic and fragile than dry hair, so brushing it from the roots down is where most breakage happens. A wide-tooth comb is the safer tool: it separates strands instead of dragging through them.
- Start at the ends: work through the last few inches first, then move up in sections until the comb glides from mid-length to root.
- Skip the towel rub: friction on wet strands roughs up the cuticle. Blot instead with a microfiber towel or an old cotton t-shirt and let the fabric absorb the water.
5. Protect from Heat Damage
Heat styling tools can severely damage the cuticle, the outer layer that protects the hair shaft, and that damage shows up later as frizz and split, broken ends. A heat protectant spray creates a buffer between the hot plate or barrel and the strand, so apply it to damp or dry hair before the tool touches it, not after.
Tip: air-dry whenever you have the time, and when you do reach for a dryer or iron, use the lowest heat setting that still gets the job done.
6. Nourish from Within

Via traya.health
Hair is mostly keratin, a protein, which means the strands you see are built from what you eat. A balanced diet with enough protein plus vitamins A, C, D, E and B-complex, and minerals like iron and zinc, supports growth and strength from the follicle out.
You do not need a special hair supplement to cover this. Regular meals with eggs, fish, beans, leafy greens, nuts and citrus do the work.
Good to know: think of your hair as a plant. It needs good soil, meaning your body, before it can flourish.
7. Prioritize Scalp Health

Courtesy of: prose.com
Hair follicles sit in the scalp, so growth starts there, not at the ends. If the scalp is tight, flaky or overloaded with product, the hair that grows out of it starts at a disadvantage.
- Massage gently: press your fingertips into the scalp in small circles for a few minutes to stimulate blood circulation, which can support growth. Do it on dry hair or during conditioning.
- Treat what you notice: persistent dryness or oiliness is a signal, not a nuisance. A targeted scalp treatment or a clarifying wash addresses the cause instead of masking it.
Pro move: a weekly scalp massage is the cheapest habit on this list and one of the easiest to keep.
8. Get Regular Trims
Split ends do not repair themselves, and left alone they travel up the hair shaft, turning a small frayed tip into a rough, thinning strand. A trim every 8 to 12 weeks removes the damaged section before it climbs higher, and it keeps the overall shape of your cut looking intentional rather than ragged.
Even when you are growing your hair out, a small trim every 8 to 12 weeks can keep it looking healthier. You are not giving up length; you are removing the weakest part so the rest can grow stronger.
Quick tip: Consider micro-trims if you are hesitant to cut length. Ask for just a few millimeters off the ends, and you get the benefit without losing visible length.
9. Protect from Environmental Stressors
Sun, chlorine, and saltwater all strip moisture and break down the outer cuticle, leaving hair dry, brittle, and rough to the touch. UV rays are the quietest culprit because the damage shows up weeks later as faded color and split ends.
Cover up before you head outside and rinse before you get in the water.
- Sun: Wear a hat or use a UV-protective hair product, especially on exposed parts and color-treated hair.
- Chlorine and saltwater: Rinse your hair with fresh water before and after swimming. Wet hair absorbs less chlorine and salt, and a post-swim rinse washes out what clings.
10. Avoid Tight Hairstyles
Constantly tying your hair in very tight styles pulls on the follicles and can lead to traction alopecia, a form of hair loss that shows up along the hairline and temples. The tension is the problem, not the ponytail itself.
Opt for looser hairstyles or vary your styles to reduce stress on your hair follicles. Rotate between loose braids, clips, and down days so the same spots are not pulled every day.
Tip: A satin or silk pillowcase can also reduce friction and breakage while you sleep. The smoother surface lets hair glide instead of catching and tugging.
11. Be Patient and Consistent
Healthy hair is a slow build, not an overnight switch. Results from a new routine can start to show within a few weeks to a few months, and the changes are often small at first: less breakage in the brush, softer ends, a scalp that feels calmer.
Changing products every two weeks resets the clock, so you never learn what actually works for your hair.
Good to know: Stick with a routine for at least 6 to 8 weeks before you evaluate it. Give your hair time to respond, then decide what to adjust.
When to Consult a Professional
Some hair changes are beyond what a routine can fix, and waiting only delays the answer. Book an appointment with a dermatologist or healthcare professional if you notice significant hair loss, a sudden change in texture, or persistent scalp problems such as excessive dryness, oiliness, or itching. These signs can point to an underlying condition, and a professional can diagnose it and recommend treatments that go beyond at-home care.
Caution: Always patch test new hair dyes or chemical treatments on a small area of skin first and wait the time listed on the package before applying them to your whole head, since allergic reactions can develop even to products you have used before.
Frequently Asked Questions
How often should I wash my hair for optimal health?
There is no single answer because it depends on your hair type, scalp oiliness, and lifestyle. The key is to avoid over-washing, which strips natural oils and can lead to dryness. Start with every other day or every two days and adjust based on how your scalp feels. If your scalp feels tight or your ends are dry, wash less often.
Can stress impact my hair health?
Yes, stress can affect your hair. High stress levels may contribute to shedding or slow growth, though it affects everyone differently. Managing stress through sleep, exercise, and relaxation techniques supports overall health, including your hair. If you notice sudden or severe hair loss, consult a dermatologist.
Are natural oils good for hair?
Natural oils like coconut, olive, and argan can help condition and add shine, but they are not one-size-fits-all. For low-porosity hair, heavy oils may sit on top and cause buildup. For high-porosity hair, oils can help seal in moisture. Use them sparingly and watch how your hair responds. Always do a patch test first.
What is hair porosity and why does it matter?
Hair porosity refers to how well your hair absorbs and retains moisture. High-porosity hair takes in water quickly but loses it fast, while low-porosity hair resists moisture and can feel coated. Knowing your porosity helps you choose products that work with your hair, like lighter formulas for low porosity and richer ones for high porosity.
Final Thoughts
If you take one thing from this, make it consistency. Pick a simple routine that fits your hair type and lifestyle, and stick with it. Real change takes time: expect a few weeks to a few months before you notice less breakage, softer ends, and a calmer scalp. My tip: take a photo now so you can compare later. Healthy hair is a long game, and the small daily choices add up.
This information is for general educational purposes only and is not a substitute for professional medical advice. If you have persistent scalp issues, significant hair loss, or sudden changes in hair texture, consult a dermatologist or healthcare professional.
Blog
How to Practice Stoicism: 7 Principles and Simple Exercises
Learn how to practice Stoicism with 7 core principles and simple daily exercises. Cultivate emotional resilience and find inner peace in your daily life.
You want more calm and less emotional chaos, but willpower alone never seems to stick. Stoicism, an ancient Greek philosophy from around the 3rd century BCE, gives you a practical system for managing stress and finding inner peace, not by suppressing feelings, but by changing how you judge events. This article covers seven core principles and simple exercises you can start today.

Courtesy of: camillestyles.com
Key Takeaways
- Focus energy only on what you control: your thoughts, judgments, and actions.
- Practice negative visualization regularly to boost gratitude and reduce attachment.
- Use the four cardinal virtues, Wisdom, Courage, Justice, Temperance, as a daily compass.
- Embrace amor fati by accepting every event as material for growth.
- Journal each evening to catch irrational judgments and reinforce virtuous reactions.
Embrace Stoicism for a Calmer, More Resilient You
Stoicism is a practical philosophy from ancient Athens, founded around the 3rd century BCE, that teaches you to manage emotions by changing how you judge events. Its central move is the dichotomy of control: separate what is yours (your thoughts, judgments, and actions) from what is not (other people’s opinions, outcomes, and everything external).
You do not need to adopt a whole belief system to benefit. The exercises are simple and repeatable, and they build emotional resilience the way strength training builds muscle: gradually, through consistent practice.
1. Master the Dichotomy of Control

Photo credit: ujido.com
Spend your energy only on what you can actually control: your thoughts, your judgments, and your actions. Everything else, from a delayed train to a friend’s mood to the final result of a project, sits outside your hands.
Releasing attachment to outcomes does not mean giving up on them. You still prepare, show up, and do the work; you just stop tying your peace of mind to a result you cannot guarantee.
My tip: When a challenge hits, ask yourself, “Is this within my control?” If the answer is no, name it as outside your hands and let it go.
2. Practice Negative Visualization
Set aside a few minutes to picture losing something you value: your health, a close relationship, a possession you rely on. The point is not gloom. It is noticing how much of your daily life you already have, which is easy to overlook when nothing is threatened.
Stoics used this exercise to loosen attachment and build gratitude, and it works because the mind tends to notice absence more sharply than presence.
My tip: Take a few minutes each morning to imagine losing something important to you, then appreciate its presence in your life for the rest of the day.
3. Live by the Four Cardinal Virtues
Four virtues form the Stoic compass for decisions and reactions:
- Wisdom: knowing what is genuinely good, bad, or indifferent.
- Courage: facing fear and doing what is right anyway.
- Justice: treating other people fairly.
- Temperance: self-control and moderation in what you want.
When a choice feels murky, run it past these four. They give you an internal standard that does not depend on applause or outcomes.
Tip: focus on one virtue at a time for a week. You will catch yourself applying it in real situations, which makes it stick far better than just reading about it.
4. Embrace Amor Fati (Love of Fate)

Image credit: faymas.in
Amor fati, Latin for “love of fate,” asks you to accept what happens not with a sigh but with genuine embrace, treating every event as part of the natural order. This shift turns obstacles into material for growth, so a missed flight becomes a chance to practice patience and a setback reveals a new direction.
When something unexpected lands in your day, swap the automatic “Why me?” for “What can I learn from this?” That single question moves you from frustration to curiosity, which is exactly where resilience gets built.
5. Practice Self-Awareness and Journaling

Source: lifestyleproblog.me
Self-awareness is the engine of Stoic practice: notice your thoughts and reactions as they happen, and you start catching the irrational judgments that fuel anger, fear, and desire. A simple daily journal makes this concrete. Each evening, write down one challenge you faced, how you reacted, and how a Stoic might have responded instead.
Over weeks, the pattern becomes visible. You will spot your emotional triggers and see where you applied reason well, which turns philosophy from an idea into a habit.
6. Engage in Voluntary Discomfort

Via mindvalley.com
Voluntary discomfort means safely choosing minor hardships, like a cold shower or skipping a meal for a short stretch, so you can train your mind to handle difficulty without crumbling. Each small act of endurance lowers your dependence on comfort and sharpens your gratitude for the warm bath or full plate you usually take for granted.
Good to know: Start small, one cold rinse at the end of your shower or one skipped snack, and build from there. The goal is to stretch, not to break.
7. Read and Reflect on Stoic Texts
Seneca, Epictetus, and Marcus Aurelius wrote practical manuals, not abstract theory, and their words still speak directly to daily struggles like anger, loss, and anxiety. Pick one text, such as Marcus Aurelius’s Meditations, and read a short passage each morning or evening.
My tip: Do not just read. Pause after each passage and ask how it applies to a situation you are facing right now. That reflection turns ancient wisdom into your own operating system.
Common Misconceptions About Stoicism
Suppressing Emotions: Stoicism is not about being emotionless. It is about understanding and managing emotions through reason so they don’t control you. Anger, fear, and excessive desire arise from faulty judgments about what is good or bad, and Stoicism gives you tools to correct those judgments.
Lack of Ambition: Stoics pursue virtuous goals and strive for excellence, but they detach from the outcome, focusing on their effort rather than the result. You can aim high and work hard while staying calm about what happens afterward.
Fatalism: Accepting fate does not mean passive resignation. Stoicism emphasizes active participation in life and making the best choices within your sphere of influence, then accepting what follows.
Instant Results: Stoicism is a lifelong practice. Don’t expect to eliminate all negative feelings overnight. It is a gradual process of self-improvement, with small daily exercises building resilience over months and years.
Frequently Asked Questions
How long does it take to see results from practicing Stoicism?
Stoicism is a lifelong practice, but most people notice subtle shifts within a few weeks of consistent daily or weekly exercises. A calmer reaction to a small frustration or a clearer decision under pressure can appear early. Deeper resilience and a more serene outlook develop gradually over months and years of steady reflection.
Can Stoicism help with anxiety?
Yes, many people find Stoicism helpful for managing anxiety because it trains you to separate what you can control from what you cannot. By catching and correcting irrational judgments that fuel anxious thoughts, you reduce mental spiraling. The practices of negative visualization and journaling also build a calmer baseline over time.
What are the four cardinal virtues of Stoicism?
The four cardinal virtues are Wisdom (knowing what is truly good or bad), Courage (facing fear and doing what is right), Justice (treating others fairly), and Temperance (self-control and moderation). They serve as a compass for decisions and reactions, helping you act virtuously in any situation.
Is Stoicism about suppressing emotions?
No, that is a common misconception. Stoicism does not ask you to suppress emotions. Instead, it teaches you to understand and manage them through reason, so emotions like anger and fear do not control you. The goal is emotional resilience, not emotional numbness.
What is ‘amor fati’ in Stoicism?
Amor fati is Latin for ‘love of fate.’ It means accepting everything that happens not with a sigh but with genuine embrace, treating every event as part of the natural order. This mindset turns obstacles into opportunities for growth, so a setback becomes material for practicing virtue.
Is journaling a key Stoic practice?
Yes, journaling is a recommended Stoic exercise. Each evening, write down one challenge you faced, how you reacted, and how you could have acted more virtuously. This builds self-awareness and helps you catch the irrational judgments that fuel negative emotions, making the philosophy practical and concrete.
Final Thoughts
My tip: Pick just one exercise, like evening journaling or negative visualization, and do it daily for two weeks. You won’t eliminate stress overnight, but you will start noticing the gap between an event and your reaction, and that gap is where your freedom lives. Consistency over months and years brings gradual, cumulative results, so stay patient and keep reflecting.
Blog
Best Glute Exercises to Do at Home for Strength and Tone
Discover the best glute exercises you can do at home with no equipment to build strength, improve posture, and tone your lower body.
If you want to strengthen and tone your glutes without a gym membership or fancy equipment, you can do it right in your living room. The glutes are made up of three muscles that work together to power your hips and stabilize your whole body, and hitting all of them with the right moves is key. This article covers the best bodyweight exercises you can do at home, a weekly plan to follow, and the common mistakes to avoid so you see real progress.

Courtesy of: womenshealthmag.com
Key Takeaways
- Perform glute workouts 2-3 times per week for noticeable strength and tone within 4-8 weeks.
- Focus on engaging your glutes during each rep instead of letting quads or lower back take over.
- Combine compound moves like squats and lunges with isolation moves like donkey kicks and fire hydrants.
- Use progressive overload by adding resistance bands, more reps, or more sets over time.
- Always warm up with dynamic stretches and cool down with static stretches to prevent injury.
1. Warm-Up: Leg Swings

Photo credit: crackyl.com
Stand tall next to a wall or sturdy chair for balance. Swing one leg forward and backward in a controlled motion, gradually increasing the range of movement as you go.
- Sets and reps: 10-15 swings per leg, 1-2 sets
- Form cue: Keep your torso still and your standing leg slightly bent
- Make it easier or harder: Hold the support with both hands for extra stability; for a challenge, let go once you feel balanced
2. Bodyweight Squats

Image credit: self.com
Stand with feet shoulder-width apart and toes pointed slightly outward. Lower your hips as if sitting into a chair, keeping your chest lifted and back flat. Go as deep as comfortable, making sure your knees track over your toes.
- Sets and reps: 3 sets of 10-15 reps
- Form cue: Keep your core tight and don’t let your knees cave inward
- Make it easier or harder: Reduce range of motion if needed; add a pulse at the bottom for extra burn
3. Glute Bridges

Source: tomsguide.com
Lie on your back with knees bent and feet flat on the floor, heels close to your glutes. Push through your heels to lift your hips toward the ceiling until your body forms a straight line from shoulders to knees. Squeeze your glutes at the top, then slowly lower back down.
- Sets and reps: 3 sets of 12-18 reps
- Form cue: Drive through your heels and avoid arching your lower back at the top
- Make it easier or harder: Perform on the floor only; for more challenge, hold the top for 2 seconds
4. Walking Lunges

Via healthline.com
Step forward with one leg, lowering your hips until both knees bend at about 90 degrees. Your front knee should be directly above your ankle, and your back knee should hover just above the floor. Push off your back foot to bring it forward into the next lunge.
- Sets and reps: 3 sets of 10-12 lunges per leg
- Form cue: Keep your core braced and your front shin vertical
- Make it easier or harder: Shorten your stride for less depth; add a pause at the bottom for more difficulty
5. Donkey Kicks

Courtesy of: runnersworld.com
Start on all fours with your hands under your shoulders and your knees under your hips. Keeping one knee bent, lift that leg directly behind you, pressing your heel toward the ceiling. Squeeze your glute at the top, then lower slowly. Complete 3 sets of 15-20 reps per leg.
- Form cue: Keep your core braced and avoid arching your lower back as you lift.
- Make it easier or harder: Loop a resistance band around your thighs for extra tension, or slow the lowering phase to increase the challenge.
6. Fire Hydrants
Begin on all fours with your hands under your shoulders and knees under your hips. Keeping your knee bent at 90 degrees, lift one leg out to the side, like a dog at a fire hydrant. Keep your hips stable and avoid rocking your torso. Perform 3 sets of 15-20 reps per leg.
- Form cue: Keep your hips level and core engaged; don’t let your lower back sag.
- Make it easier or harder: Add a resistance band above your knees to increase the challenge, or reduce the range of motion if you feel your hips rocking.
7. Single-Leg Deadlifts (Bodyweight)
Stand on one leg with a slight bend in the knee. Hinge at your hips, extending the other leg straight back for balance, so your body forms a straight line from your head to your extended heel. Keep your back flat and core engaged, then slowly return to the starting position. Do 3 sets of 8-12 reps per leg.
- Form cue: Keep your hips square to the floor and avoid rounding your back as you hinge.
- Make it easier or harder: Hold onto a wall or chair for balance, or hold a weight in one hand to increase the difficulty.
8. Cool-Down: Figure-Four Stretch
Lie on your back with your knees bent and feet flat. Cross one ankle over the opposite knee, forming a figure-four shape. Gently pull the bottom thigh toward your chest until you feel a stretch in your glute. Hold for 20-30 seconds per side.
- Form cue: Breathe deeply and avoid forcing the stretch; you should feel a gentle pull, not pain.
- Make it easier or harder: Keep your bottom foot on the floor to lessen the stretch, or pull your thigh closer for a deeper stretch.
Your Weekly Glute Workout Plan
This plan mixes compound movements, which hit all three glute muscles at once, with isolation moves that target one side at a time. Warm up before every session and cool down after, even when you are short on time. Adjust the reps and sets to your fitness level, and add a rep or a set every couple of weeks so your glutes keep adapting.
| Day | Exercises | Sets and Reps |
|---|---|---|
| Monday | Squats, glute bridges, walking lunges | 3 sets each, as listed above |
| Wednesday | Donkey kicks, fire hydrants, single-leg deadlifts | 3 sets each, as listed above |
| Friday | Full circuit of all six moves | 2 sets each, lighter effort |
| Rest days | Easy walking or stretching | 20 to 30 minutes |
Two or three sessions a week is enough to build strength, and the rest days matter as much as the workouts because muscle repairs between sessions.
Common Glute Workout Mistakes to Avoid
Most stalled glute progress comes down to a handful of habits that are easy to fix once you spot them.
- Not engaging your glutes: Many people let their quads or lower back take over. Before each rep, think about the muscle you are working and squeeze your glutes at the top instead of just moving the leg.
- Rushing through reps: Momentum will not build muscle. Lower slowly for two to three seconds and feel the tension in your glutes on the way down.
- Poor form: Letting your knees cave in during squats or rounding your back can lead to injury. Cut the reps short if needed, but keep your knees tracking over your toes and your back flat.
- Ignoring unilateral exercises: Working one leg at a time helps correct muscle imbalances and improves stability. Keep single-leg deadlifts and lunges in your routine.
- Skipping warm-up or cool-down: These are crucial for preventing injury and aiding recovery. Spend five minutes on leg swings before you start and a few minutes on the figure-four stretch at the end.
Caution: Stop if a move causes sharp pain, and check with a doctor or physical therapist before starting a new program if you have knee or back issues.
Frequently Asked Questions
How often should I work out my glutes?
For best results, aim for 2-3 glute-focused workouts per week. This gives your muscles enough stimulus to grow while allowing at least 48 hours of recovery between sessions. Listen to your body and take a rest day if you feel sore or fatigued.
Can I build muscle without weights?
Yes, bodyweight exercises can build glute strength, especially for beginners or those without equipment. To keep progressing, use progressive overload by increasing reps, sets, or adding resistance bands. You can also slow down the tempo or hold at the top of each movement for extra challenge.
What’s the best way to activate my glutes?
Before your main workout, do glute activation exercises like glute bridges, clam shells, or banded walks. Focus on squeezing your glutes hard at the top of each movement. This wakes up the muscles so your glutes take over during squats and lunges instead of your quads or lower back.
How long until I see results from glute exercises?
With consistent workouts 2-3 times per week and proper nutrition, you may notice strength and tone improvements within 4-8 weeks. More noticeable changes in shape and size typically take several months of regular training. Patience and consistency matter most.
Do resistance bands really make a difference?
Resistance bands can increase the intensity of bodyweight exercises like glute bridges, donkey kicks, and fire hydrants by adding constant tension through the full range of motion. They are a simple, affordable way to apply progressive overload at home without needing heavy weights.
What are the gluteal muscles responsible for?
The glutes include three muscles: gluteus maximus, medius, and minimus. The maximus handles hip extension and external rotation, while the medius and minimus control hip abduction and pelvic stability during walking or running. Strong glutes support better posture and can help reduce lower back pain.
Final Thoughts
Stick with a consistent routine of 2-3 glute workouts per week, mixing compound and isolation exercises, and you can expect to see strength and tone improvements in about a month or two. Remember that form matters more than speed or reps, so take your time and squeeze your glutes on every rep. The best exercise is the one you do consistently and correctly.
This article provides general fitness information and is not a substitute for professional medical or physical therapy advice. If you have a pre-existing condition, injury, or experience persistent pain during exercise, consult a healthcare provider or certified trainer before continuing.
-

 Makeup Trends2 years ago
29 Harley Quinn Makeup Ideas: Iconic Looks for Every Occasion
-

 Hairstyle2 years ago
Round Face Haircuts Ideas 2025: 29 Flattering Styles to Try
-

 Hairstyle2 years ago
25 90s Layered Hair Ideas to Inspire Your 2025 Look
-

 Fashion2 years ago
27 Every Day Spring Outfits Inspiration for 2025
-

 Hairstyle2 years ago
29 Long Layered Haircuts Ideas for 2025
-

 Hairstyle2 years ago
64 Fall Hair Color Trends to Elevate Your Style in 2024
-

 Hairstyle2 years ago
Choppy Bob Haircuts 2025: 29 Stylish Ideas
-

 Hairstyle2 years ago
27 Medium Length Haircut with Layers Ideas for 2025